Hiking the Koʻolau Summit Trail (KST) North to South on Oʻahu, Hawaiʻi
Distance: 56 miles / 90.1 km
The Koʻolau Summit Trail (KST) on Oʻahu is a 56-mile (90.1 km) cross-island hike that begins in Pūpūkea on Oʻahu’s North Shore and ends at the Makapuʻu Lighthouse, the southern terminus.
This is to say, the Koʻolau Summit Trail is not only the hardest trail on Oʻahu, but all of Hawaiʻi.
That said, there are other resources with extensive amounts of information about the KST and its different parts, but there’s not one article that talks about the entire trail—including aspects such as where to find water, things to look for, things I wish I had known, and, most importantly, how to break it up.
I say 'how to break it up' because, if you’re ever planning to thru-hike it, hike the KST in sections first. Trust me, these mountains will break you down in some way or another. Everyone working toward this goal has had great and bad days on the KST. Whether it be weather, injury, you’re in over your head, or something else, you’ll see what I mean if you start venturing north.
I finished my KST goal on April 21, 2020, and since then, I have spent countless days back on the summit trail, enjoying some of my favorite sections, as well as all the less-than-ideal miles than come with it.
All to say, not every section of the trail below has photos, but when I can, I will continually update this article with the most up-to-date information available.
Koʻolau Summit Overview
Starting off, I believe the most accurate distance is 56.0 miles (90.1 km). It may be more or less, depending on how you record it, but if you have a different thought, I’d love to hear why in the comments.
Now, if you think 56.0 miles (90.1 km) doesn’t sound bad because you’ve hiked longer than this on a mainland National Forest trail, those who have completed the KST might laugh.
I’m not kidding when I say it will test you! The KST will test your ability to hike far, your ability to climb/ scramble crumbling basalt, your tolerance for mud (and I mean mud pits), your tolerance for overgrowth, and your ability to keep calm while constantly being exposed to drops where a fall would be fatal.
All this tough talk aside, the KST is a cool goal, and I want anyone to be prepared for what they’re getting into because some sections are very remote and unforgiving.
Thru-Hiking the Koʻolau Summit Trail
One of the most important things is to not go into a KST thru-hike blind. This has been attempted many times, and I cannot think of one successful thru-hike that was completed by a person with no prior experience.
For example, you can check out Jackson Grove’s post about when he and some friends decided to go into the hike blind and failed not long after beginning. What he actually didn’t know is that he was very close to the next cabin. But, since he hadn’t been there before, how could he make a safe decision to push forward instead of turning back like they did? They also had no prior experience on the Kalihi Saddle, which was presumably their worst mistake. This aside, Jackson is a good friend, and he is planning on finishing the KST someday!
In any case, before attempting a thru-hike, the KST should have already been hiked in sections, as everything north of the ʻAiea Ridge Trail requires a lot more planning and preparation than everything south of it. However, everything south of ʻAiea begins to get into 'Saddle Territory,' which are the single-most difficult sections of the entire summit trail.
If you are new to the island, I would say that you should have already hiked the majority of the following access trails before beginning long and remote sections on the KST. I can’t tell you how many times knowing exactly what my exit trail options were saved me in crappy situations. Knowing these trails kept others in the group sane when I could be confident on every trail leading up to the KST, in order to get us home safely.
When it’s all said and done, that 56 miles (90.1 km) is going to start to look like 100 (160.9 km), maybe 150 miles (241.4 km) because of the ridges up and down, depending on how you choose to break it up.
KST Access Trails: North to South
If you’re reading through this list and wondering where many of these are, I’d say you’ve got some hiking to do.
I wrote this list off the top of my head, and you should be able to list these off in order too.
North KST
Pūpūkea Summit
Mālaekahana (not practical)
Pauao Ridge
Middle KST
Kīpapa Ridge (not practical)
Hālawa Ridge
South KST
Bowman (not practical)
Powerline
Lulumahu Ridge (not practical)
Luaʻalaea Ridge (not practical)
Waiakeakua (not practical)
Kaʻau Crater (both sides)
Mariners (not practical)
I hope it stands out to you how many trails there are in the south compared to the north.
Additionally, I didn’t include every access trail, as someone very knowledgeable might see, but these are the best and most viable options to get you up or down safely.
Hawaiʻi Hiking Pants
Out of all the gear items on the list below, good hiking pants are arguably the most important item, as they are an absolute must on the KST!
The pants below are my recommendations that hold up the best with the overgrowth here in Hawaiʻi, but with any hiking pants that need to be durable, make sure that they are at or near 100% nylon. This is really the most important factor!
North Koʻolau Summit Trailhead Parking
Parking for the KST is located along the side of Pūpūkea Road on the North Shore of Oʻahu. This is the same trailhead as the Kaunala Trail.
If you’re going to be away for more than a day hike, I would advise against leaving your car here for multiple nights, as break-ins have been known to occur at this trailhead.
Google Maps Directions: Pūpūkea Road
North KST: Pūpūkea to Lāʻie
It must be said before you attempt anything up north, but plan it!
You might think that you are, by reading this, but that’s not what I mean. I mean that personally, I’ve spent countless hours using Apple’s 3D satellite maps, dropping and labeling pins, so that I knew exactly where to go.
That said, I used to think the detail on Apple Map was incredible, but Apple went through some kind of update, which now leads me to believe that Google Maps is the winner.
In any case, planning is important because when you’re hiking in the north, having pins will keep you sane when you look around you and feel like you haven’t moved.
This is why I recommend dropping pins for various points along the trail, which should be obvious portions of the trail that you can easily identify to keep you on track.
Additionally, always mark your trails down and identify the water sources. This picture should give you an idea of how much knowledge is on my phone, and yours should start to look like this too.
Pūpūkea Summit Trail
The start of the Koʻolau Summit Trail begins up Pūpūkea Road past the Boy Scout Camp.
Be aware that no part of the Kaunala Trail is a part of the KST, with the exception of Pūpūkea Road.
From the trailhead, walk up Pūpūkea Road as if you’re going to hike Kaunala. However, when you reach the split for the lower Kaunala Loop at about 0.6 miles (1.0 km), continue further up the road.
The true start of the KST doesn’t begin until after 2.6 miles (4.2 km) of walking up Pūpūkea Road.
Read My Separate Post: Kaunala Trail
The KST trailhead is located a short way past this high-water maker on the right-hand side.
'True' KST Trailhead
After 2.6 miles (4.2 km), the true KST Trailhead splits off Pūpūkea Road at just about the back/ top of the road, which may or may not be marked by a few ribbons.
Pūpūkea Summit Trail
Past the true trailhead, the KST begins on what’s known as the Pūpūkea Summit Trail, but it’s only after Pūpūkea Summit that the 'real' hiking begins.
By this, I mean that the entire stretch from Pūpūkea Summit to Kōloa Cabin is long, overgrown, and feels like you're not making much progress at all. However, the one upside is that you hardly feel the elevation gain because Pūpūkea Road climbs to about 1,450 ft. (442 m) before the trail actually begins.
At this first split, go right to stay on the summit trail.
Don’t forget to wear good hiking pants for these sections.
At this split, go left.
Pūpūkea Summit
Pūpūkea Summit is where most hikers that have come this far turn around.
This is the reason I said previously that the 'real' hiking begins after Pūpūkea Summit, as the trail is obviously less traveled past this clearing.
In my opinion, it’s quite a blessing when the trail gains enough elevation to get out of the invasive Strawberry Guava because it typically means the end of the pig tunnels!
Mālaekahana Junction
The first notable landmark after Pūpūkea Summit is the Mālaekahana Ridge Trail, which is not a trail that I recommend relying on to get back down.
On a different note, the KST gets significantly easier after the Mālaekahana junction because the Strawberry Guava will end shortly after this point.
Mālaekahana and Lāʻie Summit are not that close, but I don’t have many photos between the two summits because something messed up while I was taking photos my last hike up here.
Lāʻie Summit
It’s almost impossible to say, 'Look for this bush or that tree,' but you need to find the Lāʻie Ridge Trail when you pass it if you’re planning on using it as your exit trail.
This is why I recommend dropping a pin ahead of time, as there may or may not be a sign at this junction.
Read My Separate Post: Lāʻie Ridge Trail
If you’re looking for Lāʻie Summit on Apple Maps, it will look like this photo here.
Lāʻie to Papali Ridge
After Lāʻie Summit, the KST will come to the marshy meadow in the photo below, which will be 'easier' to find on Apple Maps.
This is also where people tend to take the wrong trail because there is an adjacent fence that doesn’t follow the KST and seemingly leads nowhere important if you follow it on maps.
Mark this area well, and when you pop out of the bushes at the meadow, look to the right directly across and up the little hill. The photo below is of the same meadow but looking north (backwards).
Furthermore, the trail across the meadow is where the KST continues, and from here, you can’t get too turned around for the rest of the hike to Kōloa Cabin.
Soon after the meadow, the KST meets with the fence in the photo below, where it goes straight or left if you’re facing south.
Don’t follow the fence to the left, as it leads nowhere, but continue following the more obvious path along the fence.
When you come to this steep hill in the photo below, you’re getting close to Kōloa Cabin.
You’ll probably see the outhouse first, and then you’ll come to an area to hop the fence right next to the cabin.
Kōloa Cabin
For a long time, Kōloa Cabin was locked, but as you can see, someone broke in, as they usually do. I won’t give my opinions on this, but I’m just glad that the cabin is still accessible.
That said, don’t leave trash in the cabin. If you stay in it overnight, try to clean it, so it can continue to be open for the next hikers.
Furthermore, Kōloa Cabin is a water source from a rain catchment, but be sure to purify the water before drinking.
If you only planned for one night on the KST, then your best option is turning around to Lāʻie Summit, which is roughly 1-1.5 hours of hiking back north.
However, if you planned for a longer hike south, continue on to the next section.
My friend and I started at around 9 a.m. from Pūpūkea, which I considered to be a late start. I wanted to start at seven, but we had to make a few last-second stops.
The whole trip there took about 9.5 hours to get to Kōloa due to some bad weather and all the overgrowth, but if you cut the KST short at Lāʻie Ridge, know that the trail gets significantly easier once you reach the junction for Lāʻie Falls on the way down.
This 9.5-hour hike was done with gear to sleep in the cabin, but day hiking from Pūpūkea to Lāʻie Summit only is more practical, which I have done since this first long hike, and it’s the option I recommend over staying the night.
Kōloa Cabin to Papali Ridge
I need to update this section from Kōloa to Papali with photos, but these are the notes I can leave you with for now.
If you’re breaking the KST up like I recommend, then hike back up Lāʻie Ridge to Kōloa Cabin in order to continue south.
If you choose to hike up Lāʻie Ridge to ʻŌpaeʻula for the night, and down Papali, the hike will be about 17.5 miles (28.2 km) total.
From Kōloa Cabin, the KST wraps around the backside as if you hadn’t walked down to it.
Then, the KST continues along the fence as normal, but quickly you lose the fence and enter some of the worst overgrowth on the entire summit trail. It took my friend and I about three hours, moving at a decent pace with large backpacks, to push through this section the first time I hiked it.
However, when I returned some years later, I was able to move at a very fast pace through this same section with only a day pack, and it only took 1.5 hours to hike from Kōloa to Papali Summit!
That’s an incredibly fast pace, and I wouldn’t plan for this if it’s your first time. There may be some strategy to not camping anything up north, but only do this if you can hike all of the sections light and fast before the sun sets.
In any case, this section alone is why marking the trail on your phone ahead of time will keep you sane.
When you’re mapping it, you will lose the trail at parts and regain it later because it’s almost a joke to call the KST 'a trail' at some points.
Then, when you finally break through the overgrowth, you’ve arrived at the Papali Summit, which is the photo below.
Papali Summit is a big horseshoe in the fence line, and from here, it’s truly an easy walk compared to what you just went through to get to ʻŌpaeʻula Cabin.
Furthermore, be aware that ʻŌpaeʻula Cabin is slightly off the KST, following a different fence that meets the KST fence from the west. Mark this junction, so as not to miss it.
Papali Ridge Trail
The Papali Ridge Trail is a long and tedious 4.7-mile (7.6 km) hike down to the joint trailhead for both Maʻakua Ridge and the Hauʻula Loop Trail.
That said, I highly recommend checking out my separate post to see the most important turn where Papali Ridge leaves Kaluanui, about 1.4 miles (2.3 km) off the summit.
It’s not very obvious, and it seems like you should continue following the fence, but I promise it leads nowhere! I’ve followed it by mistake, and it was pretty heartbreaking to turn around at the end of it.
Read My Separate Post: Papali Ridge Trail
Papali Ridge to ʻŌpaeʻula
If you choose to hike down Papali Ridge, then you have a few options in order to complete this section.
First, you could retrace your steps up Papali to meet the ʻŌpaeʻula junction and continue south to Poamoho. Alternatively, you could hike north from Poamoho to ʻŌpaeʻula and on to Papali Ridge.
In either case, I highly suggest hiking Poamoho at some point, as it is one of the best access trails across the entire Koʻolau Mountains.
The 'Highway Miles'
This stretch between Papali and ʻŌpaeʻula is what I like to call the 'Highway Miles.'
I say this because, outside of this section here, and the trail between Schofield-Waikāne and Poamoho, no part of the summit trail moves as fast!
This stretch from Papali Summit to ʻŌpaeʻula measures roughly 1.2 miles (1.9 km) total.
Please remember to close the gate!
Lehua Makanoe Bog
The Lehua Makanoe Bog is a fenced-in area located just off the KST, and it’s one of the only notable landmarks between Papali Ridge and ʻŌpaeʻula.
That said, stay to the left along the much more trafficked fence, instead of leaving it for the fence in the clouds in the photo below.
This is the view looking east from the KST.
Just before ʻŌpaeʻula, the mud pits can be at their worst!
Lower ʻŌpaeʻula Junction
ʻŌpaeʻula is not one, but two different gates in the fence.
That said, it doesn’t matter if you decide to go through this first gate here or up the hill to the right and then through, as both routes meet up shortly ahead.
However, I personally recommend going right, then left through the gate up the hill to continue on to Poamoho.
Upper ʻŌpaeʻula Junction
This is the upper ʻŌpaeʻula gate, where the KST continues through the gate to the left to get to Poamoho.
ʻŌpaeʻula Cabin
Personally, ʻŌpaeʻula is my favorite cabins on the island, but again, please leave it cleaner than you found it, so that it can continue to be used by future hikers.
What happened to ʻŌhikilolo Cabin in the Waiʻanaes would be a shame if it happened on the KST too.
Also, ʻŌpaeʻula Cabin is another reliable water source from rain catchment.
ʻŌpaeʻula to Poamoho
I need to update this section from ʻŌpaeʻula to Poamoho with photos, but these are the notes I can leave you with for now.
From the ʻŌpaeʻula junction heading south, the KST is more of the same: lots of overgrowth and lots of mud.
In my opinion, this part of the trail feels very monotonous because you are constantly looking at Punaluʻu Valley for seemingly 75% of the way, and it barely feels like you’re making any progress when you look out.
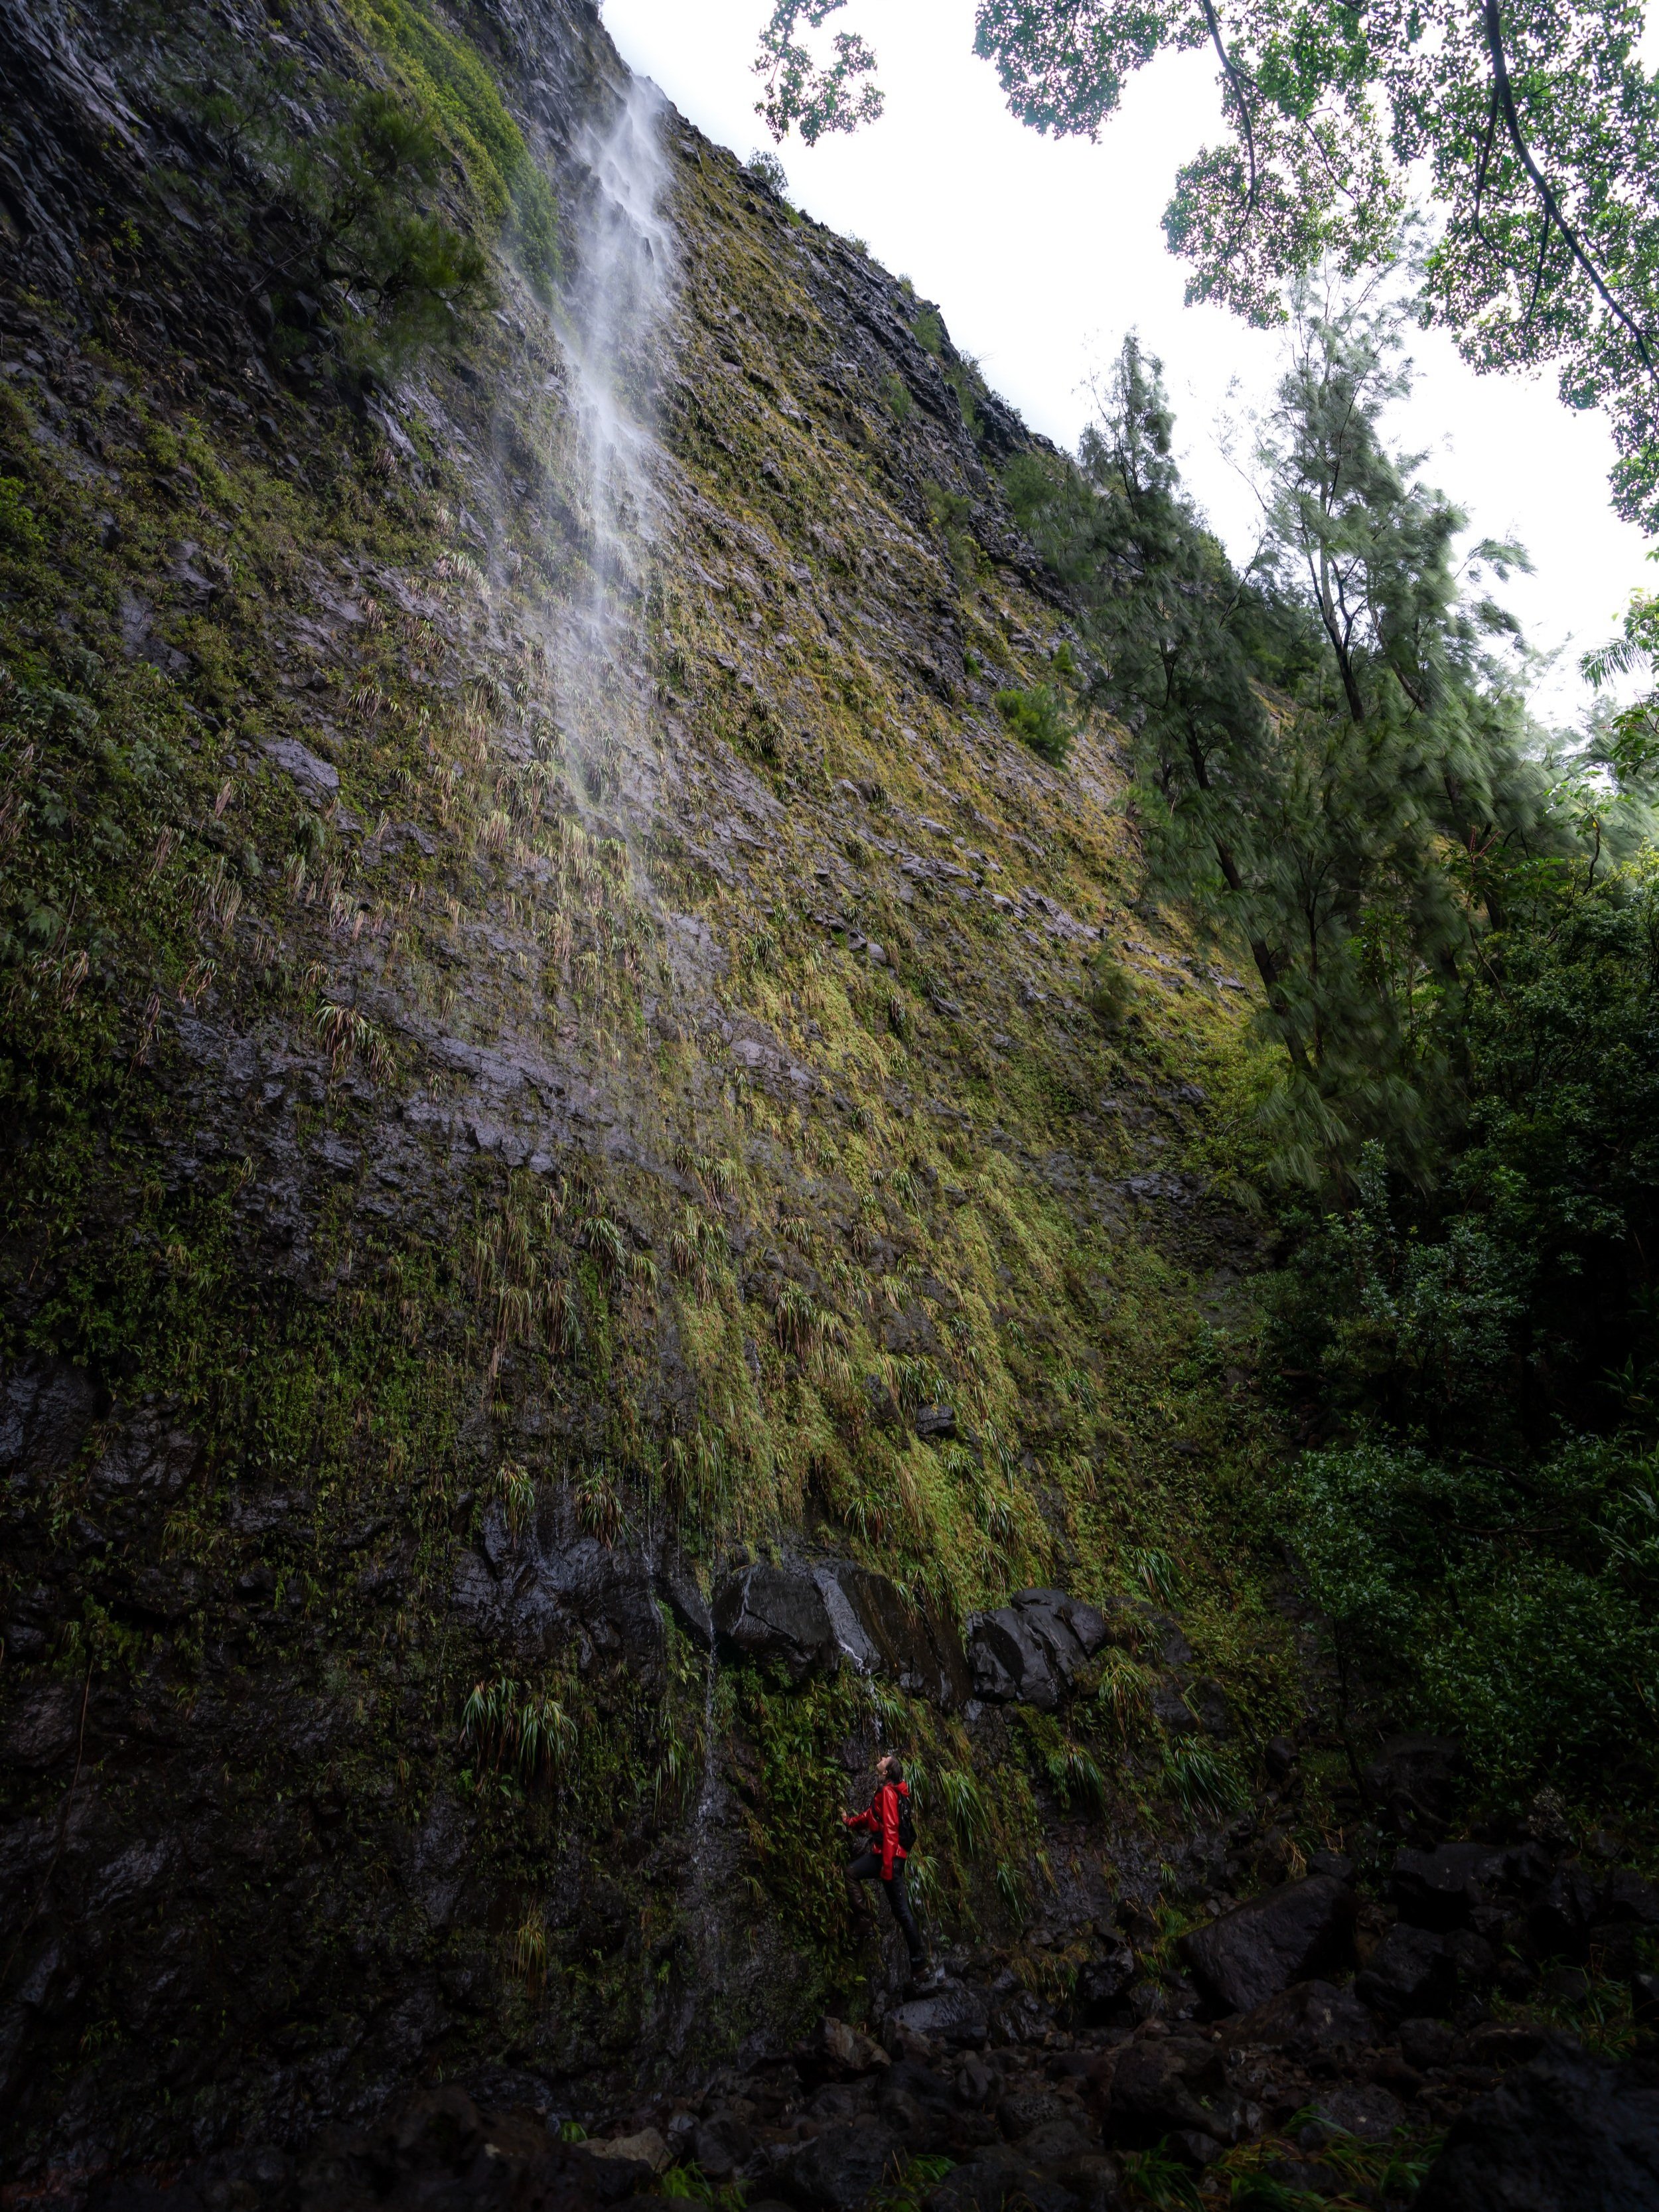
Castle Falls
Eventually, the KST passes over a little stream called Castle Stream (Castle Falls), which may or may not be a reliable source of water.
This is also where the views of Punaluʻu Valley begin and continue for the entire hike to Poamoho.
Boot Junction
Shortly past Castle Stream, the KST crosses a large meadow, where the trail makes a hard left turn, commonly known as the 'Boot Junction,' on the south side of the meadow. This is where you’ll need to hop the fence to continue along a different fence after crossing the meadow, prior to reaching the boot.
On Apple Maps, this meadow is one of the more obvious places to mark near Punaluʻu Valley. However, since there’s a fence along this entire section, ʻŌpaeʻula to Poamoho may be the easiest section on the NKST to find in Apple Maps.
Middle KST: Poamoho to Mānana
[This Section is Written from South to North: Mānana to Poamoho]
Poamoho to Mānana, or rather Mānana to Poamoho, is typically most hikers' final KST section, as these are some of the most challenging miles to access.
To add to this, Schofield-Waikāne is generally not a good access trail to break up this section because the summit is just too close to Poamoho to make it worth it. By this, I mean that the section between Schofield-Waikāne and Poamoho is known commonly as the 'Highway Miles,' being that they are some of the fastest and easiest miles on the entire KST.
Therefore, it simply doesn’t make sense to hike the 7-mile (11.3 km) Schofield-Waikāne Trail when the section between Schofield-Waikāne and Poamoho is so easy comparatively.
Why Do I Recommend Day Hiking from South to North?
I recommend hiking south to north (Mānana to Poamoho) for one main reason: difficulty.
By this, I mean that the further you hike north of Mānana, the better the trail gets. Rather, if you go in reverse (north to south), you’ll start out on an excellent trail and hike into harder and harder miles, finishing on the rollercoaster trail that is Mānana Ridge.
Additionally, from Mānana to Kīpapa, the KST rides a rollercoaster of a ridgeline, and it isn’t until after Kīpapa that you hit the KST contour trail. That’s the difference between the KST vs. KSRT (Koʻolau Summit Ridge Trail), which you may have read about in other blogs.
With whatever you decide, the reason I recommend a long day-hike over camping in this section is that I found that carrying camping gear only makes the hiking slower and harder. However, carrying only what I needed made a huge difference in terms of success on this section.
The total distance from the Mānana Trailhead to the Poamoho Trailhead is 18.6 miles (29.9 km) but in my case, I couldn’t coordinate a pickup from the Poamoho trailhead, so it was actually 24.5 miles (39.4 km) to the Poamoho gate!
Mānana to Poamoho
To hike this section in one day, which is what I recommend, start Mānana Ridge well before the sun comes up, so that you ideally finish before the sun goes down.
On this day, I started at 2:30 a.m. at the Mānana Trailhead, and looking back, I wouldn’t have done it differently because starting this early got me to Poamoho gate an hour and a half before sunset!
In any case, I began the 5.8-mile (9.3 km) Mānana Ridge Trail at 2:30 a.m. and arrived at the summit at 5:10 a.m.
Read My Separate Post: Mānana Ridge Trail
From Mānana Summit, turn left (north) on the KST toward Waiāhole Valley.
The next summit you will reach is the Mānana Corner (Waiawa Summit). It is the high point on this section, and it was a little while after I started to traverse Waiāhole that the sun started to come up, the first time I ever hiked it.
Mānana Corner
The Mānana Corner is a medium-sized KST meadow just after Mānana Summit that may or may not have various spots to find water, depending on how much it has recently been raining.
Waiawa Gap
The middle of Waiāhole is the Waiawa Gap.
Essentially, the Waiawa Gap is a low point, like a mini overgrown 'saddle,' where you will lose roughly 700 ft. (213 m) of elevation from the Mānana Corner; then, you have to regain nearly all of it to climb out of the gap to Waiāhole Middle, the first summit on the north side of the valley.
Waiāhole Middle
Waiāhole Middle may seem a little obscure, but you’ll know you’re on Waiāhole Middle when you’re standing on the peak where the north ridge of Waiāhole Valley meets the KST from the east side.
For some adventurous hikers, this ridge has actually been used as an access trail, but I personally couldn’t speak to it.
In any case, Waiāhole Middle is about a half-hour or less away from Kīpapa Summit.
Kīpapa Summit
During my initial KST hike, I reached Kīpapa Summit at 8:50 a.m., which is what gave me so much hope that I was doing well on time.
It’s also here that you will visibly see the contour trail directly ahead.
In any case, the Kīpapa Ridge Trail can be used to bail off the KST for whatever reason, but I would never recommend it or recommend turning back toward Mānana.
I say this because I believe Kīpapa should be the dividing line between Poamoho and Schofield-Waikāne in terms of your safest and closest trails down.
This is all without mentioning, there is a cabin exactly 2.0 miles (3.2 km) down Kīpapa, but the hike is terribly overgrown, which is why I would never advise heading down that way.
Read My Separate Post: Kīpapa Ridge Trail
Leeward Contour
Leaving Kīpapa, you’ll drop in elevation immediately into an oddly-placed Sugi Pine grove before popping out on the contour trail.
From a distance, the trail looks distinct, obvious, and clear, but much of it is thigh to waist-high Uluhe overgrowth until the Windward Notch.
Nevertheless, this section is called the Leeward Contour because at no point do you want to follow the ridgeline. Rather, the contour, which winds like crazy while hugging the mountain and seems to drag on forever, is definitely easier to follow than the ridge.
Windward Notch
Eventually, after your second fence crossing, also called 'selfie junction,' you’ll see the Windward Notch off in the distance.
This notch is an obvious cut-out hole in the mountain where the much easier trail begins to take over.
If you are planning this on Apple Maps, which I cannot recommend more highly, you’ll notice two distinct trails cut into the side of the mountain joining together right below the notch. The upper is the KST, and the lower leads down to Waikāne.
The Windward Notch is also the signifier that the hardest hiking is behind you!
However, I don’t recommend taking a break at the notch because the much clearer Schofield-Waikāne Summit is shortly ahead, and it’s a much better place to eat some food.
Schofield-Waikāne Summit
On the long day that I hiked from Mānana to Poamoho, I arrived at Schofield-Waikāne around 1:00 p.m., and from there on, the distance started to fly by.
I say this because even though it may look significant compared to what you’ve already done, the rest of the hike to Poamoho is significantly easier than everything leading up to this point; hence, why I prefer to hike south to north.
Read My Separate Post: Schofield-Waikāne Trail
The 'Highway Miles'
The stretch in between Schofield-Waikāne and Poamoho is also another fast, well-maintained section, similar only to KST from Papali to ʻŌpaeʻula.
In my experience, whenever the KST regains the fence line, the hiking generally gets easier, and whenever it loses it again, the hiking generally gets a little slower.
This stretch toward Puʻu Pauao/ Pauao Ridge is the most difficult part of the KST between Schofield-Waikāne and Poamoho.
Pauao Summit
As soon as the KST reaches Pauao Summit, the hiking gets easier for the remaining hike to Poamoho.
Poamoho Cabin
In my experience, Schofield-Waikāne to Poamoho Cabin generally takes between 1.5-2 hours because the trail is mostly clear, and you’ll follow the fence line most of it!
Additionally, the Poamoho Cabin is another reliable water source, which is important to note because from this section to the Moanalua Saddle, finding water can be unreliable.
Poamoho Summit
If you choose to hike in the same direction, the remaining hike is an easy 3.3 miles (5.3 km) down the graded Poamoho Trail.
Ideally, you will have planned a pick-up from, but if you’re like me, you may have to walk.
I actually jogged the extra 5.9 miles (9.5 km) out of there, so that I wasn’t walking the long access road in the dark.
All in all, I finished at the Poamoho Trailhead at about 4 p.m., which was a pretty great feeling, as this was my last section on the Koʻolau Summit Trail!
Read My Separate Post: Poamoho Trail
Mānana to ʻAiea
[This Section is Written from North to South: Mānana to ʻAiea]
For this section and the remainder of the article, the KST is written from north to south.
In any case, I’ve personally hiked Mānana to ʻAiea in both directions. I don’t believe there is one best way to do it, but whatever you decide, this is another section where I recommend a long day hike, as opposed to camping.
In my opinion, hiking with a big bag only makes this section unnecessarily more difficult.
Mānana to ʻAiea
From Mānana Summit, there is a short traverse to get across to ʻEleao, which will take roughly 15-20 minutes.
ʻEleao Meadow
ʻEleao, also called ʻEleao Meadow, is a grassy meadow at the northern corner of Waiheʻe Valley.
That said, I do not consider ʻEleao to be a good campsite, because the meadow acts like a wind funnel and a sponge for standing water in the best places to set up a tent.
However, Waimalu Meadows across Waiheʻe Valley is a much better campsite, as there are places to get out of the wind!
Waiheʻe Valley
Leaving ʻEleao, the KST drops off the steep peak as it makes its way down to Waimano.
Waimano is the true low point of Waiheʻe Valley, so for obvious reasons, it’s easy to tell where the summit/ trail is going to be from far away.
Waimano Summit
From Waimano Summit heading south, the KST climbs back up toward Waimalu; hence, why Waimano is the low point, much like the Waiawa Gap.
Read My Separate Post: Waimano Ridge Trail
Waimalu Meadows
I need to update this section from Waimano to ʻAiea with photos, but these are the notes I can leave you with for now.
As mentioned previously, Waimalu Meadows is a great place to camp, and you may find water to filter in random areas throughout the meadow. However to be safe, don’t count on any reliable water sources until the Moanalua Saddle.
Nevertheless, the KST moves from Waimalu across ʻĀhuimanu, with ʻAiea Summit shortly after.
In all, doing either one big hike from Mānana to ʻAiea or breaking it up into two smaller hikes with Waimano in between are really the only two ways to consider this section.
South KST: ʻAiea to Kulanaʻahane
In my opinion, everything south of ʻAiea/ Hālawa gets a little more fun, and the trail doesn’t feel like it needs to be broken up as strictly as I suggest for the sections above.
Therefore, go with the weather, do a lot of it in day hikes, and go further or shorter than what I suggest because you have so many more options going up and down the ridges compared to the north.
From ʻAiea Summit, the KST traverses about four major peaks until you descend the fourth, where Stairway to Hell and the Moanalua Valley begin.
Read My Separate Post: ʻAiea Ridge Trail (Stairway to Hell)
Stairway to Hell (North Haʻikū Stairs)
On a side note, I wrote a specific article on Stairway to Hell, which does make a fun overnight trip, beginning from the ʻAiea Loop Trail.

My Print - Stairway to Hell
As the KST moves south from Stairway to Hell, the trail begins to head into 'Saddle territory', which will begin to get tricky.
Therefore, I don’t recommend hiking with a big backpacking bag on any of the saddles, and this is one of the reasons why I’ve steered away from thru-hiking the summit trail.
Moanalua Saddle
Warning
I hope it’s obvious from these photos, but this and every saddle are sections that you do not want to go into unprepared.
All three—which include Moanalua, Kalihi, and Nuʻuanu—are easily the most dangerous sections of the entire KST, which is obviously why completing the entire summit is such an elusive goal.
For this reason, I recommend considering a hike like the Keaʻau Middle Ridge prior to hiking any saddle just to know what 'easy' exposure in Hawaiʻi looks like before attempting something more involved, like any of the saddles.
This and every section across Moanalua are all areas where there is no room for error!
Kulanaʻahane Summit (Kaunakōlea)
The bottom of the Moanalua Saddle is the summit of the Kulanaʻahane Trail, which is easily the best KST access trail between ʻAiea Ridge and the Moanalua Middle Ridge.
For those thru-hiking, I recommend finishing the Moanalua Saddle if there is enough daylight, as Stairway, at 0.8 miles (1.3 km) away, would be a much better starting point for the long and tedious Kalihi Saddle that immediately follows.
In addition, the North Fork of the Moanalua Stream, just below the summit of Kulanaʻahane, is a good, reliable water source that’s only 0.25 miles (0.4 km) and 420 ft. (128 m) of elevation change below the KST.
Read My Separate Post: Kulanaʻahane Trail
Kulanaʻahane to Moanalua Middle
Upon leaving the summit of Kulanaʻahane, the south side of the Moanalua Saddle is where things start to get tricky. This is where the first real challenge begins when hiking the KST from north to south.
By this, I mean that shortly after leaving the bottom of the saddle, the ridgeline reaches two very tricky, exposed sections, one right after the other.
In my opinion, the first is the worse of the two, though the second is more than double the distance and vertical height.
I put it this way because if you make it up the first climb, you’re pretty much committed to making it to Stairway. However, if you can’t make it up the first, the Kulanaʻahane Trail is at least a good option for getting back down.
Additionally, it’s important to keep in mind that the Moanalua Saddle is where you need to start hiking with your own ropes.
It’s best practice to never rely on a rope you didn’t place, especially considering that KST ropes get replaced far less frequently than others around Oʻahu, such as those on Mt. Olomana. I have a bad story about this that I’ll share when I get to the Kalihi Saddle.
On a clear day, both climbing sections can be seen immediately after leaving the bottom of the saddle, the first being the vertical rock face right after the small dip in the ridgeline in the photo below.
In my opinion, both vertical sections should be climbed on the leeward side of the ridgeline.
This is the beginning of the first and, in my opinion, much worse of the two major climbs on the Moanalua Saddle.
The one thing these photos don’t show is how exposed the drops really are, meaning there is really no room for error here, or it certainly is a long way down!
This is the view looking back toward Kulanaʻahane from the top of the first climb.
That said, I did my best to take photos on the first climb, but I still felt there was a lot I couldn’t really capture because I had no ability to take a photo while scaling the loose cliff face.
After the first climb, there’s another very short, exposed traverse to reach the bottom of the second.
Unlike the first climb, I think the route up the second is much more obvious, in that the only way up is by traversing the leeward side of the ridgeline.
This is the beginning of the traverse to the leeward side of the ridge.
There’s nothing really to say except climb up and don’t fall.
This is only the lower half of the second climb, with the upper half becoming visible once you reach the top of this vertical section.
It really isn’t the worst idea to send your strongest hiker up to tie a better rope for the rest of your group!
This is the top of the first half of the second climb.
That said, I can see how these sections could easily be classified as three and not two climbs, but in reality, the next scramble begins just steps after reaching the top of the vertical climb shown above.
Compared to everything experienced thus far, this final scramble is considerably easier and less vertical than all of the lower sections.
Now you can breathe!
In all seriousness, this is the top of the second vertical climb and the end of the most challenging sections on the Moanalua Saddle.
From here, there is still quite a bit of exposure from this point to the Stairway to Heaven, but it is nowhere near as challenging or vertical as everything from the top of this climb to Kulanaʻahane.
On a different note, if you’re thru-hiking the KST from north to south and found the Moanalua Saddle to be particularly challenging because of exhaustion, lack of sleep, dehydration, etc., I would caution against continuing past Tripler Ridge to the Kalihi Saddle, as it only gets more challenging on the saddles farther south—and yes, I believe Moanalua to be the easiest of the three.
After the two near-vertical sections, the Moanalua Saddle will continue climbing about 700 ft.(213 m) from this point to the top of Stairway, which should move at a considerably faster pace than everything below!
The drops here are bigger than photos may make them seem!
This short stretch may be the narrowest and most exposed section after the second climb.
At this point, the KST becomes much more like the overgrown trail that spans much of the mountain range.
This is where the Koʻolau Summit Trail begins to pass some of the remnants of the Haʻikū Stairs, along with what remains after sections were removed on the Moanalua Saddle following the 2024 deconstruction project on this side of the stairs.
The final ascent up to Stairway is quite steep, but with all the overgrowth and old infrastructure to rely on, it’s pretty easy considering all that was climbed to get to this point.
Be careful, as much of what is left on this side of the Stairway is very sharp and rusted.
This is the final ascent to the summit of Puʻu Keahiakahoe.
Stairway to Heaven (Haʻikū Stairs & Puʻu Keahiakahoe)
The south side of the Moanalua Saddle is the Stairway to Heaven.
For obvious reasons, the KST across this next section, between Stairway and the Moanalua Middle Ridge, is one of the most well-trafficked portions of the Koʻolau Summit, similar to the short stretch above Kaʻau Crater to the south.
Read My Separate Post: Stairway to Heaven (Haʻikū Stairs)
This is the short 0.1-mile (0.2 km) section between the Haʻikū Stairs and the Moanalua Middle Ridge Trail.
Moanalua Middle Ridge Summit
The end of the very clear, well-trafficked section is the summit of the Moanalua Middle Ridge.
If you decide to plan a day from Kulanaʻahane to the Moanalua Middle Ridge instead of continuing on to the Powerline Trail, this might be one of the few times you start and end at your car—no Uber and no coordinating with friends, which only happens here and in Kuliʻouʻou Valley.
Read My Separate Post: Moanalua Middle Ridge Trail
Moanalua Middle to Power Lines
Moanalua Middle to Power Lines is one of the top two most dangerous sections on the Koʻolau Summit Trail.
For that matter, the other side of Power Lines, continuing on the Kalihi Saddle, is the other most dangerous section, and a near-fatal fall occurred as recently as 2023.
Moanalua Middle to Bowman
That said, the Koʻolau Summit from Moanalua Middle to Bowman is nothing too noteworthy.
The ridgeline traverses a handful of rolling peaks, which seem to move rather quickly because there are a few notable landmarks, like the Bowman Tower shown below.
Bowman Tower
Other than the power lines in the distance, the Bowman Tower, just past Moanalua Middle, is the main notable landmark between Stairway and Tripler Ridge.
Kahoʻomoe ʻihikapulani (Tripler Summit)
After a relatively short hike from Moanalua Middle, which may take around 20-30 minutes, the KST reaches Tripler Summit, which is the last 'descent' access trail to reach this area of the Koʻolaus before the Kalihi Saddle.
I say 'descent' because Bowman is not a great or practical trail to use.
Read My Separate Post: Tripler Ridge Trail
Tripler to Power Lines (Kalihi Saddle)
Back when I said I’ve enjoyed countless days back on the summit trail, well, the Kalihi Saddle isn’t one of them.
To that point, I’m not sure if I ever have the desire to go back up there just for the sake of filling in this section with photos.
I hope this shows that this one section is not meant for all hikers, even if you have done the majority of the sections surrounding Kalihi, as it’s truly the crux of the route.
That said, the one benefit that you have from coming from Tripler is that you can place your own ropes. However, I could easily see this section being done in reverse.
Facing Kailua/ Kāneʻohe on the ridge, the left side of the saddle (north side) is much 'easier' than the right (south side).
Be that as it may, don’t read this and think that the north side is now easy. It’s not.
In any case, when heading down to Power Lines from Bowman, you will pass over one big feature called the “Witch's Hat,” which is immediately followed by the Power Line Trail.
On a side note, when I was coming down the saddle this way, I stopped to say something to my friend when suddenly, the ground I was standing on just gave out! The only thing that saved my life was the rope in my left hand. This isn’t meant to scare anyone but to keep you aware of how real and dangerous hiking on this saddle is, as shown by the 2023 hiker who took a 100 ft. (30.5 m) fall.
Power Line Trail
The Powerline Trail is likely unfamiliar to most Hawaiʻi hikers, as most don’t choose to hike the Kalihi Saddle for fun.
In short, Power Lines is a quick, short-distance, reliable trail that leads from the ventilation building for the Wilson Tunnels, right off the Likelike Highway, to the saddle.
There’s no parking here, so you will either have to coordinate with a friend or do a weird Uber pickup/ drop-off. I’ve done Uber two out of the three times I’ve been on the saddle, and it’s always worked for me.
Power Lines to Lanihuli
If you have completed the north side of the saddle shown in the photo above, know that it’s maybe only 20% of it, and it’s the 'easy' half. The south side is where the hiking gets real!
In the last section, when I said you cross over one feature called the “Witches Hat,” know that you traverse many more of these features going south of Power Lines, and in my opinion, they’re worse!
In order from the Power Line Summit, they go: the “Sharks Fin,” the “Bunny Ears,” the “Doorstop,” the “Pimple,” and the “Can Opener/ Lanihuli Wall.” Each one is challenging in its own way, but I’d say the Lanihuli Wall and the Doorstop are the worst. The Doorstop is the prominent feature in the photo below, with the Bunny ears behind that and the Pimple being the closest.
Furthermore, going down the backside of the Doorstop is sketchy, and this is one of those sections where it would be smart to tie and leave your own rope. Even the traverse to the right of the Pimple is awkward and very dangerous.
In all, making it from Power Line Summit to the base of the Lanihuli Wall has never taken me anything short of three hours. Keep in mind, if you get stuck at the wall, like I did on my first attempt, it’s now three hours back before you can head down, and you don’t want to be up there in the dark!
Additionally, the base of the wall is really the only place to take a short break and eat some food on the majority of the saddle because you are otherwise constantly focused on making every step count.
I’m not kidding when I say if you trip wrong or slip wrong, that could be it.
Lanihuli Wall
For a first-time Kalihi Saddle hiker, I would never recommend going from Lanihuli to Power Lines because I believe going up something that vertical is easier than going down.
In any case, at the base of the wall, the trail contours to the left. My first mistake, which is what made me turn around on my first attempt, was thinking we needed to climb directly up the ridge. DON’T! You might get yourself in a bad situation like we did. The KST contours to the left on a less-than-ideal path, while clinging to the Uki grass for dear life.
The Can Opener/ Lanihuli Wall goes like this: Contour left, go up a near-vertical section, contour left again, and go up one more much longer near-vertical section. The ground is soft and sinks in, so tread lightly!
I personally believe that every group makes this trail significantly harder for the next because of the erosion, especially when there’s already so little places to put your weight on as is.
Kalihi Saddle Rope Story
Back when I was talking about the Moanalua Saddle, and I said I had a story about the Kalihi Saddle ropes, well, this is it.
I was climbing the first vertical section using the rope as a guide but heavily relying on the terrain to support my weight.
When I got to the top, I thought I would replace the rope to send down a new one, so there would be something more reliable for the next person. When I started digging into the grass to find out where the original rope was tied that I had in my hand, I found this dead stick no bigger than my pointer finger, and I snapped it in the process of digging.
I was absolutely pissed that some hiker before me thought that the twig was a decent place to trust someone else’s life with. I then redid the rope on the one only reliable thick branch in the area, but even then, I’d say it wasn’t much to trust.
That’s why you should never trust someone else’s work because if I slipped or fell, I was grabbing a rope tied to a dead stick, and I likely would have fallen hundreds of feet down the pali.
Puʻu Lanihuli (Kapālama Ridge)
Past the Lanihuli Wall, the difficulty doesn’t let up yet, but it does get significantly 'easier' and moves a little faster than the saddle below.
Then, once on the first summit, you go down and up a couple of dips to reach the Kapālama Ridge Trail, located right in the middle of Puʻu Lanihuli.
Personally, I don’t recommend hiking both Kalihi and the north side of Nuʻuanu in one long day. I say this because the Nuʻuanu Saddle has gotten significantly more challenging and more dangerous over the years, due to sections that have and will continue to fall out.
What I’m really trying to say is that some parts of Nuʻuanu are really just like an extension of the Kalihi Saddle, and I think it’s best to rehike the 3.8-mile (6.1 km) Kapālama Ridge Trail in order to come back when you’re better rested.
Read My Separate Post: Kapālama Ridge Trail
From the Kapālama Ridge Summit, the KST traverses across a few dips before arriving at the south summit of Puʻu Lanihuli, also called 'True Lanihuli'.
Puʻu Lanihuli to Kōnāhuanui (K2)
Puʻu Lanihuli
After the short traverse from the Kapālama Ridge Summit, Puʻu Lanihuli tops out at the true summit, standing at 2,780 ft. (847 m) above both Kalihi to the north and Nuʻuanu to the south.
Nuʻuanu Saddle
I don’t believe it matters too much whether you choose to hike from Puʻu Lanihuli to the Pali Lookout or in reverse. However, I personally prefer hiking down it than up, as I like to place my own ropes, which is much more feasible when descending.
In any case, I’ve hiked this section in both very rainy weather and on a perfect day, but I only recommend this section when the weather is about as perfect as you can ask for because of how dangerous it really is.
Another reason why I prefer to descend Lanihuli on the Nuʻuanu Saddle instead of climbing up from the Pali Lookout is because of the section below.
The 'flatter' part of the ridge before it turns to the left, which you can see in the photo below, is called 'Annie’s Saddle,' and it’s easily the most challenging and dangerous section of the entire route.
For this reason, you can decide rather quickly if turning back is your best and safest option, as opposed to hiking up from the bottom, which would be much more tedious to backtrack.
'Annie’s Saddle'
This section at the beginning of Annie’s Saddle is one that I can honestly not remember from my first hike prior to taking these photos.
What this tells me is that over the years it fell out, and will likely continue to do so, meaning that these photos may not be the most accurate representation as the years go on.
What this also tells me is that ropes that had been previously placed will most likely not be safe to use as time goes on. For example, the white rope in the photo below was tied to an ʻŌhiʻa tree where the base fell out from beneath, and the same could be said about our orange rope as time goes on.
In any case, this descent was the trickiest part of Annie’s Saddle.
We first tried climbing below it to ascend, which proved fatal, as everything I stepped on just kept crumbling under my weight. Then, we tried a side traverse about halfway up, but it also proved too dangerous. So, in the end, we decided that going straight over the ridge was our best bet, as we tried not to knock out too much as we climbed down.
This section took about 4-5 minutes for each of us once we finally figured it out.
After the landslide, there are still a few more features to traverse—some of which need to be climbed over, and some of which should be contoured around.
After Annie’s Saddle, the rest of the Nuʻuanu Saddle becomes significantly 'easier', but take that word lightly.
All of these narrow sections are absolutely no-fall zones. However, there are more places to figure out how to climb across, as opposed to Annie’s Saddle above.
Nuʻuanu Wall Contour
Eventually, when the KST meets the top of the Nuʻuanu Wall, the end of the Pali Puka Trail below, the trail cuts off the ridge to the right, where it descends a few hundred feet through the forest.
This descent will eventually end when it cuts over to the famous Puka.
Pali Puka
Once down the majority of the north side of Nuʻuanu, the KST meets with the popular Pali Puka Trail, making it the easiest section of this entire stretch to follow down to the parking lot.
Read My Separate Post: Pali Puka Trail
Nuʻuanu Pali Lookout
Where the Pali Puka Trail ends, continue across to the far side, where the Pali Notches Trail begins.
If you are thru-hiking the KST, know that camping off the Old Pali Highway may be the best place to spend the night.
Additionally, about 1 mile (1.6 km) down the Old Pali Highway is a large rain catchment should you need water.
This will likely be the second-to-last reliable water source before Makapuʻu, with the last being the third waterfall at Kaʻau Crater.
Pali Notches Trail
Just like the Pali Puka Trail, the popular Pali Notches Trail that continues on the opposite side of the lookout will be one of the most defined sections of the KST.
Read My Separate Post: Pali Notches Trail
Pali Notches
The top of the first notch, shown in the photo below, is where most hikers turn around.
That said, the first notch is the easiest, the second notch is a bit more difficult to find the hand and feet placement, and the Chimney is the most difficult part of the entire Pali Notches Trail.
The Chimney
Once at the Chimney, the route climbs up the leeward side. There’s no way for me to put in writing regarding where to put your hands and feet, but I also believe you should have done this climb a few times prior to the full ascent, or you might have to turn around here.
It’s not a bad climb, but the Chimney is more vertical than the Lanihuli Wall.
Also, unlike the Lanihuli Wall to the summit, the Chimney to the summit will not let up, like the saddle does on the south side of Kalihi.
What I mean is that the section gets slightly more difficult above the Chimney, and it’s deceiving how long and, in some spots, sketchy the rest of the hike is to the summit of K1, even more so when the summit looks so close on a clear day!
The Chimney to Puʻu Kōnāhuanui
Past the chimney, there’s a number of exposed sections that you will have to maneuver, usually moving around to the leeward side.
There’s also one chute that resembles a mini waterfall—if there was water—and if it wasn’t for this one tree in the right spot, I’m not sure getting up it would be doable for most people.
In any case, the KST climbs straight to the summit once past this chute.
Puʻu Kōnānuanui (K1)
Once at the summit of K1, be sure to go left, not right, to continue on the KST to K2 and the ridge trail down to Tantalus.
The trail to the right is for Lulumahu Ridge, which I would regard as a less-than-ideal access trail, considering that the Puʻu Kōnāhuanui Ridge Trail is so much easier.
Read My Separate Post: Puʻu Kōnāhuanui Ridge Trail
Puʻu Kōnānuanui II (K2)
As mentioned above, the reason why I stopped this section at K2 instead of K1 is because the trail down to Tantalus from K2 is much better than Lulumahu Ridge from K1.
It almost seems pointless to not do the little traverse between the two peaks.
K2 to Waʻahila (Mānoa Valley)
In no particular direction, Mānoa Valley could be hiked either way with no significant differences in difficulty.
Personally, I traversed Mānoa twice—once toward K2 and once toward Waʻahila—both times using Mānoa Middle to reach the KST.
However, there’s no reason why it couldn’t be done in one day or further because south of K2 is where you begin to have all of your choices to move as far as you want, with any number of ridges to take up and down.
Puʻu Kōnānuanui II (K2) to Mānoa Middle
From K2, the KST moves south across Mānoa.
The KST traverses a lot of downhill sections to Mānoa Middle, as you come off the highest point in the Koʻolaus at 3,150 ft. (960 m) on K1.
On Apple Maps and even in person, it looks like there’s a nice contour trail across the Mānoa Valley, but don’t follow it.
Staying on the ridgeline is much easier in terms of overgrowth until you hit Waiakeakua Ridge, which isn’t until you’re almost at Waʻahila.
Mānoa Middle Summit
Once at Mānoa Middle, assuming you’re on the summit and not the contour trail, stay to the left to keep hiking toward Waʻahila.
It isn’t until shortly after the boulder section seen in the photo below that the KST meets Waiakeakua and the good contour trail across Mānoa.
Then, from Waiakeakua, the KST is a fairly smooth hike until the much easier Waʻahila Ridge Trail to Mt. Olympus.
Read My Separate Post: Mānoa Middle Ridge Trail
Waʻahila Ridge Trail (Mt. Olympus)
The short section on the Waʻahila Ridge Trail to Mt. Olympus will be another highly trafficked section, as this is a very popular trail among day hikers.
Read My Separate Post: Waʻahila Ridge Trail
Waʻahila (Mt. Olympus) to Kuliʻouʻou
From Mt. Olympus (ʻAwaʻawaloa), heading south, the KST drops significantly off the peak toward the popular Kaʻau Crater Trail.
This short section between the two day hikes will get slightly more overgrown, but both trails are commonly combined as one longer hike, making this section move fairly fast.
This is the steep descent off Mt. Olympus.
Kaʻau Crater Loop
Then, not long after the steep descent, the KST traverses one of the most popular sections on the entire summit trail, as Kaʻau Crater is commonly hiked as a loop around the crater.
Therefore, the section across Kaʻau is fairly easy compared to all the other sections mentioned previously.
Read My Separate Post: Kaʻau Crater Trail
Kaʻau Summit (Puʻu Palikea)
For thru-hikers, you have the option to get water one last time at the top of the third waterfall, which is the last reliable water source for the rest of the Koʻolau Summit Trail.
The trail leading to the right in the photo below is the trail heading down Kaʻau Summit (Puʻu Palikea), and the KST continues through the grass ahead.
Read My Separate Post: Kaʻau Crater Trail
Once past Kaʻau Summit (Puʻu Palikea), the KST begins heading toward Mauʻumae Ridge (Puʻu Kainawaʻanui), sometimes called false Lanipō, followed by true Lanipō about 0.25 miles (0.4 km) after.
Puʻu Kainawaʻaunui (False Lanipō)
The summit of Mauʻumae Ridge is Puʻu Kainawaʻanui, not Puʻu Lanipō, which is why Puʻu Kainawaʻanui is sometimes called 'False Lanipō.'
That said, Puʻu Lanipō is the next summit to the south (right) of Puʻu Kainawaʻanui, located about 0.25 miles (0.4 km) away.
Read My Separate Post: Mauʻumae Ridge Trail
The initial drop from Puʻu Kainawaʻanui is fairly steep, but not nearly as steep as the drop past Puʻu Lanipō, heading toward Wiliwilinui.
The top of the first summit is a false summit, with Puʻu Lanipō located straight ahead.
This endangered Kōlea species certainly isn’t difficult to see if you find yourself hiking in other areas across the Koʻolau Summit, but I think it’s an important reminder to do what you can to minimize your impact in these fragile environments, as endangered Hawaiian species are found all across Hawaiʻi’s mountains—whether they are easy to come across like this or not.
At the top of the next steep hill, there’s one more short, flatter traverse to reach the true summit of Puʻu Lanipō.
Puʻu Lanipō
Standing at roughly 2,590 ft. (789 m), Puʻu Lanipō marks the end of the long hike up the Mauʻumae Ridge Trail.
That said, Puʻu Lanipō is also the unofficial 'halfway' point between Mauʻumae Ridge to the north and Wiliwilinui Ridge to the south, even though the hike continuing south is longer—totalling 0.5 miles (0.8 km) to reach Wiliwilinui, compared to 0.25 miles (0.4 km) to turn back to Puʻu Kainawaʻanui.
Read My Separate Post: Mauʻumae Ridge Trail
After Puʻu Lanipō, the KST traverses a relatively flat section over Waiʻalae Nui.
Waiʻalae Nui Summit
Waiʻalae Nui Summit is a lesser-known peak and ridge trail between Puʻu Lanipō and Wiliwilinui, but the trail heading down is all but lost to time.
This steep descent off Waiʻalae Nui is the biggest drop between Puʻu Lanipō and Wiliwilinui, similar to the descent off ʻAwaʻawaloa to get to Kaʻau Crater.
After the power lines, the KST continues to descend a short distance before starting the climb to Wiliwilinui, which is the first peak of the few that can be seen in the photo below.
These sections of the KST are relatively well traveled because of the power lines on the ridge.
This is where the final ascent to Wiliwilinui begins.
Wiliwilinui Summit
The summit of Wiliwilinui is the end of one of the most popular ridge trails in the southern Koʻolaus, similar only to Hawaiʻi Loa Ridge and Kuliʻouʻou Ridge farther south.
That said, the Wiliwilinui Ridge Trail is one of the best access points in the southern Koʻolau Mountains, because it’s such an easy-access trail compared to the Wailupe Loop and Kūlepeamoa Ridge after Hawaiʻi Loa.
For this reason, I highly recommend using Wiliwilinui Ridge as a starting or stopping point, because, if you decide to continue further, the next best place to leave the KST is Hawaiʻi Loa Ridge, after the summit of Wailupe.
Read My Separate Post: Wiliwilinui Ridge Trail
From the summit of Wiliwilinui and south, the KST really starts to feel like it’s moving faster and faster than everything prior.
Wailupe Summit
From Wiliwilinui, as shown above, the KST traverses a short stretch to Wailupe, a lesser-known trail located in the back of ʻĀina Haina.
Read My Separate Post: Wailupe Loop Trail
Hawaiʻi Loa Summit
After Wailupe, the next major summit just a few peaks over is Hawaiʻi Loa.
Read My Separate Post: Hawaiʻi Loa Ridge Trail
Kūlepeamoa Summit
Next, the KST crosses over Kūlepeamoa, which I personally wouldn’t recommend as an access trail, given that Puʻu ʻO Kona is so, and it’s easier to get up and down.
Read My Separate Post: Kūlepeamoa Ridge Trail
False Puʻu ʻO Kona
Most hikers think that the summit of the Puʻu ʻO Kona Ridge Trail, where the trail down to Kuliʻouʻou Valley is located, is Puʻu ʻO Kona. However, true ʻO Kona is situated between both Kuliʻouʻou Summit and here.
Nevertheless, the Puʻu ʻO Kona Ridge Trail is a great trail to finish on because the popular Kuliʻouʻou-Puʻu ʻO Kona Loop, described below, makes for a great day hike on its own!
Read My Separate Post: Puʻu ʻO Kona Trail
Kuliʻouʻou-Puʻu ʻO Kona Loop
The Kuliʻouʻou-Puʻu ʻO Kona Loop is another one of the most popular KST day hikes.
To add to this, the loop trail is only the second of three hikes where you have the opportunity to start and end at the same trailhead as you parked—the other being the Kulanaʻahane (Moanalua Saddle)-Moanalua Middle Ridge Loop.
False Puʻu ʻO Kona to Kuliʻouʻou
With whatever you decide, the KST section from False Puʻu ʻO Kona to Kuliʻouʻou is all very straightforward.
The trail passes the popular tent/ photo spot, then traverses one more steep dirt section before reaching the popular Kuliʻouʻou Ridge Trail, which is another access trail that I highly recommend utilizing.
Kuliʻouʻou Summit
Like Poamoho further north, the Kuliʻouʻou Ridge Trail should be utilized when hiking up to the KST, as it’s such an easy-access trail to continue in either direction.
Read My Separate Post: Kuliʻouʻou Ridge Trail
Kuliʻouʻou to Kamehame (Dead Man’s)
This section could be broken up with Pyramid Rock to make it two shorter hikes, but I personally think Kuliʻouʻou to Dead Man’s is a great day hike, being that the trail moves so fast compared to most of the sections further north.
In addition to this, Hahaʻione Summit is too close to Kuliʻouʻou to make it feel like you’ve made any progress, and Mariners Ridge should be avoided at all costs if you know that situation.
Finally, Kamiloʻiki is too close to Dead Man’s to stop there, making Pyramid Rock the only reasonable hike in the middle if you wanted to shorten this roughly 7-mile (11.3 km) section.
Kuliʻouʻou to Pyramid Rock
From Kuliʻouʻou Summit and south is where you’ll stop seeing Uluhe ferns on the trail.
You’ll greatly come to appreciate this if you’ve done any of the more overgrown sections prior to hiking in the south.
In any case, Kuliʻouʻou to Hahaʻione is all fairly straightforward.
This is where the KST leaves Kuliʻouʻou Summit to the south.
Hahaʻione Summit
After just 0.4 miles (0.6 km) from Kuliʻouʻou, the KST reaches Hahaʻione Summit, which is the north side of the Pyramid Rock Loop Trail and Hahaʻione Valley.
For the most part, this section of the summit is fairly straightforward, with the exception of a few tricky turns right before Pyramid Rock.
Read My Separate Post: Pyramid Rock Loop Trail
Depending on the amount of maintenance, if any, the trail receives, the grass can be particularly overgrown near the power lines.
At this unique Ironwood tree, the tricky turns on the KST begin and continue until Pyramid Rock shortly ahead.
That said, go around this tree on the left-hand side, and look for the trail that makes a sharp left turn off the ridge almost immediately after.
It will appear as if this isn’t the correct route at first, but if you don’t make this left and remain on the ridge, the ridgeline will cliff out, and you’ll be looking at Pyramid Rock, instead of being near Pyramid Rock.
Just past the tree in the photo above, make a hard left where you wouldn’t expect it, or you’ll end up on the wrong ridge looking at Pyramid Rock instead of standing on the KST next to Pyramid Rock, like I have done a few times.
The left turn is shown in the photo on the left.
The photos below show the hidden left turn that may be tricky to notice.
Following the section above, the KST will continue to descend until it comes to this very vague overgrown area in the photo below.
To continue toward Pyramid Rock, you need to go right on the not-so-obvious trail down this hillside, which will likely look less straightforward than staying on the ridge on the left.
At this rock feature, the KST curves around on the windward side along a little skinny trail.
Next, at this split in the photo below, go right down the steep path.
The path going straight will cliff out shortly after.
Pyramid Rock
The intersection in the photo below is where the Pyramid Rock Loop leaves the Koʻolau Summit Trail.
The trail to the left around the windward side is the route to continue along the KST, and the trail to the right is the best and easiest path to continue up to Pyramid Rock.
Read My Separate Post: Pyramid Rock Loop Trail
This is where Mariners Summit becomes visible for the first time unless you climb to the top of Pyramid Rock.
Mariners Summit
From Pyramid Rock to Mariners, the KST follows a fairly straightforward ridgeline, with just a few more miles to reach Dead Man’s.
Native plants can be more difficult to come by in these low-elevation miles, but ʻIlima is one of the most resistant to non-native weeds in Hawaiʻi.
These photos may make this down climb appear more difficult than it really is, but on a different note, I’m hiking in my favorite trail-running shoes for these less-overgrown sections of the KST.
Globe Schiedea is one of the more common natives across the southernmost portions of the Koʻolau Summit and Makapuʻu.
Kamiloʻiki Summit
The section from Kamiloʻiki to Dead Man’s is more or less one big down and up, with most of the route finding being fairly self-explanatory.
On a different note, Kamiloʻiki Summit is one of the best places in the southern Koʻolaus to spend the night if you are looking for a place to set up.
Read My Separate Post: Kamiloʻiki Ridge Trail
Once in the Ironwood trees, turn right down the hill.
As the KST reaches the low point between both peaks, look for the trail that descends off to the right of the ridgeline through the grass.
If not, the actual ridgeline will cliff out, in which case you’ll have to backtrack to find where it drops to the right.
This is where the trail drops down to the right.
The climb up to Dead Man’s can be a little overgrown and annoying because of the grasses, but this section doesn’t last too long!
At this point, there’s either the option to go right to continue down Kamehame Ridge or left toward the site of the now-removed Dead Man’s Catwalk.
Dead Man’s Catwalk
This is the site where Dead Man’s Catwalk once sat, but the famous concrete slab was removed back in 2016.
Kamehame Ridge
Once at the road that is Kamehame Ridge (Dead Man’s), continue down the road to get around all the fences.
Read My Separate Post: Kamehame Ridge Trail (Dead Man’s)
There’s always a hole in the fence somewhere.
This is where the KST leaves Kamehame Ridge behind.
Here, go left to hike back up to the ridgeline.
Dead Man’s to Makapuʻu (Tom Tom Trail)
Personally, I prefer to hike this section from the Tom Tom Trail to Dead Man’s, but it could be hiked in either direction if driving the majority of elevation up Kamehame Ridge matters most to you.
After Dead Man’s, the KST drops down to the Tom Tom Trail Puka, where the rest of the summit trail gets more and more straightforward the further you hike!
Tom Tom Puka
This is the Makapuʻu Tom Tom Trail Puka, and from here, it’s only 1.2 miles (1.9 km) to reach Kalanianaʻole Highway!
Read My Separate Post: Makapuʻu Tom Tom Trail
I think it’s easiest to stay to the left of this fence.
Makapuʻu Lookout
It must be said that the KST is NOT the paved Makapuʻu Lighthouse Trail, but rather, the final hill from the Makapuʻu Lookout to make it official.
Personally, I think it would be cheating to come this far and not take the final hill in order to finish the KST.
Read My Separate Post: Makapuʻu Point Lighthouse Trail
Makapuʻu Point Lighthouse Trail
Once over the final hill and on the paved trail, the rest of the KST continues down the easy path to the lighthouse.
Congratulations!
That’s Oʻahu’s KST, and it’s easily the hardest trail in Hawaiʻi!

PAU!
In any case, the KST can be tricky because of remoteness, planning, people’s schedules, permits, scheduling pick-ups/ drop-offs, and most importantly, the WEATHER! So many times the weather dictated what section I would hike or avoid.
I’ve had the best days and the crappiest days on the KST. I’ve been poured on while in the north, the Kalihi Saddle, leaving Stairway to Hell, and coming down Lanihuli to the Lookout, and that doesn’t even mention that the Kalihi Saddle took me three separate hikes to complete!
I also barely mentioned all of my long nights in the dark or crazy early mornings to either get down safely or to go after a section early.
Overall, I know everyone will have a different experience, but it's for this reason that I said in the beginning: This trail will test you. Believe me, it will!
I’ve had very confident, capable friends who tried to do it all in one go without first hiking it in sections to which they did well, but on account of the crappy weather they were dealt and their low morale because they didn’t know what was coming next, they only made it as far as Triple Ridge from the north. My friends even used this post to prepare, but this post only does so much compared to seeing the trail for yourself.
In any case, I am happy to be the first all-in-one post for the entire Koʻolau Summit Trail!
The Koʻolau Summit Trail Record
As it stands, the current record is 2 days, 7 hours, and 27 minutes, set by Conrad Newfield, which is an absolutely insane record that I can very confidently say will stand for some time!
I mean, to beat this, someone would have to have perfect conditions—no rain and good cloud cover to avoid the heat—and, perhaps more importantly, know the KST perfectly! One couldn’t get lost or off track, and you’re seriously up against the best when it comes to Conrad’s time across all three saddles!
This is all to say, I highly encourage you to read his write-up. It’s insane!
Fastest Known Time: Koʻolau Summit Trail (KST) Record
The 'Official' KST Thru-hike Rules
Here is the blog written about Chase Norton; the first person to ever to connect and complete the entire Koʻolau Summit in one push.
That said, he had a few general rules/ guidelines over two attempts to keep it fair across the board. Keep in mind that he did many practice hikes to learn the trail before attempting the whole thing in one go.
Carry all your food and camping gear on your back—no stashing gear ahead of you, and no having someone meet you on the KST to resupply you. This includes water. To resupply, you need to use the resources on the trail, like rain catchments or streams.
No bailing off at any point on the trail to sleep a night at home, like the Pali Lookout, and regaining the trail the next day. The push needs to be continuous and uninterrupted.
Hike it alone. This one is a little more loose than the first two because he did have people meet him for some sections, but for the most part, he was alone. Also, hiking it alone takes away the temptation to have friends resupply you.

My Print - KST
Native Plants on the Koʻolau Summit Trail
There’s honestly too many different native plants that I could list from my observations on the summit trail, but I really wanted to include this section to say that you will be hiking by some of the world’s rarest plants!
I purposefully excluded location information about some of these species throughout the post, so as not to advise searching for them or disturbing their habitat. Regardless, please do your part to minimize your impact.
If you would like to learn more about identifying native Hawaiian plants from the Koʻolau Summit Trail and around Hawaiʻi, I encourage you to check out my separate post.
Read My Separate Post: Native Hawaiian Plant Guide