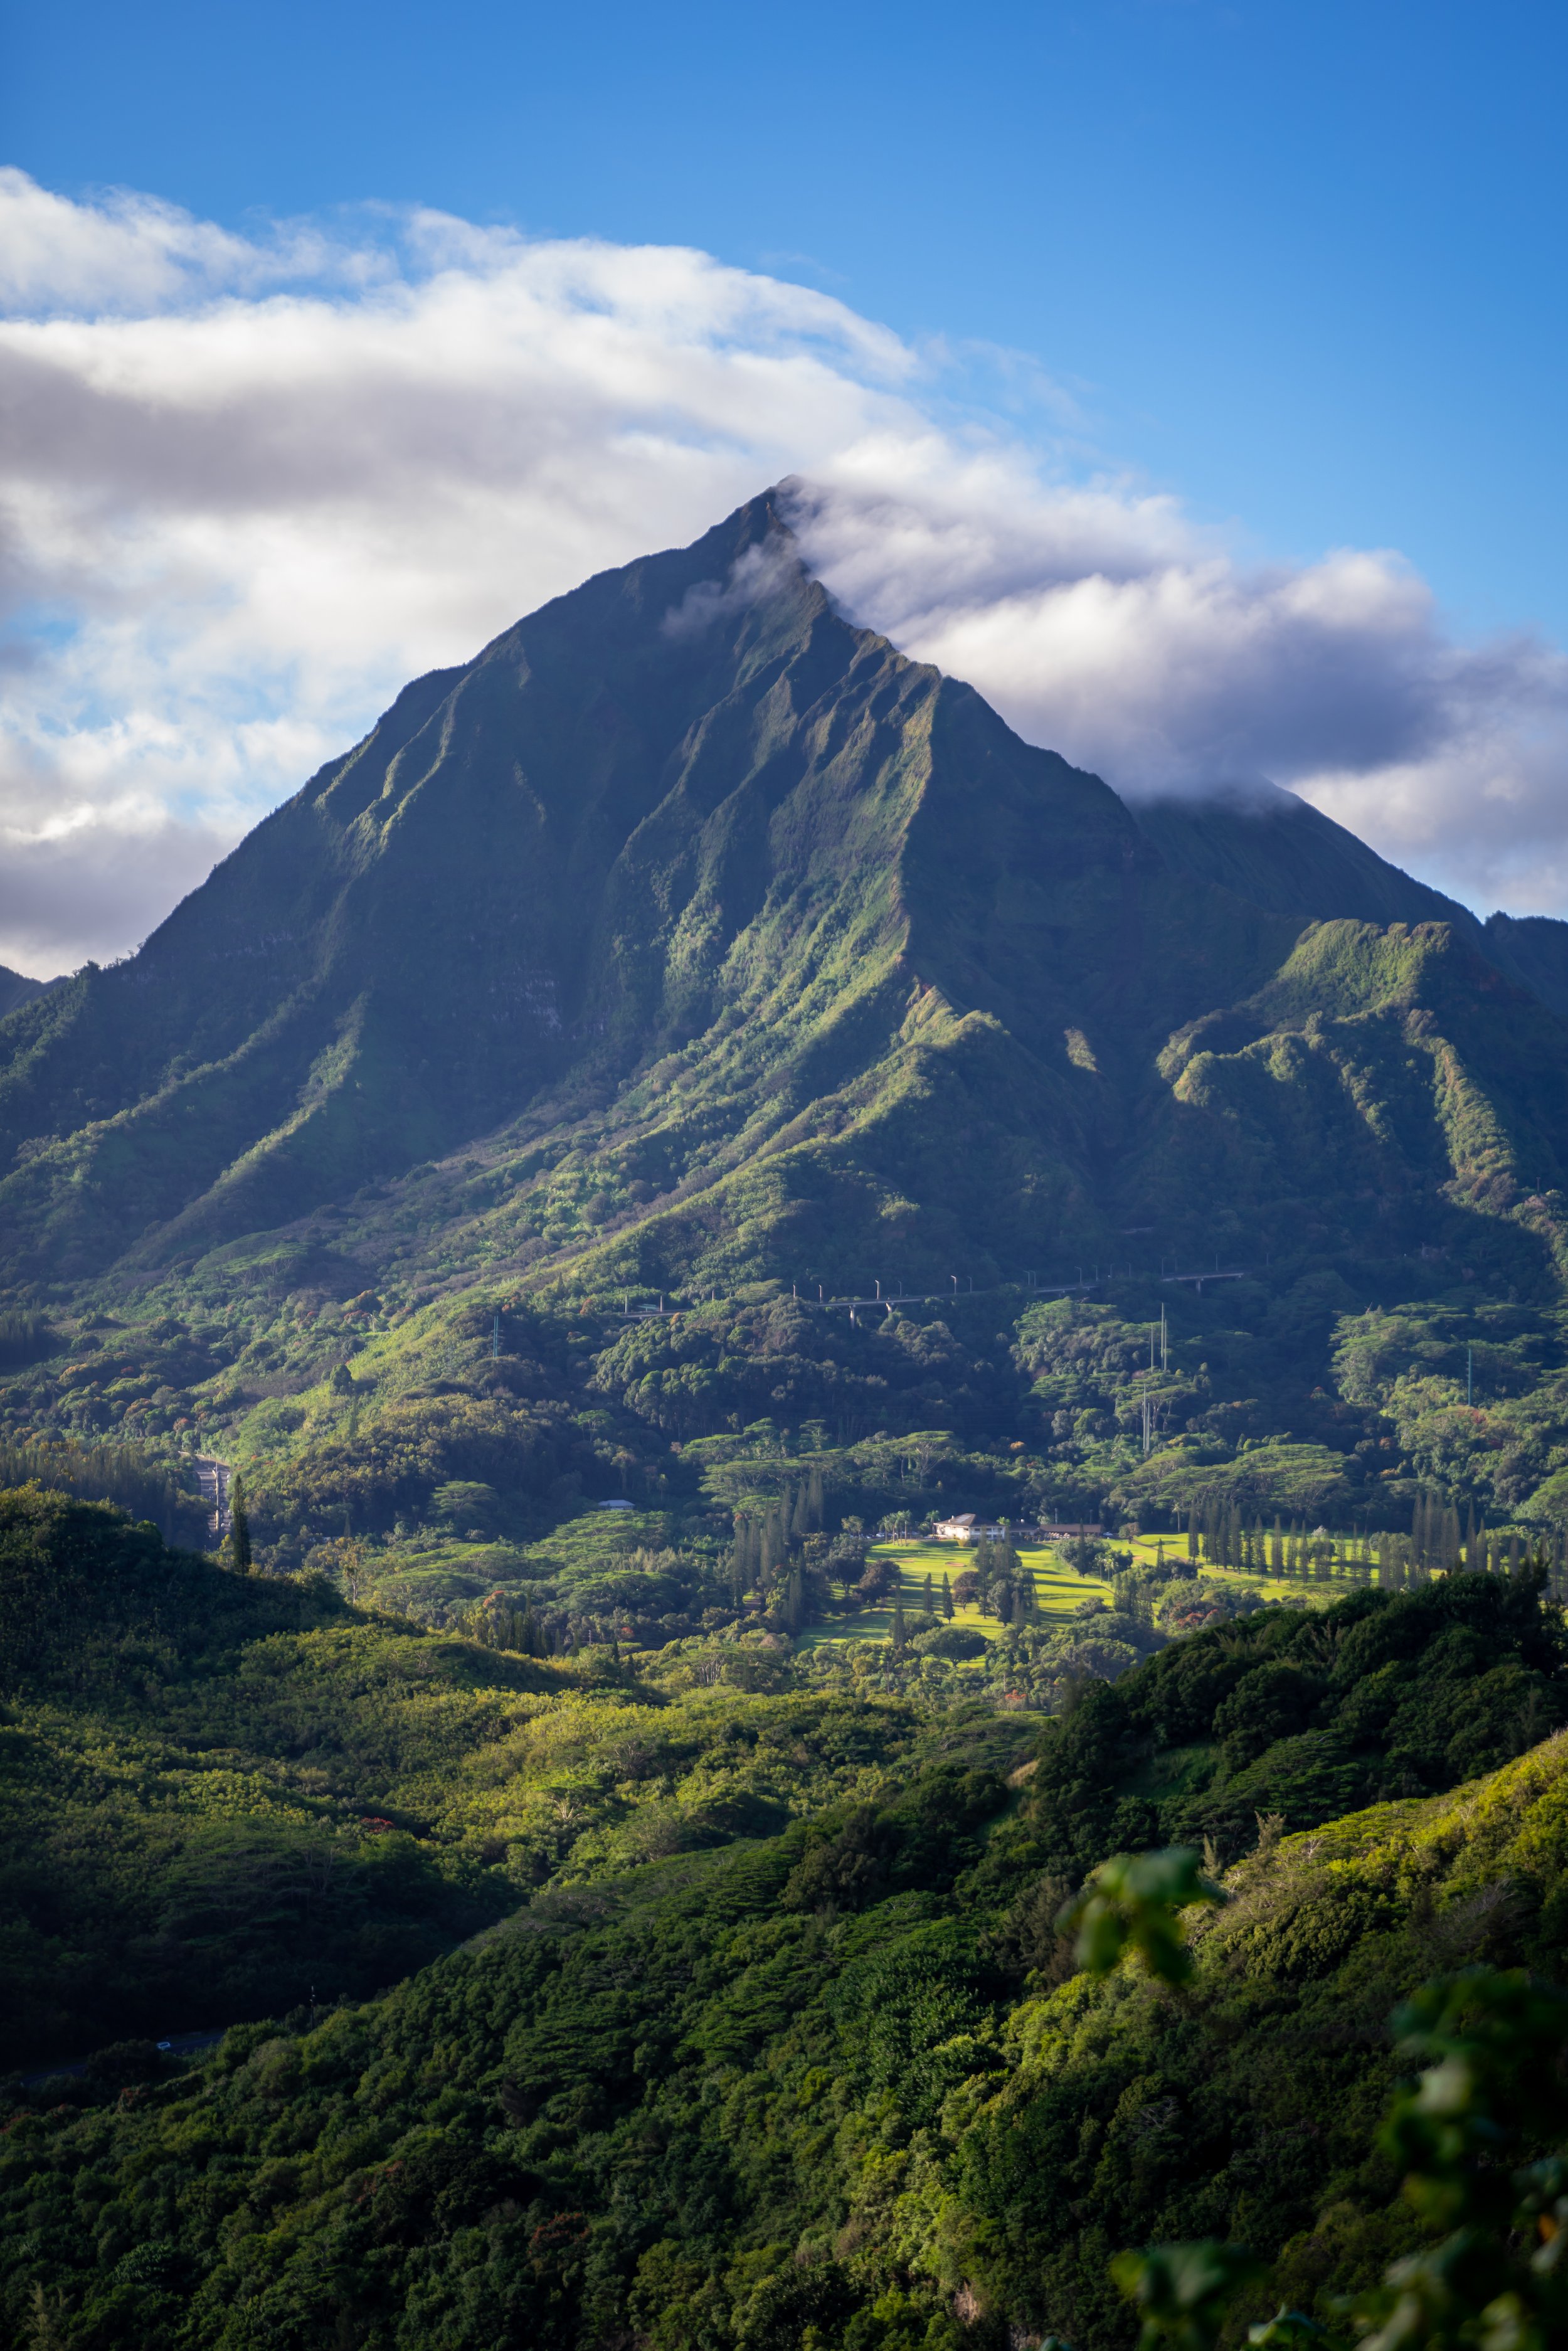
Hiking the Lulumahu Ridge Trail to Puʻu Kōnāhuanui on Oʻahu, Hawaiʻi
Distance (Roundtrip): 4.6 miles / 7.4 km
Distance (Lulumahu Ridge Loop): 9.0 miles / 14.5 km
The Lulumahu Ridge Trail to Puʻu Kōnāhuanui in the southern Koʻolau Mountains on Oʻahu is a very short, steep, and unpopular day hike to the summit of K1, the highest peak in the Koʻolau Range!
That said, the Lulumahu Ridge Trail is often treated as a one-way hike because taking the traditional Puʻu Kōnāhuanui Trail down to Tantalus is a bit easier, even though it makes for a longer hike overall.
This is called the Lulumahu Ridge Loop Trail, which translates to hiking up Lulumahu Ridge, down the Puʻu Kōnāhuanui Trail to Pauoa Flats, then down the Nuʻuanu Trail to the Judd Trail, and finally walking 0.8 miles (1.3 km) up Nuʻuanu Pali Drive to get back to the Lulumahu Falls Trailhead.
All this to say, I think the distances on the Lulumahu Ridge Trail are a bad indicator when determining difficulty, as 2,200 ft. (671 m) of elevation gain in just 2.3 miles (3.7 km) should tell you all you need to know about how steep the hike really is. However, the first 0.7 miles (1.1 km) follow the mostly flat Lulumahu Falls Trail, meaning the vast majority of the elevation gain is condensed to the final 1.6 miles (2.6 km), which is why my overall recommendation leans toward hiking the loop!
Lulumahu Ridge Trailhead Parking
Parking for the Lulumahu Ridge Trail is located in a large, unpaved parking lot near the intersection of Nuʻuanu Pali Drive and the Pali Highway, the same trailhead parking area that also serves the Lulumahu Falls Trail.
Out of caution, consider the Lulumahu Ridge Trailhead to be a high-crime area for petty theft, meaning you should never leave visible bags or anything valuable in your car.
Google Maps Directions: Lulumahu Ridge Trailhead
Hiking the Lulumahu Ridge Trail
The Lulumahu Ridge Trail follows the Lulumahu Falls Trail for the first 0.7 miles (1.1 km) until the two split from on another.
Over the years, the Lulumahu Falls Trail has become a less-than-straightforward hike, as so much inaccurate information and directions have proliferated the increase of misleading social trails that stray from the best, fastest, and most straightforward route to the waterfall.
This being the case, hikers get off-route and end up hiking much farther than is actually necessary by following one of these many wrong paths, which is why I highly recommend following this article as it is specifically written, as I have outlined the best route to reach Lulumahu Falls with the least amount of effort.
To skip ahead to the start of the Lulumahu Ridge Trail, click here.
Immediately after beginning the hike, the Lulumahu Falls Trail will split.
From here, go right, then right again at both splits, to follow the trail through the Bamboo to the service road, about 0.1 miles (0.2 km) away.
This is the second right turn immediately after the one shown above.
After the first two turns, follow the trail through the Bamboo until it opens up to a service road shortly ahead.
When the trail reaches the service road, go left to continue hiking toward Lulumahu Ridge.
When the road splits again, with a very obvious path on the left-hand side, go straight, as the trail to the left leads the wrong way, like the split at the very beginning.
These big circular leaves above the Lulumahu Falls Trail are called Hau, and they are one of the few native Hawaiian plants on the trail, as most this relatively low-elevation hike is dominated by non-native, invasive species.
Lulumahu Falls-Kaniakapūpū Junction
When the trail comes to this T-intersection, go left to continue hiking toward Lulumahu Ridge.
That said, do not follow the path on the right, as it leads to a highly protected historic site, where first-time trespassers will receive a $10,000 fine for entering without permission.
The State of Hawaiʻi isn’t messing around!
This check dam is always a nice sign that you’re following the correct trail.
The next best mental checkpoint is where the Lulumahu Falls Trail reaches this long, straight section through these tall Eucalyptus trees.
When the Lulumahu Falls Trail reaches this clearing, go straight/ slightly to the right to find where the trail continues through the trees ahead.
This is where the Lulumahu Falls Trail continues just to the right of the clearing.
When the Lulumahu Falls Trail reaches this next clearing in the Strawberry Guava forest, go left, and the trail should become more defined just a few steps ahead.
This next split is where all the incorrect paths finally come together for the rest of the hike to Lulumahu Ridge.
Once here, go right at this split to continue hiking to Lulumahu Ridge, but if you plan to hike down this way instead of following the loop outlined in the beginning, don’t forget to make a mental note of this left turn for the return hike.
Luakaha Weir
When the Lulumahu Falls Trail reaches this weir, walk along the wall toward the top of the overflow, at which point there are two options.
Once at this point, there’s either the option to walk directly upstream, as the Lulumahu Falls Trail continues on the left-hand side, or to cross the weir, then cross almost immediately again to reach the same trail on the left side of the stream.
I usually choose to cross, then cross again.
This is where the Lulumahu Falls Trail continues up the left side of the stream.
As the Lulumahu Falls Trail enters the gulch, Māmaki—the native Hawaiian tea—starts to become more and more abundant as the dominant native species on the trail, similar to the Hau trees from the beginning.
That said, if you are curious about trying the native Hawaiian Māmaki tea, I kindly ask that you don’t harvest Māmaki from our native forests.
Instead, Māmaki can be bought from one of the local reputable vendors listed below.
Lulumahu Ridge-Lulumahu Falls Junction
After 0.7 miles (1.1 km), the Lulumahu Falls Trail finally reaches the junction for the Lulumahu Ridge Trail.
Once here, go left to begin the hiking the steep Lulumahu Ridge Trail up to Puʻu Kōnāhuanui.
On a different note, many Hawaiʻi visitors trying to reach Lulumahu Falls often end up following the Lulumahu Ridge Trail by mistake. I mention this because if you happen to see anyone who looks confused up ahead, it’s probably because they didn’t intend to end up on the ridge trail.
Read My Separate Post: Lulumahu Falls Trail
In my experience, the lower sections of Lulumahu Ridge may be a little more vague than the rest, but try to follow the most obvious trail heading up the ridge.
Then, when the trail starts getting steeper, like the photo below, it will be a lot less confusing, as there is only one real path to follow.
On a different note, hiking pants are a must for the overgrowth once you leave the Lulumahu Falls Trail behind.
The pants below are my recommendations that hold up the best with the overgrowth here in Hawaiʻi, but with any hiking pants that need to be durable, make sure that they are at or near 100% nylon. This is really the most important factor!
Lulumahu Ridge-Upper Lulumahu Falls Junction
While there is technically more than one Upper Lulumahu Falls, this is generally the one that most refer to, as it’s the route to rappel down the main Lulumahu waterfall.
That said, most hikers hiking up Lulumahu Ridge leave the ridge trail at this split to go down to the Lulumahu Stream.
However, stay straight on the ridge to the left to continue hiking up to Puʻu Kōnāhuanui.
Once above the lower canopy, the rest of Lulumahu Ridge to the summit is very straightforward.
However, these sections past the Upper Lulumahu Falls junction are where quality hiking pants become the most useful.
These views of the upper mountain in the do not show the true summit, but in terms of the entire hike, getting to the top of the false summit is roughly 99% of the way to the top.
This photo below is the part of Lulumahu Ridge where the views of K1, the true summit of Puʻu Kōnāhuanui, start to become visible.
Puʻu Kōnāhuanui (K1)
After 2.3 miles (3.7 km), the Lulumahu Ridge Trail ends at the summit of Puʻu Kōnāhuanui, also known for being the highest peak in the Koʻolau Mountains at 3,150 ft. (960 m).
Read My Separate Post: Koʻolau Summit Trail (KST)
Puʻu Kōnāhuanui Ridge
As previously mentioned, there are some things to consider regarding the route you choose to take back down. However, it is always my personal preference to return by way of the Puʻu Kōnāhuanui Ridge Trail, followed by the Nuʻuanu Trail, which is exactly what’s shown below.
This route completes the roughly 9.0-mile (14.5 km) loop trail mentioned previously, utilizing Nuʻuanu Pali Drive to walk the final stretch back to the Lulumahu Falls Trailhead.
Read My Separate Post: Puʻu Kōnāhuanui Ridge Trail
Pauoa Flats-Nuʻuanu Junction
Once past the Pauoa Flats Bench, look for the Nuʻuanu Trail on the right-hand side, which descends the final stretch back down to Nuʻuanu Valley.
Read My Separate Post: Nuʻuanu Trail
Nuʻuanu Stream
The last part of the Nuʻuanu Trail finishes on the Judd Loop Trail.
That said, go right at the Judd Trail junction to hike out to Nuʻuanu Pali Drive on the shortest route.
Judd Trailhead
Once at the Judd Trailhead, go right to begin the final 0.8-mile (1.3 km) walk back to the Lulumahu Falls Trailhead.
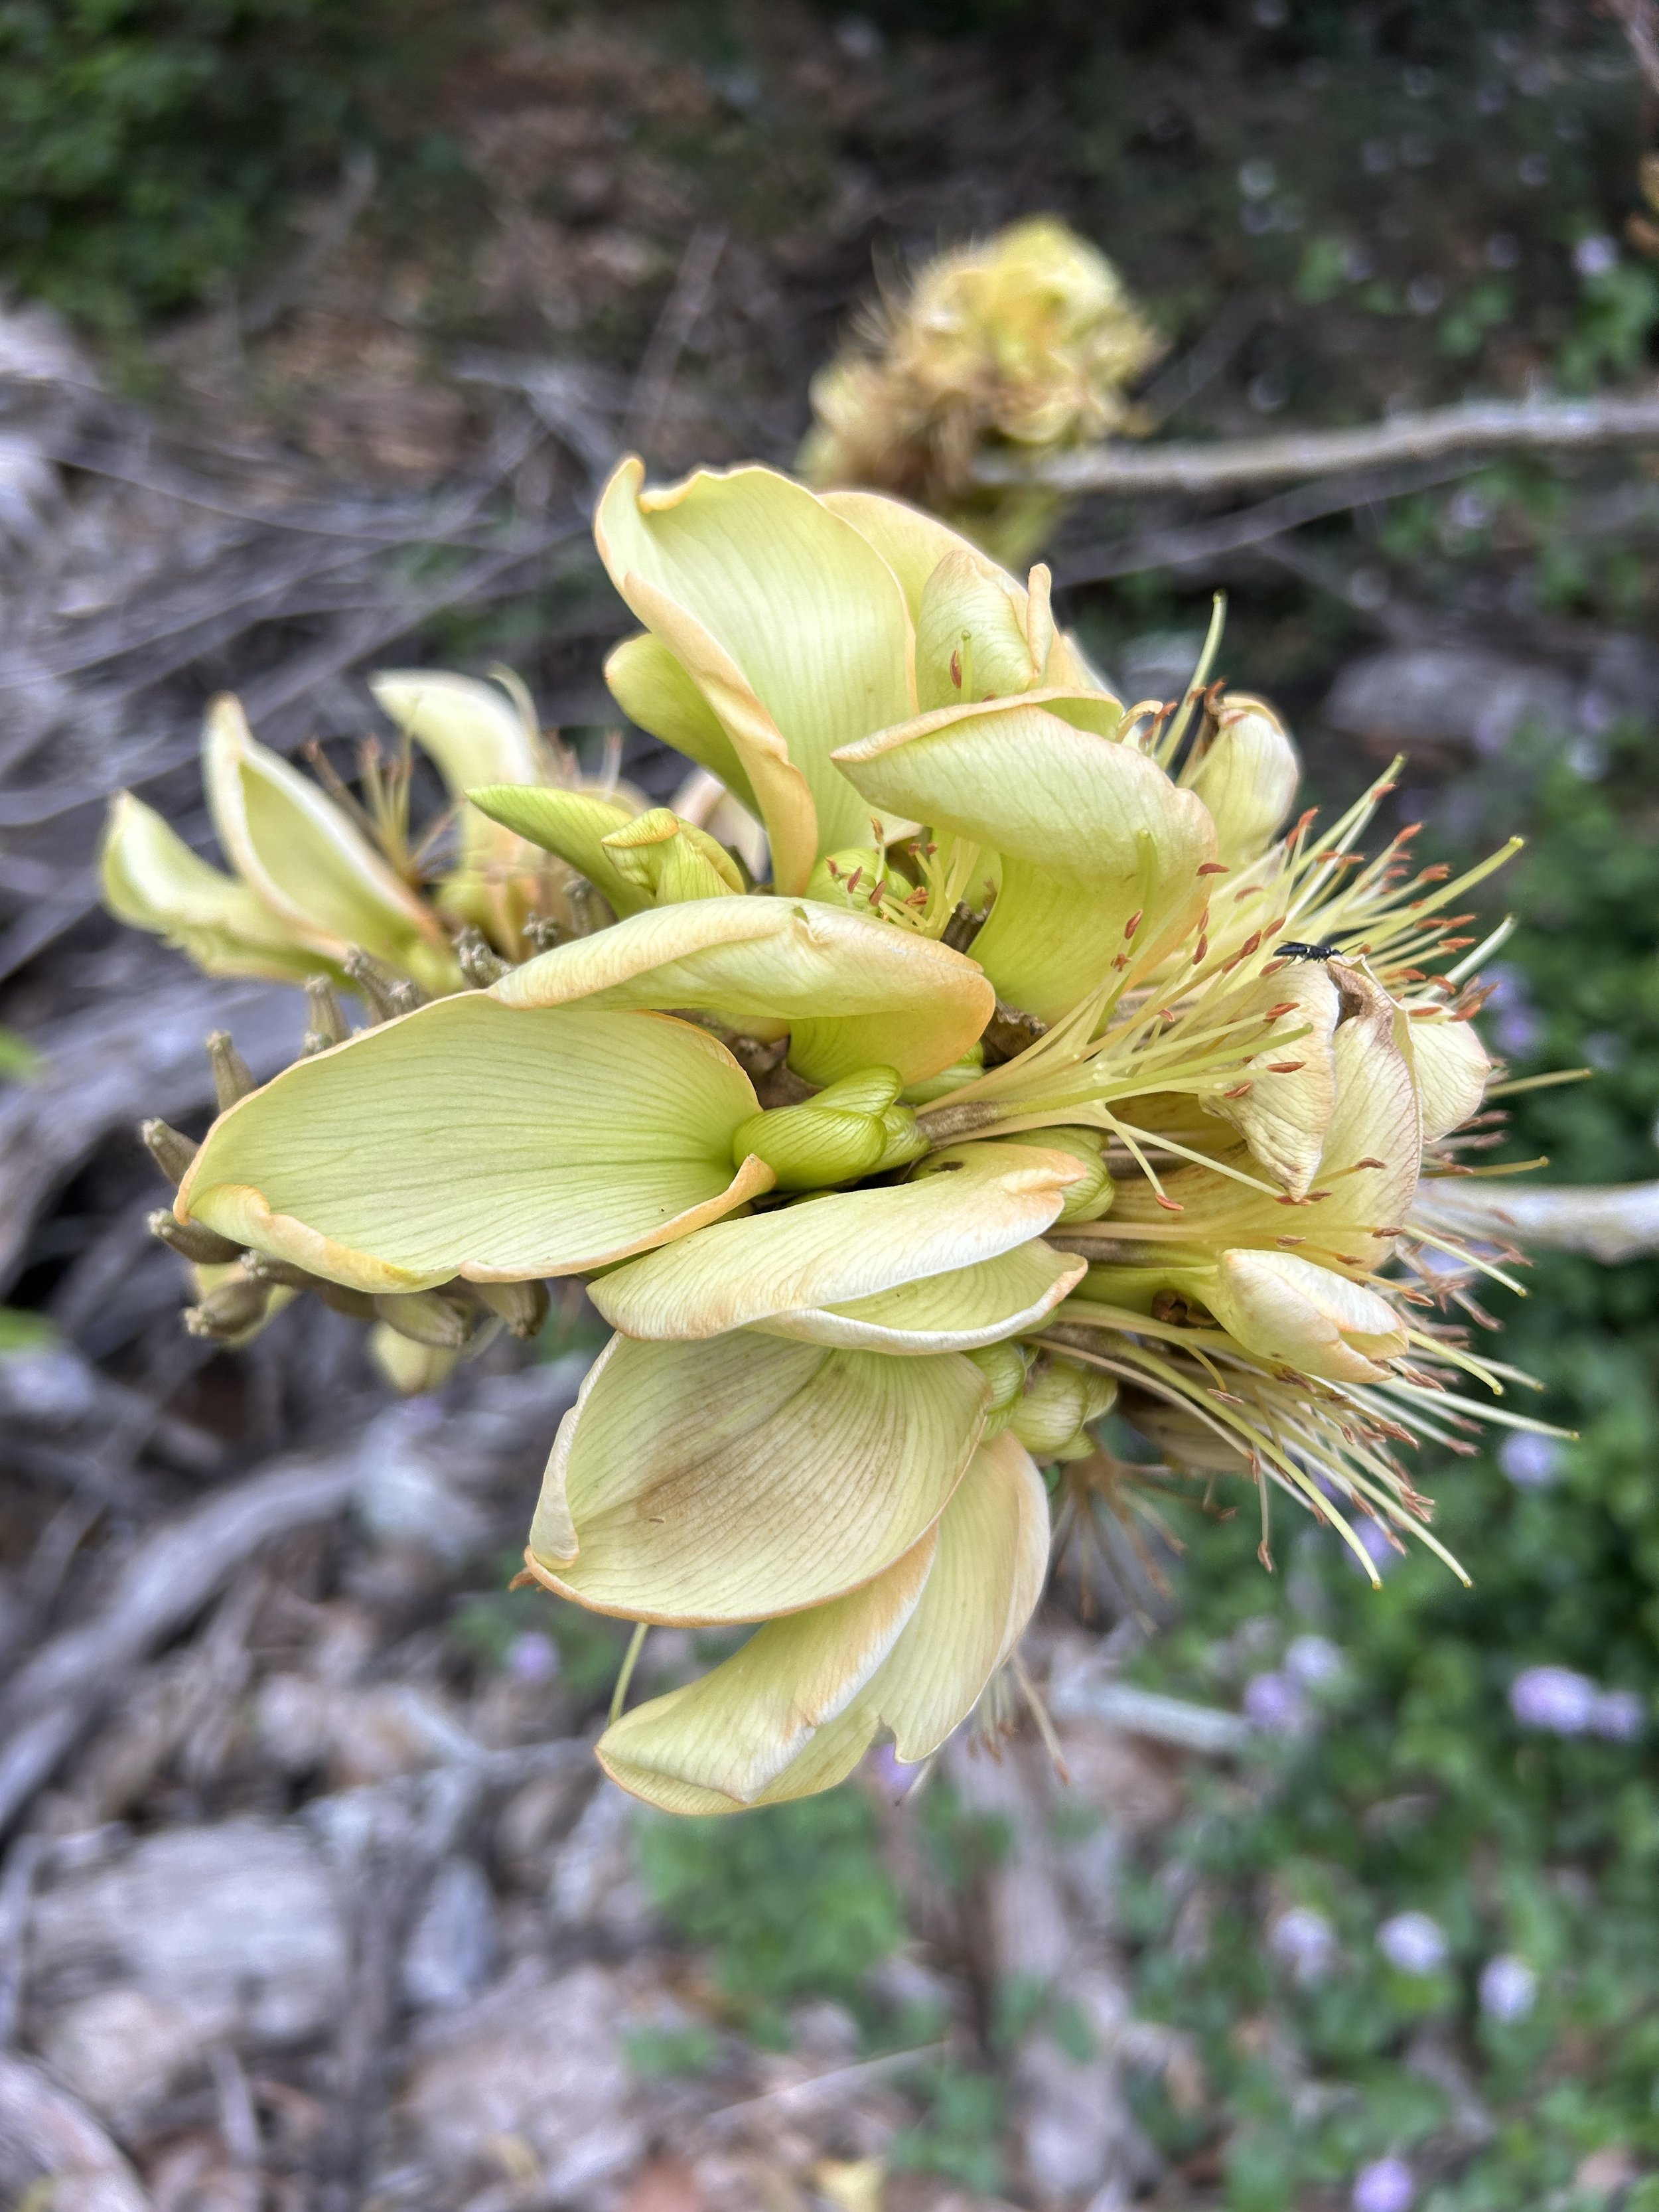
Native Plants on Lulumahu Ridge
The Lulumahu Falls Trail is not the best place to look for native plants beyond the many Hau trees; however, once Lulumahu Ridge ascends above the lower canopy, there are tons of different native plants to find for the rest of the hike up to the summit.
Some of these include Kōpiko, various ʻŌhiʻa species, ʻAhakea lau nui, Alani, Kokolau and Kōlea, to truly only name a few.
If you would like to learn more about these and many other native Hawaiian plants from across the islands, I encourage you to check out my separate post linked below.
Read My Separate Post: Native Hawaiian Plant Guide