Hiking the Half Dome Trail (The Cables) in Yosemite National Park
Distance (Roundtrip): 16.4 miles / 26.4 km
Elevation Change: 4,770 ft. (1,454 m)
The Cables on Half Dome in Yosemite National Park is one of the best, most iconic, and most sought-after day hikes across all of Yosemite, as hiking to the summit of the park’s most prominent peak is a bucket list item for people from around the world!
This is what inevitably prompted the National Park Service to implement a permit system for The Cables on Half Dome in 2010, which has changed a number of times over the years to now include every day of the week The Cables are up—typically from late May to mid-October.
That said, there’s a lot to consider when it comes to planning the Half Dome Trail, which often begins months in advance with the pre-season lottery. However, there are a number of ways to secure one of these elusive permits, which is why I highly recommend reading through the next section below, as hiking The Cables to the summit of Half Dome—especially for sunrise—is one of my favorite things to do and top recommendations when visiting Yosemite National Park!
How to Get a Half Dome Permit?
There are three ways to get permits for The Cables on Half Dome, two of which are incredibly difficult for the vast majority of Yosemite National Park visitors.
They are the pre-season lottery, the daily lotteries (two days in advance), and the backpacker permits—with the two most challenging options being the lotteries.
So, let me explain. Months prior to my Yosemite trip, during which I hiked the Half Dome Trail, I applied for the pre-season lottery with dates that spanned a two-week period. Needless to say, I was unsuccessful. Then, when I was actually there for the trip, I began applying for the daily lotteries, which took seven days of constant applying before I was successfully awarded a permit—surprisingly, on a Saturday of all days!
I say that to say, the Recreation.gov lottery system is 100% random, as I have personally seen someone get awarded permits in the daily lottery for back-to-back days because the weather wasn’t good for their permit on the first day.
Now, I recognize that the vast majority of visitors do not have the time to submit daily lottery applications for a week straight—or even two weeks straight, as I would have done if necessary—so that’s why I think it’s important to highlight the Half Dome backpacker’s permit.
You are already going to hike directly by the Little Yosemite Valley backcountry campsite on the hike up Half Dome, so camping just one night—not to mention cutting out the worst half of the hike—is a very practical option. Half Dome backpacker permits can be obtained on-site simply by walking into the Wilderness Permit Office in Yosemite Village. They almost always have permits available (weekends may be more difficult) if you arrive right when they open.
To do this, simply make your one-night backcountry reservation for Little Yosemite Valley on Recreation.gov using the wilderness permit link below. Then, arrive at the backcountry office in Yosemite Village when they open to add Half Dome to your reservation.
Book Here: Half Dome Permits / Yosemite Wilderness Permits
What is the Best Time of Day to Hike Half Dome?
EARLY—and by early, I do not mean starting at 5:30 a.m. from the Happy Isles Trailhead, which is what the National Park Service recommends.
I say this because The Cables on Half Dome can become an unenjoyable bottleneck by 8:30–9:00 a.m. and throughout much of the afternoon, as the vast majority of permit holders all arrive within a specific window.
That doesn’t even mention that The Cables are very steep—steep to the point where no hiker is getting to the top of Half Dome without them. So, it really only takes one hiker who is uncomfortable with this type of terrain or exposure to cause a bottleneck for both those climbing up and those descending.
This is why I like to say, if you’re familiar with hiking through the night when it comes summiting other big peaks throughout the U.S., then hiking through the night to climb Half Dome for sunrise should be no difficulty.
It certainly is a long hike with a lot of elevation change—about 4,770 ft. (1,454 m)—but it certainly is a luxury to enjoy sunrise on the summit and The Cables both on the way up and down without other hikers.
For context, I began hiking from the Happy Isles Trailhead at 12:50 a.m. for a roughly 5:30 a.m. sunrise, and without stopping for any breaks, I summited just before 4:30 a.m. Personally, I overestimated the difficulty of Half Dome—but this is coming from someone who hikes constantly. Someone else would likely have an entirely different perspective.
Happy Isles Trailhead Parking
Parking for the Half Dome Trail is located at the Happy Isles Trailhead in the very back of Yosemite Valley, either in the dirt lot just past Curry Village or along Happy Isles Loop Road, with many visitors parking as far away as Yosemite Village and relying on the free shuttle to get to and from the trailhead.
That said, the Happy Isles Trailhead is one of the most challenging places in Yosemite National Park to find parking—unless you arrive first thing in the morning, which is what recommend for most adventures in and around Yosemite Valley.
Google Maps Directions: Mist & John Muir Trailhead (Happy Isles)
Hiking Checklist - Yosemite
Here is a complete list of must-have things that you will want for any hike in Yosemite National Park.
That said, bear spray is purposefully excluded from this list because, while the Sierra Nevadas are home to a large Black Bear population, bear spray is not allowed in Yosemite National Park.
Hiking the Half Dome Trail
The Half Dome Trail begins at the Happy Isles Trailhead on the far side of the Merced River from the shuttle stop.
Those parking in the dirt lot or along the road by Curry Village can utilize the Yosemite Valley Loop Trail or the shuttle to reach the trailhead, as it is at least a 0.6-mile (1.0 km) walk each way from the closest parking area.
This is the same trailhead for both the Mist Trail and the John Muir Trail, which is why the beginning of this post will mirror both my article about Vernal and Nevada Falls, as well as the beginning of the Diving Board Trail.
To skip ahead to the JMT at the top of the Mist Trail, click here.
Initially, the hike begins on a very flat trail, but this will quickly change, as the entire 6.4-mile (10.3 km) Mist–John Muir Loop to Vernal and Nevada Falls is almost always climbing or descending one of many steep sections.
After just 0.4 miles (0.6 km), the Mist Trail makes a hard left turn to begin the ascent up to Vernal Falls.
This is also where the Mist Trail becomes paved and continues all the way to the Vernal Falls Bridge, about 0.9 miles (1.4 km) into the hike.
This sign at the beginning of the Mist Trail is strikingly similar to the sign at the beginning of the Crescent Meadow Loop Trail in Sequoia National Park, which marks the start of countless different adventures on the High Sierra Trail, such as the Mineral King Loop.
It really is fun to look at when you think about all the possibilities one can reach throughout the Sierras and beyond, like Mt. Whitney, more than 200 miles (322 km) away!
This is where the Mist Trail noticeably begins gaining elevation, a climb that remains fairly steep all the way to the top of Nevada Falls.
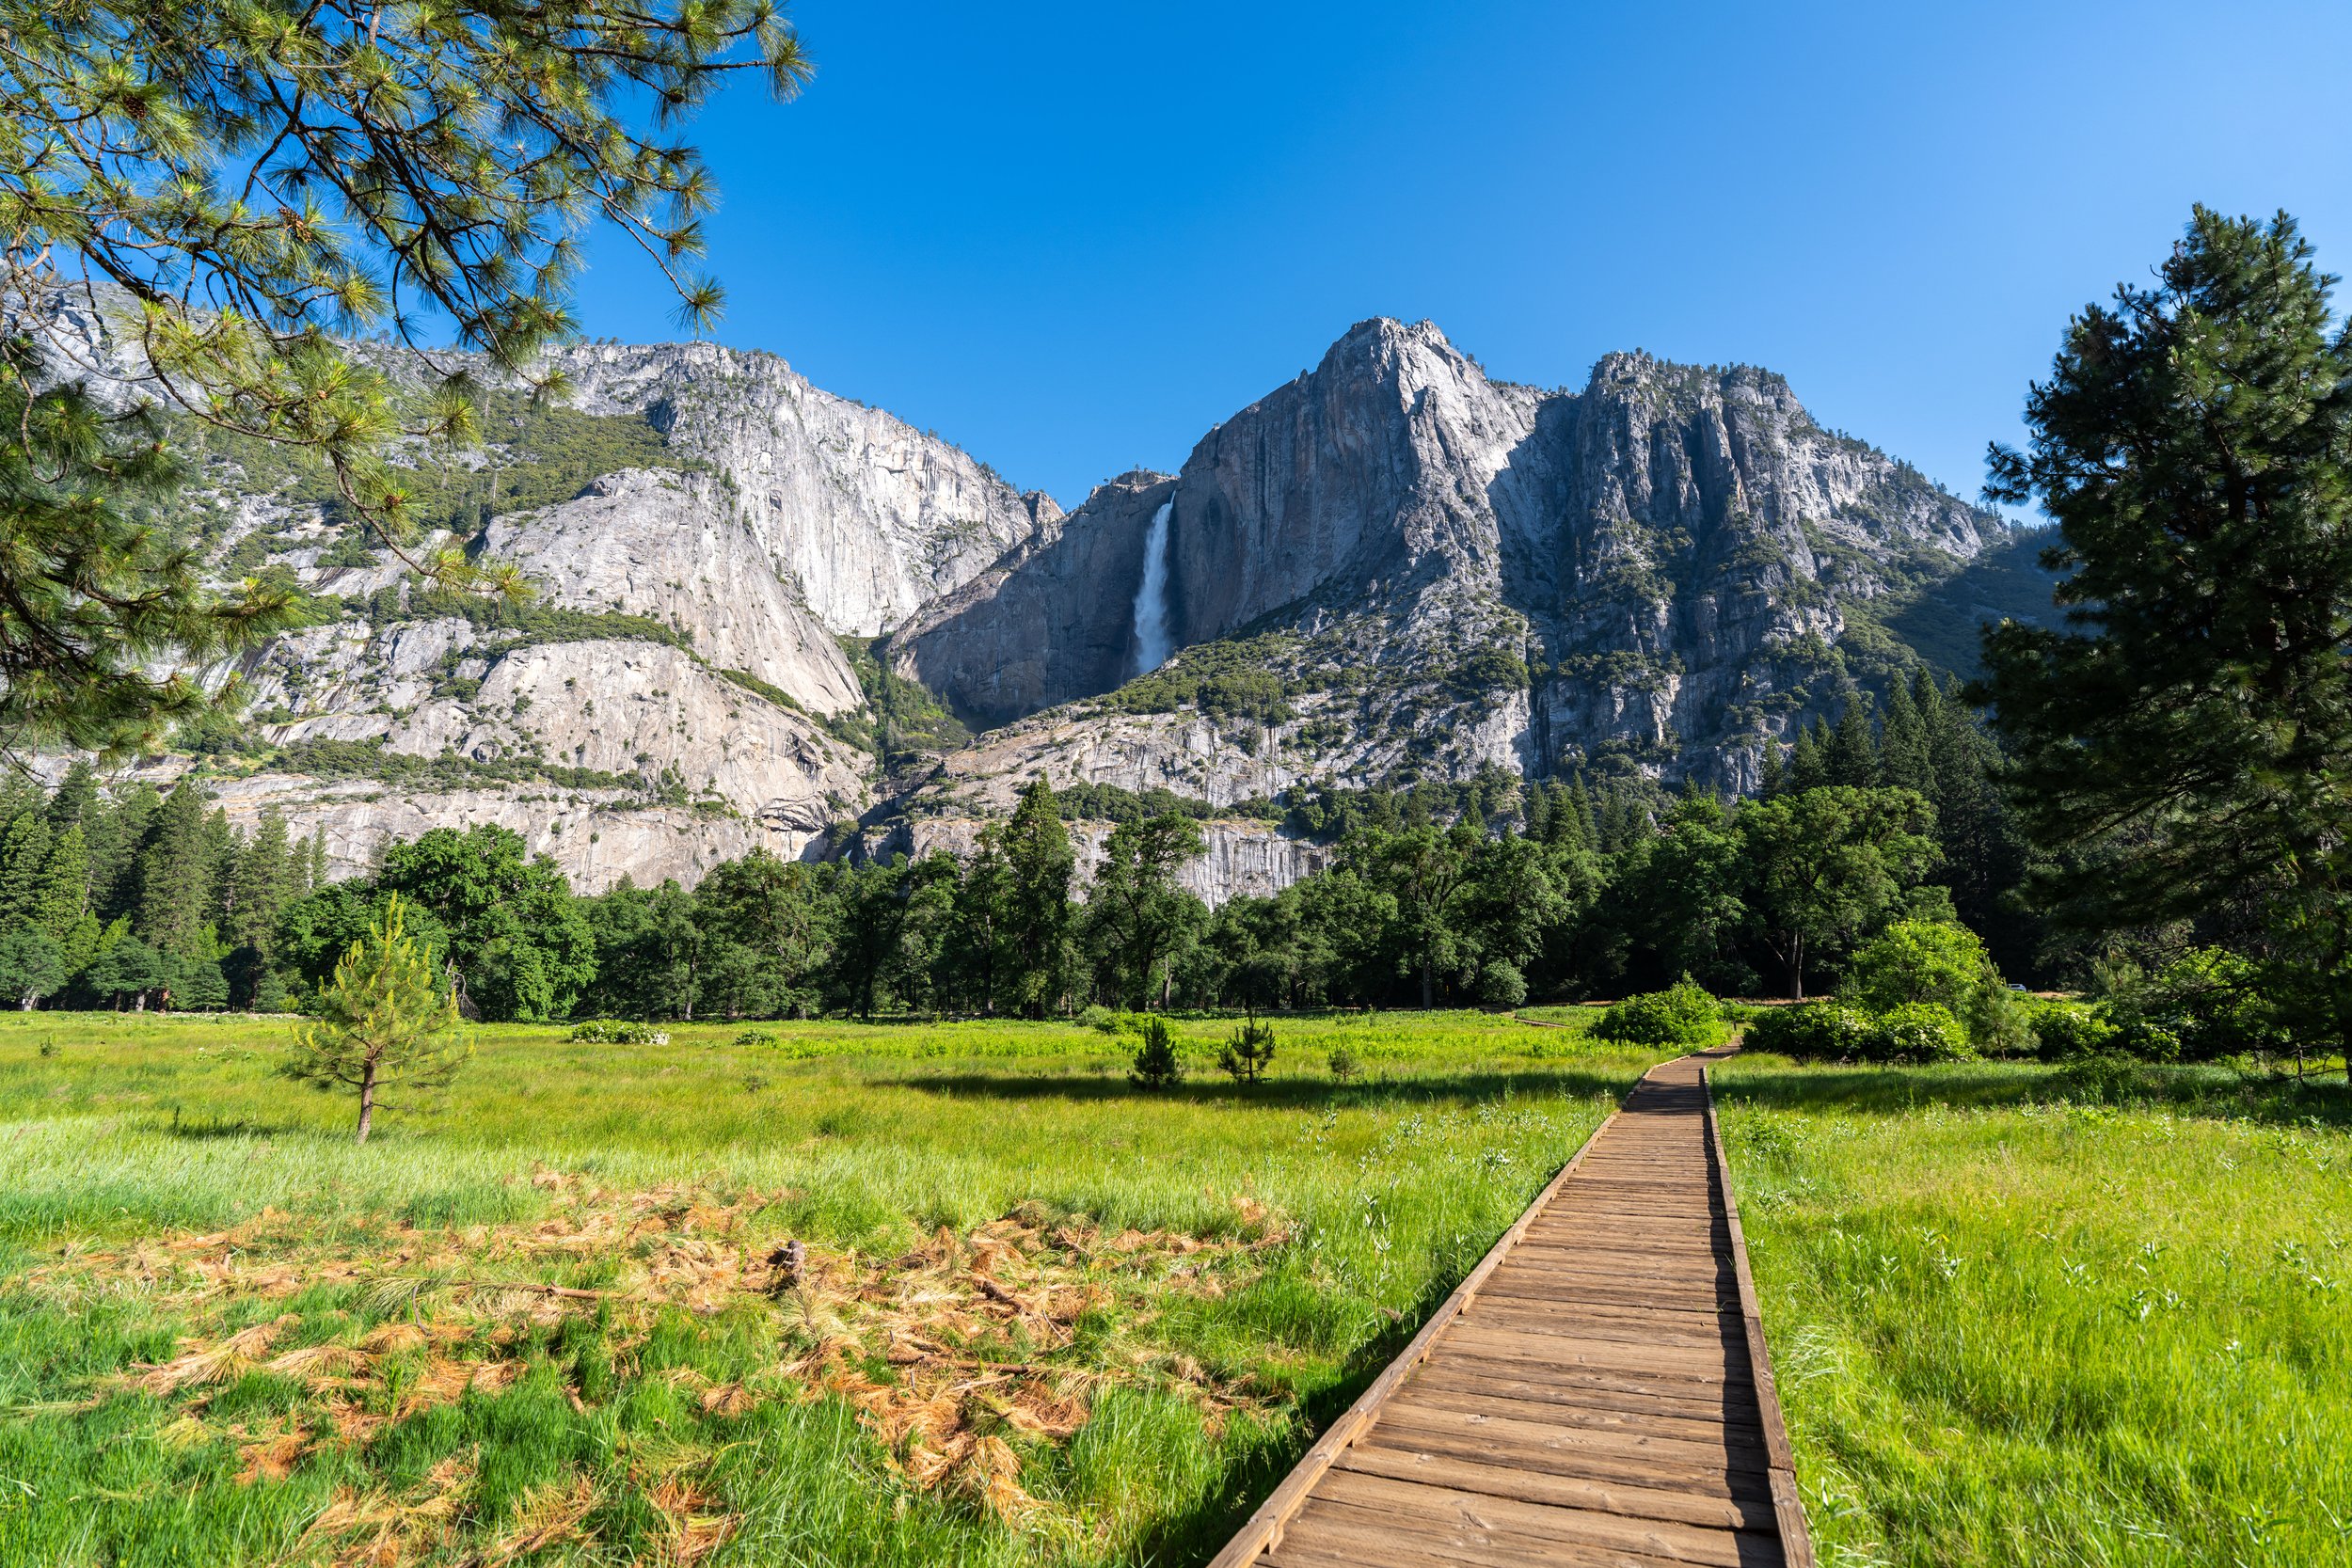
From this viewpoint, hikers can see Upper Yosemite Falls in the distance!
On a sunny day in Yosemite, which is very common in the Sierras during the summer, I highly recommend hiking in a hooded sun shirt to stay safe—something that can certainly be useful here and on countless other adventures throughout the park.
After roughly 0.9 miles (1.4 km), the Mist Trail crosses the Merced River for the first of two times before reaching the top of the loop.
That said, the Vernal Falls Bridge is a good sign that the beginning of the Mist Loop Trail is not far ahead.
Outside of filtering, the far end of the Vernal Falls Bridge is the last place for visitors to get water on the hike to Half Dome.
With that in mind, all hikers should carry at least 2–3L of water for the steep Mist Trail and the Half Dome Trail, which is why I highly recommend traveling to Yosemite with a good water bladder, like the one listed below.
After the Vernal Falls Bridge, the Mist Trail continues for another 0.2 miles (0.3 km) until it reaches the John Muir Trail junction.
Lower Mist-John Muir Junction (Mist Loop Trail)
This is the lower junction where the Mist Trail and John Muir Trail split for the first time, effectively creating the Mist Loop Trail.
Here, hikers can either ascend the John Muir Trail to the top of Nevada Falls first by going right, but it is much more common to continue straight on the Mist Trail toward Vernal Falls, returning on the John Muir Trail at the end.
This is the direction in which this article is written.
Mist Trail vs. John Muir Trail
Whether to hike up the Mist Trail or John Muir Trail—especially when hiking Half Dome—is a fair debate, but I strongly feel that the Mist Trail is the better choice for hiking the full Mist–John Muir Loop Trail, Half Dome, and even the Diving Board.
I believe this because the Mist Trail, while steeper, is very direct and straight to the point, whereas the John Muir Trail is much longer, more out of the way, less fun, and the views aren’t as good.
That’s not to say I recommend against returning on the John Muir Trail, but when it comes to hiking up—especially when trying to get to Half Dome and the Diving Board as fast as possible—I highly recommend the Mist Trail, as it totals about 1.5 miles (2.4 km) from this point to the top of the loop, compared to 2.7 miles (4.3 km) on the John Muir Trail.
What is the Winter Route?
The winter route refers to a route that intentionally avoids both the Mist Trail from here to the top of Vernal Falls and the John Muir Trail between Clark Point and the Panorama Trail, while utilizing the connector in between.
This is because both routes can become extremely dangerous during the colder months of the year, as mist from Vernal Falls turns into ice on the steep sections by the waterfall, and water and rocks falling on the John Muir Trail between Clark Point and the Panorama Trail can make it particularly and unnecessarily dangerous.
Regarding my thoughts above, I chose to go straight on the Mist Trail toward Vernal Falls.

Mist Trail
This is where the Mist Trail begins—the steep, and soon-to-be-wet, sections up and around Vernal Falls.
This turn is where the Mist Trail will noticeably begin to get wetter and wetter until it reaches the uppermost sections closest to Vernal Falls.
Some hikers may prefer to carry trekking poles for the very steep, wet sections near Vernal Falls.
This first flat section is one of the better places to take photos on the hike up Vernal Falls, as it is conveniently protected from the worst of the mist.
Once through the rock tunnel, the Mist Trail enters the wettest part of the entire hike past Vernal Falls, which is why some visitors prefer to wear rain jackets for both the hike up and down.
After climbing to the top of the wettest section shown above, the Mist Trail becomes significantly drier around this flatter section, which is where I personally think the best places to take photos on the entire trail can be found!
Immediately past Vernal Falls, the Mist Trail continues up a very steep stretch, which essentially continues with no breaks until the top of Vernal Falls.
Yes, it’s really this steep!
Choosing the Mist Trail over the John Muir Trail will be a significantly steeper climb, but I truly think it’s worth the effort because of the beautiful sections below—and to cut out about 1.2 miles (1.9 km) to reach the uppermost part of the loop.
Just before the top of Vernal Falls, the Mist Trail traverses a very short but narrow section that can become a bit of a bottleneck as hikers squeeze past one another.
At the top of the narrow section, the Mist Trail opens up, with the path continuing to Nevada Falls on the right and the top of Vernal Falls straight ahead.
Top of Vernal Falls
The top of Vernal Falls is this panoramic viewpoint overlooking the 317-ft. (96.6 m) waterfall, which marks the most popular turnaround point on the Mist Trail after the Vernal Falls Bridge.
That said, the number of hikers continuing on the Mist Trail to Nevada Falls—about 1.3 miles (2.1 km) away—significantly drops from this point on.
To continue up the Mist Trail to the start of the Half Dome Trail, simply continue upstream and the trail will eventually narrow as it climbs its way up.
Just past Vernal Falls, there is another restroom with a third located at the very top of the loop.
Shortly past the restroom, the Mist Trail makes a hard right turn away from the Merced River.
Mist-John Muir Connector Junction (Clark Point Junction)
The next time the Mist Trail splits is when it comes to this short connector between the Mist Trail and the John Muir Trail, which is the winter route, as it avoids both the sections of each trail that are closed during off-season months.
That said, I personally don’t recommend following this connector at any point during the hike, because the fastest route to the top of the loop and the Half Dome Trail is by continuing straight.
All that to say, go straight (left) to continue on the Mist Trail to the top of Nevada Falls.
Shortly after the Clark Point junction, the Mist Trail crosses over the Merced River once again, where it begins to make its way toward the steepest sections, up the switchbacks to the top of Nevada Falls.
After the view of Nevada Falls from the bottom, the Mist Trail begins climbing through the trees, gaining roughly 700 ft. (213 m) to the uppermost part of the loop.
When the Mist Trail breaks out of the trees, the hike begins the steepest and typically hottest section of the entire climb!
Once again, I could not recommend hiking in a hooded sun shirt more!
In my opinion, the hot summer sun makes this ascent up Nevada Falls more difficult than the Mist Trail by Vernal Falls.
In total, there are 25 or 26 short, but steep, switchbacks to the top of Nevada Falls, depending on how you count.
This short straightaway is a nice break from the steep switchbacks prior to this point.
After the 'flatter' section, the few remaining switchbacks to the top of the loop and the Mist Trail begin.
Upper Mist-John Muir Junction
This uppermost junction is the very top of the Mist–John Muir Loop Trail, and it’s where the John Muir Trail continues to popular destinations such as Little Yosemite Valley, the Diving Board, and Half Dome.
That said, go left to begin the John Muir Trail (if you hadn’t at the lower junction) to continue hiking toward the start of the Half Dome Trail.
If you are curious about the rest of the John Muir side of the loop—across Nevada Falls and back to the beginning—all the details can be found in my separate post linked below.
Read My Separate Post: Mist Trail (Vernal & Nevada Falls)
John Muir Trail
After the steep hike up the Mist Trail, the John Muir section of the hike to Little Yosemite Valley becomes much less steep compared to the sections to get to this point.
From the top of the Mist Loop Trail, the John Muir Trail continues for about 0.8 miles (1.3 km), until it reaches the split for the Diving Board Trail.
It’s always cool to run into Aspen trees throughout the Mountain West!
John Muir-Merced Lake Junction
The first time the John Muir Trail splits before the Half Dome Trail is at this junction, for the route that leads to Merced Lake.
Here, go left to continue hiking toward Little Yosemite Valley and Half Dome beyond.
John Muir-Diving Board Junction
After less than 0.1 miles (0.2 km) past the Merced Lake junction, the John Muir Trail splits, with this inconspicuous path to the left—the beginning of the Diving Board Trail.
However, the Diving Board is a much more difficult and dangerous hike than the hike up The Cables on Half Dome, which you can learn more about in my separate post linked below.
In any case, go straight here to continue toward Little Yosemite Valley, about 0.6 miles (1.0 km) away.
Read My Separate Post: Diving Board Trail
Little Yosemite Valley
This is where the John Muir Trail passes by a few different side trails on the right-hand side that lead to different parts of the Little Yosemite Valley backcountry campground.
This is exactly why I mentioned at the beginning that spending just one night at Little Yosemite Valley is really the life hack to securing a Half Dome permit for The Cables.
At any rate, go left here—and at the next few side trails—to continue on the John Muir Trail toward Half Dome.
John Muir-Little Yosemite Ranger Station Junction
At this next split, go left once again, and the start of the ascent up to the base of the Subdome will begin just a short distance ahead.
This is where the John Muir Trail leaves Little Yosemite Valley, beginning the climb to the start of the Half Dome Trail, about 1.3 miles (2.1 km) ahead.
This stretch between Little Yosemite Valley and the start of the Half Dome Trail is what I found to be the longest, most tedious section of the entire hike—especially in the dark!
From the start of the ascent out of Little Yosemite Valley to the Half Dome Trail junction, the John Muir Trail climbs about 850 ft. (259 m), which remains fairly constant throughout this section of the hike.
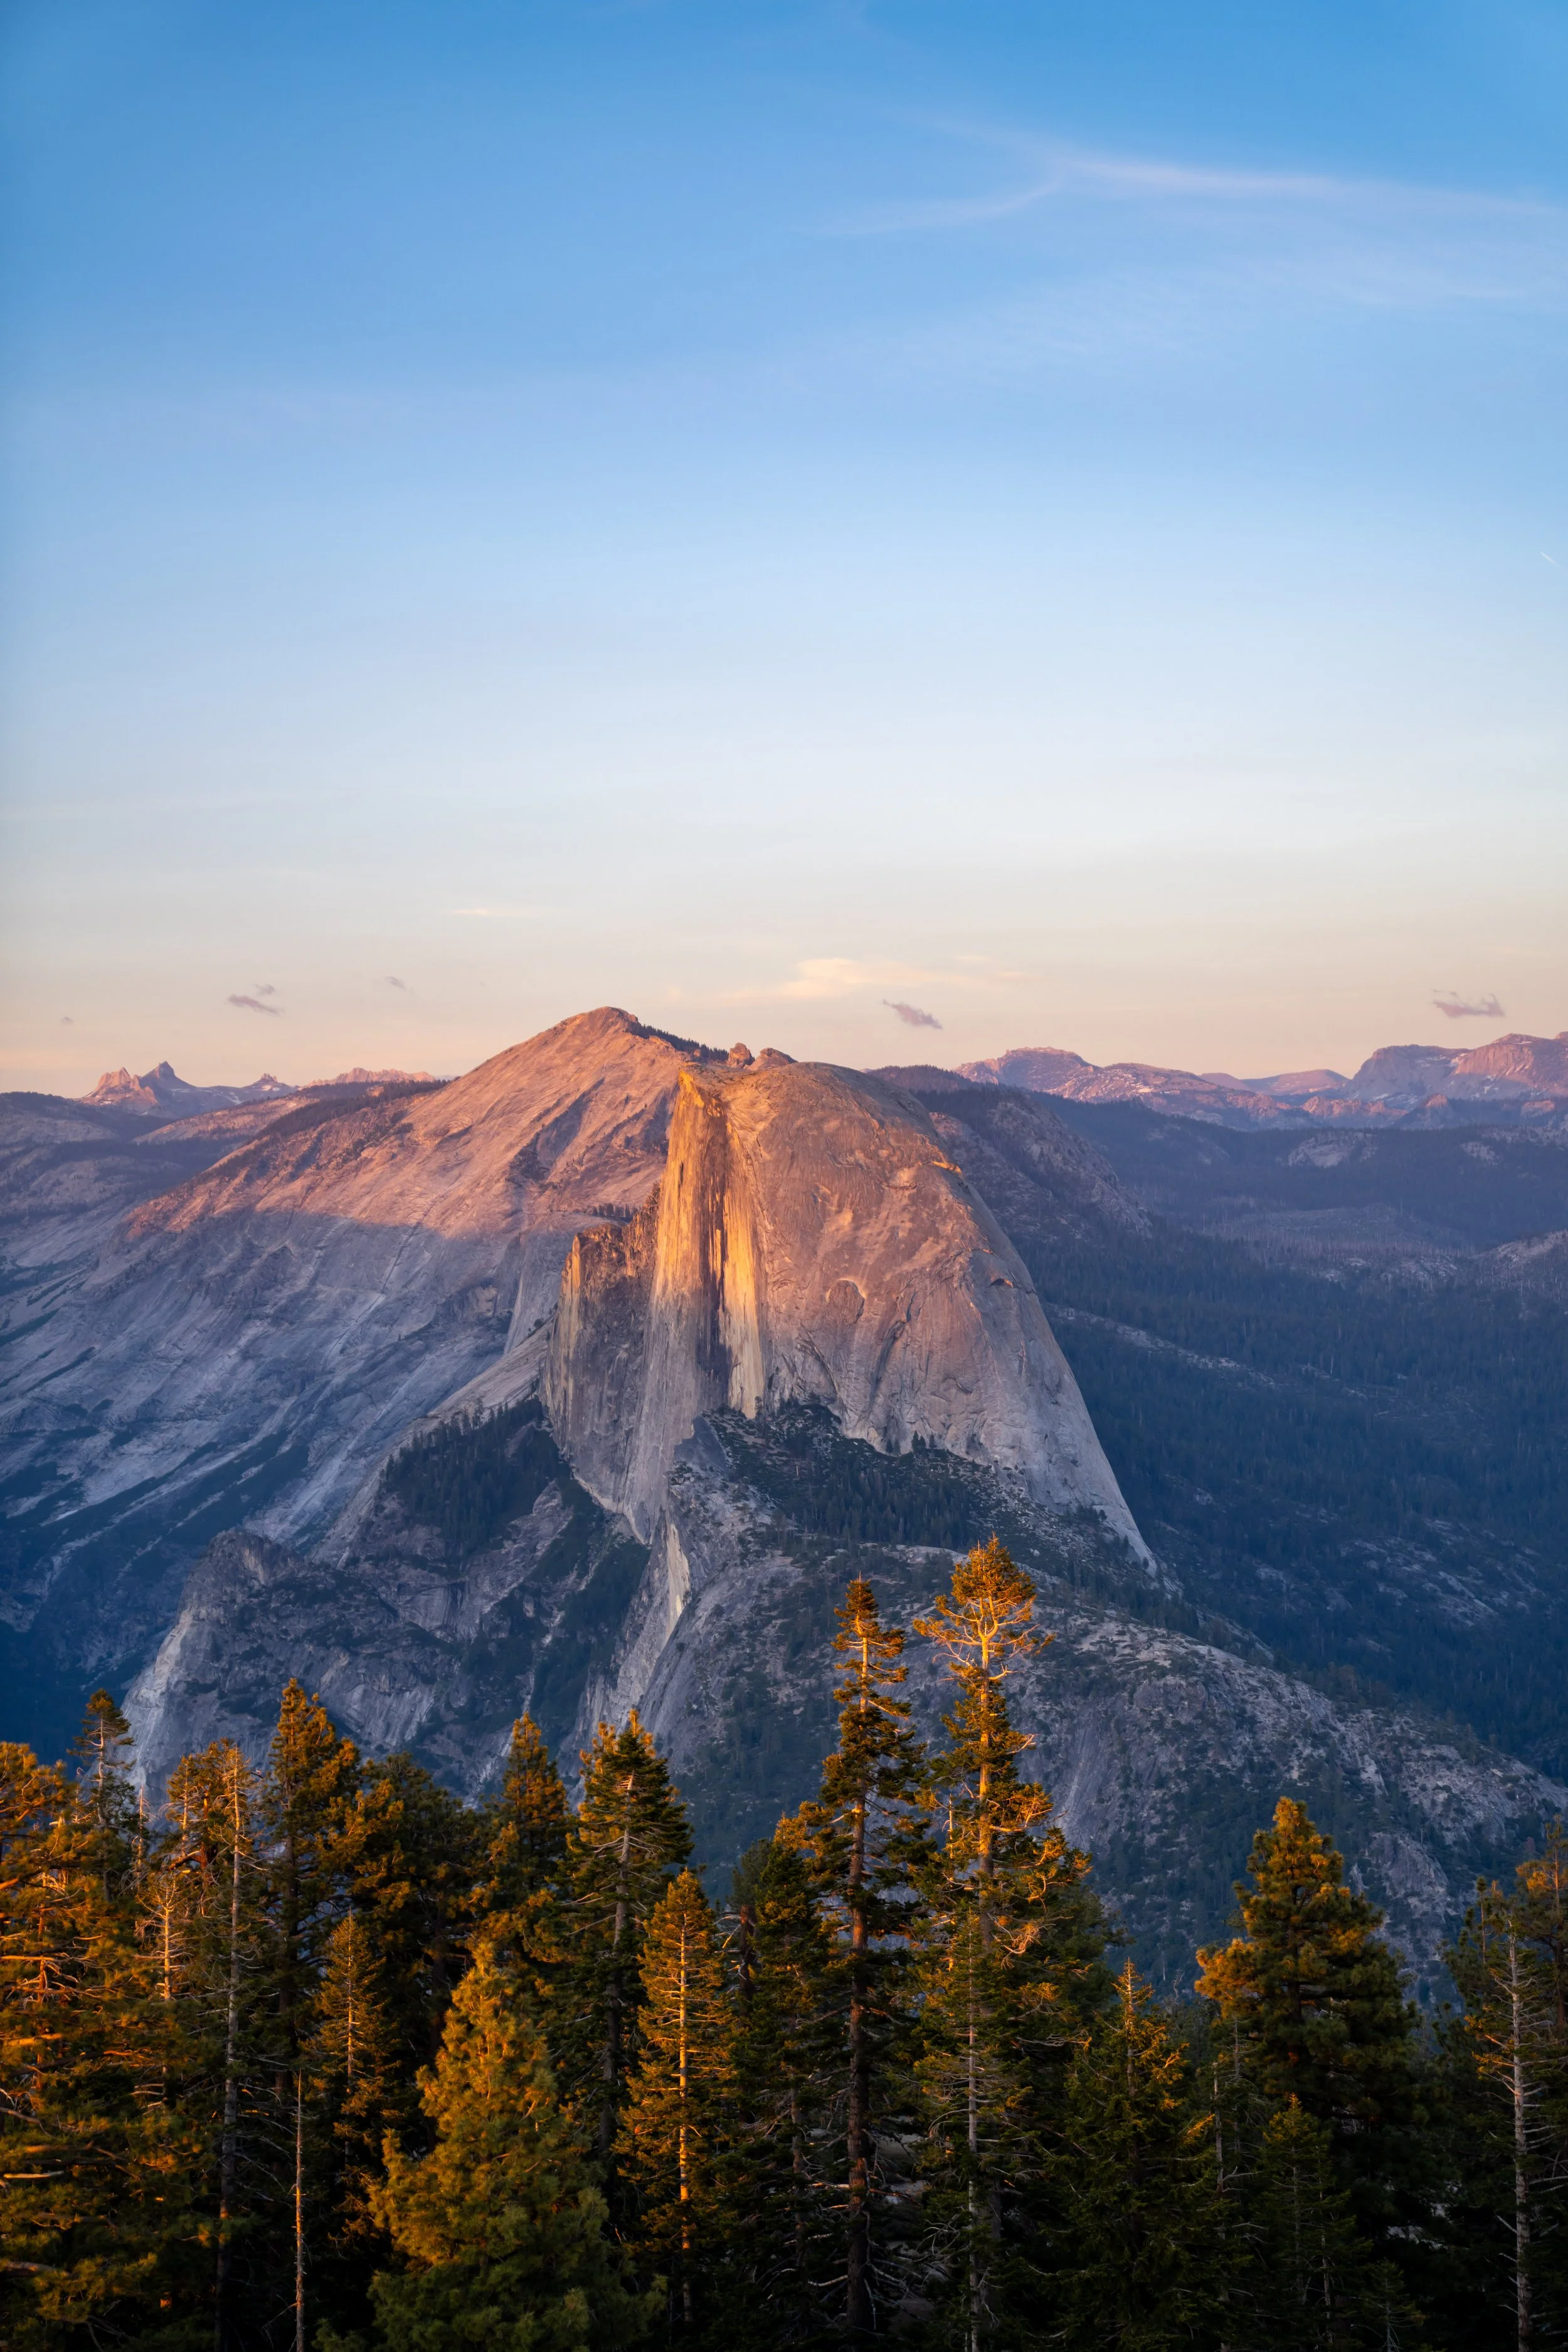
This is where Half Dome and the Subdome start to become visible for the first time!
While hiking poles will certainly not be useful for The Cables, some hikers may want them for the steep hike back down, as the entire hike—apart from the short stretch around the Diving Board junction and Little Yosemite Valley—seems to be climbing or descending.
Half Dome-John Muir (Clouds Rest) Junction
After the 1.3-mile (2.1 km) ascent from Little Yosemite Valley, the true Half Dome Trail finally begins!
That said, go left to continue hiking up toward The Cables, as the route to the right is where the John Muir Trail continues into the backcountry. This route is also commonly utilized by those interested in combining Clouds Rest with Half Dome.
However, this isn’t the way I recommend hiking to Clouds Rest, as I think it’s easier to make the drive up to the Sunrise Lakes Trailhead, since the hike from that direction isn’t overly challenging—just long.
To learn more, you can check out the full details in my separate post about Clouds Rest, linked below.
Read My Separate Post: Clouds Rest Trail
Half Dome Trail
From the beginning of the Half Dome Trail to the base of the Subdome, the trail continues for another 1.5 miles (2.4 km), climbing roughly 900 ft. (274 m), with about 2.0 miles (3.2 km) remaining to the summit overall.
On the hike up in the dark, this final stretch through the forest felt the longest, as I was initially surprised by how long the hike up Half Dome remains in the trees.
This turn is where the Half Dome Trail begins heading to the west to start working its way straight toward the Subdome and Half Dome beyond.
As the Half Dome Trail curves around the north side of the hill below the Subdome, it’s a nice sign that the hike is nearing tree line and the beginning of the Subdome.
Reaching these open granite faces is such a great feeling after spending so much time in the trees following Little Yosemite Valley!
Subdome [Permits Required]
This is the base of the Subdome, and from this point on, all hikers are required to carry a valid permit and a valid ID matching the name on the permit before continuing further.
For those curious, Little Yosemite Valley is often staffed by backcountry rangers who make the short day hike up to the Subdome to check hikers’ permits. I saw this myself.
This hand-drawn sign is a fairly accurate description for most hikers, as the Subdome and The Cables are very steep!
However, when I was hiking up in the dark, I did not stop and made it from this point to the summit in about 25 minutes.
I say that to say, the final 0.5 miles (0.8 km) can really vary from person to person.
As previously mentioned, the Subdome is very steep, and if there happens to be snow in the early season, micro-spikes may be necessary.
I discuss this in more detail below, but if the weather is looking questionable on your hike up the Subdome, turn around here!
The worst thing would be to climb above the trees and be the tallest object around if there is lightning overhead.
When the steps stop, simply continuing walking straight toward the top of the Subdome.
If you arrive at the top of the Subdome and the weather isn’t looking good, do not continue your hike up The Cables! In fact, the top of the Subdome is already too high and exposed if the conditions are poor.
I say this because The Cables and the summit of Half Dome are quite literally the worst places you want to be if lightning is overhead, which is why I always recommend checking Mountain Forecast before this or any climb above tree line.
Believe me, I’ve been very high up in the worst of conditions throughout the U.S., and it’s not a risk worth taking. Instead, cancel your permits the night before for a refund if you keep checking Mountain Forecast and the weather doesn’t seem to be improving.
Mountain Forecast: Half Dome
The Cables
The Cables are the final 0.2 miles (0.3 km) of the Half Dome Trail, and depending on who you ask, they may either say The Cables were their favorite part or the most dreaded part of the hike.
In fact, I even watched one hiker get to the top of the Subdome, look at his friend, and say, 'No way. F#@k that!'
All I can say is that I really enjoyed the steep hike up The Cables, but I think this photo from the base is very deceptive. The Cables are much steeper than this angle makes them initially appear, which was something that caught me by surprise when first hiking up in the dark for sunrise.
This isn’t some trick with the camera.
The Cables really are this steep!
It is nice that the National Park Service places these 2x4s across the stanchions, as they certainly are useful when you’re looking for somewhere to place your weight while waiting for other hikers to pass.
Other than The Cables being the steepest part of the trail, the one thing no one really mentions before hiking up is how worn the granite is along the trail.
There’s a reason the National Park Service says never to hike up The Cables if it has been raining, and it’s because there isn’t a lot of grip—even with good shoes—when the trail is dry.
This is where The Cables begin to level out, as the trail nears the summit of Half Dome!
At the top of The Cables, go right, and the summit will be just a short distance ahead!
Half Dome
This is the summit of Half Dome, which, according to the USGS, stands at 8,846 ft. (2,696 m) and roughly 4,800 ft. (1,463 m) above the Valley floor!
This is what it looked like to be first on the summit at roughly 4:30 a.m., about an hour before sunrise!
That said, this mid-June hike wasn’t too cold to wait for the sun, and the high clouds I got lucky to have made the sunrise so much better than it would have been otherwise!
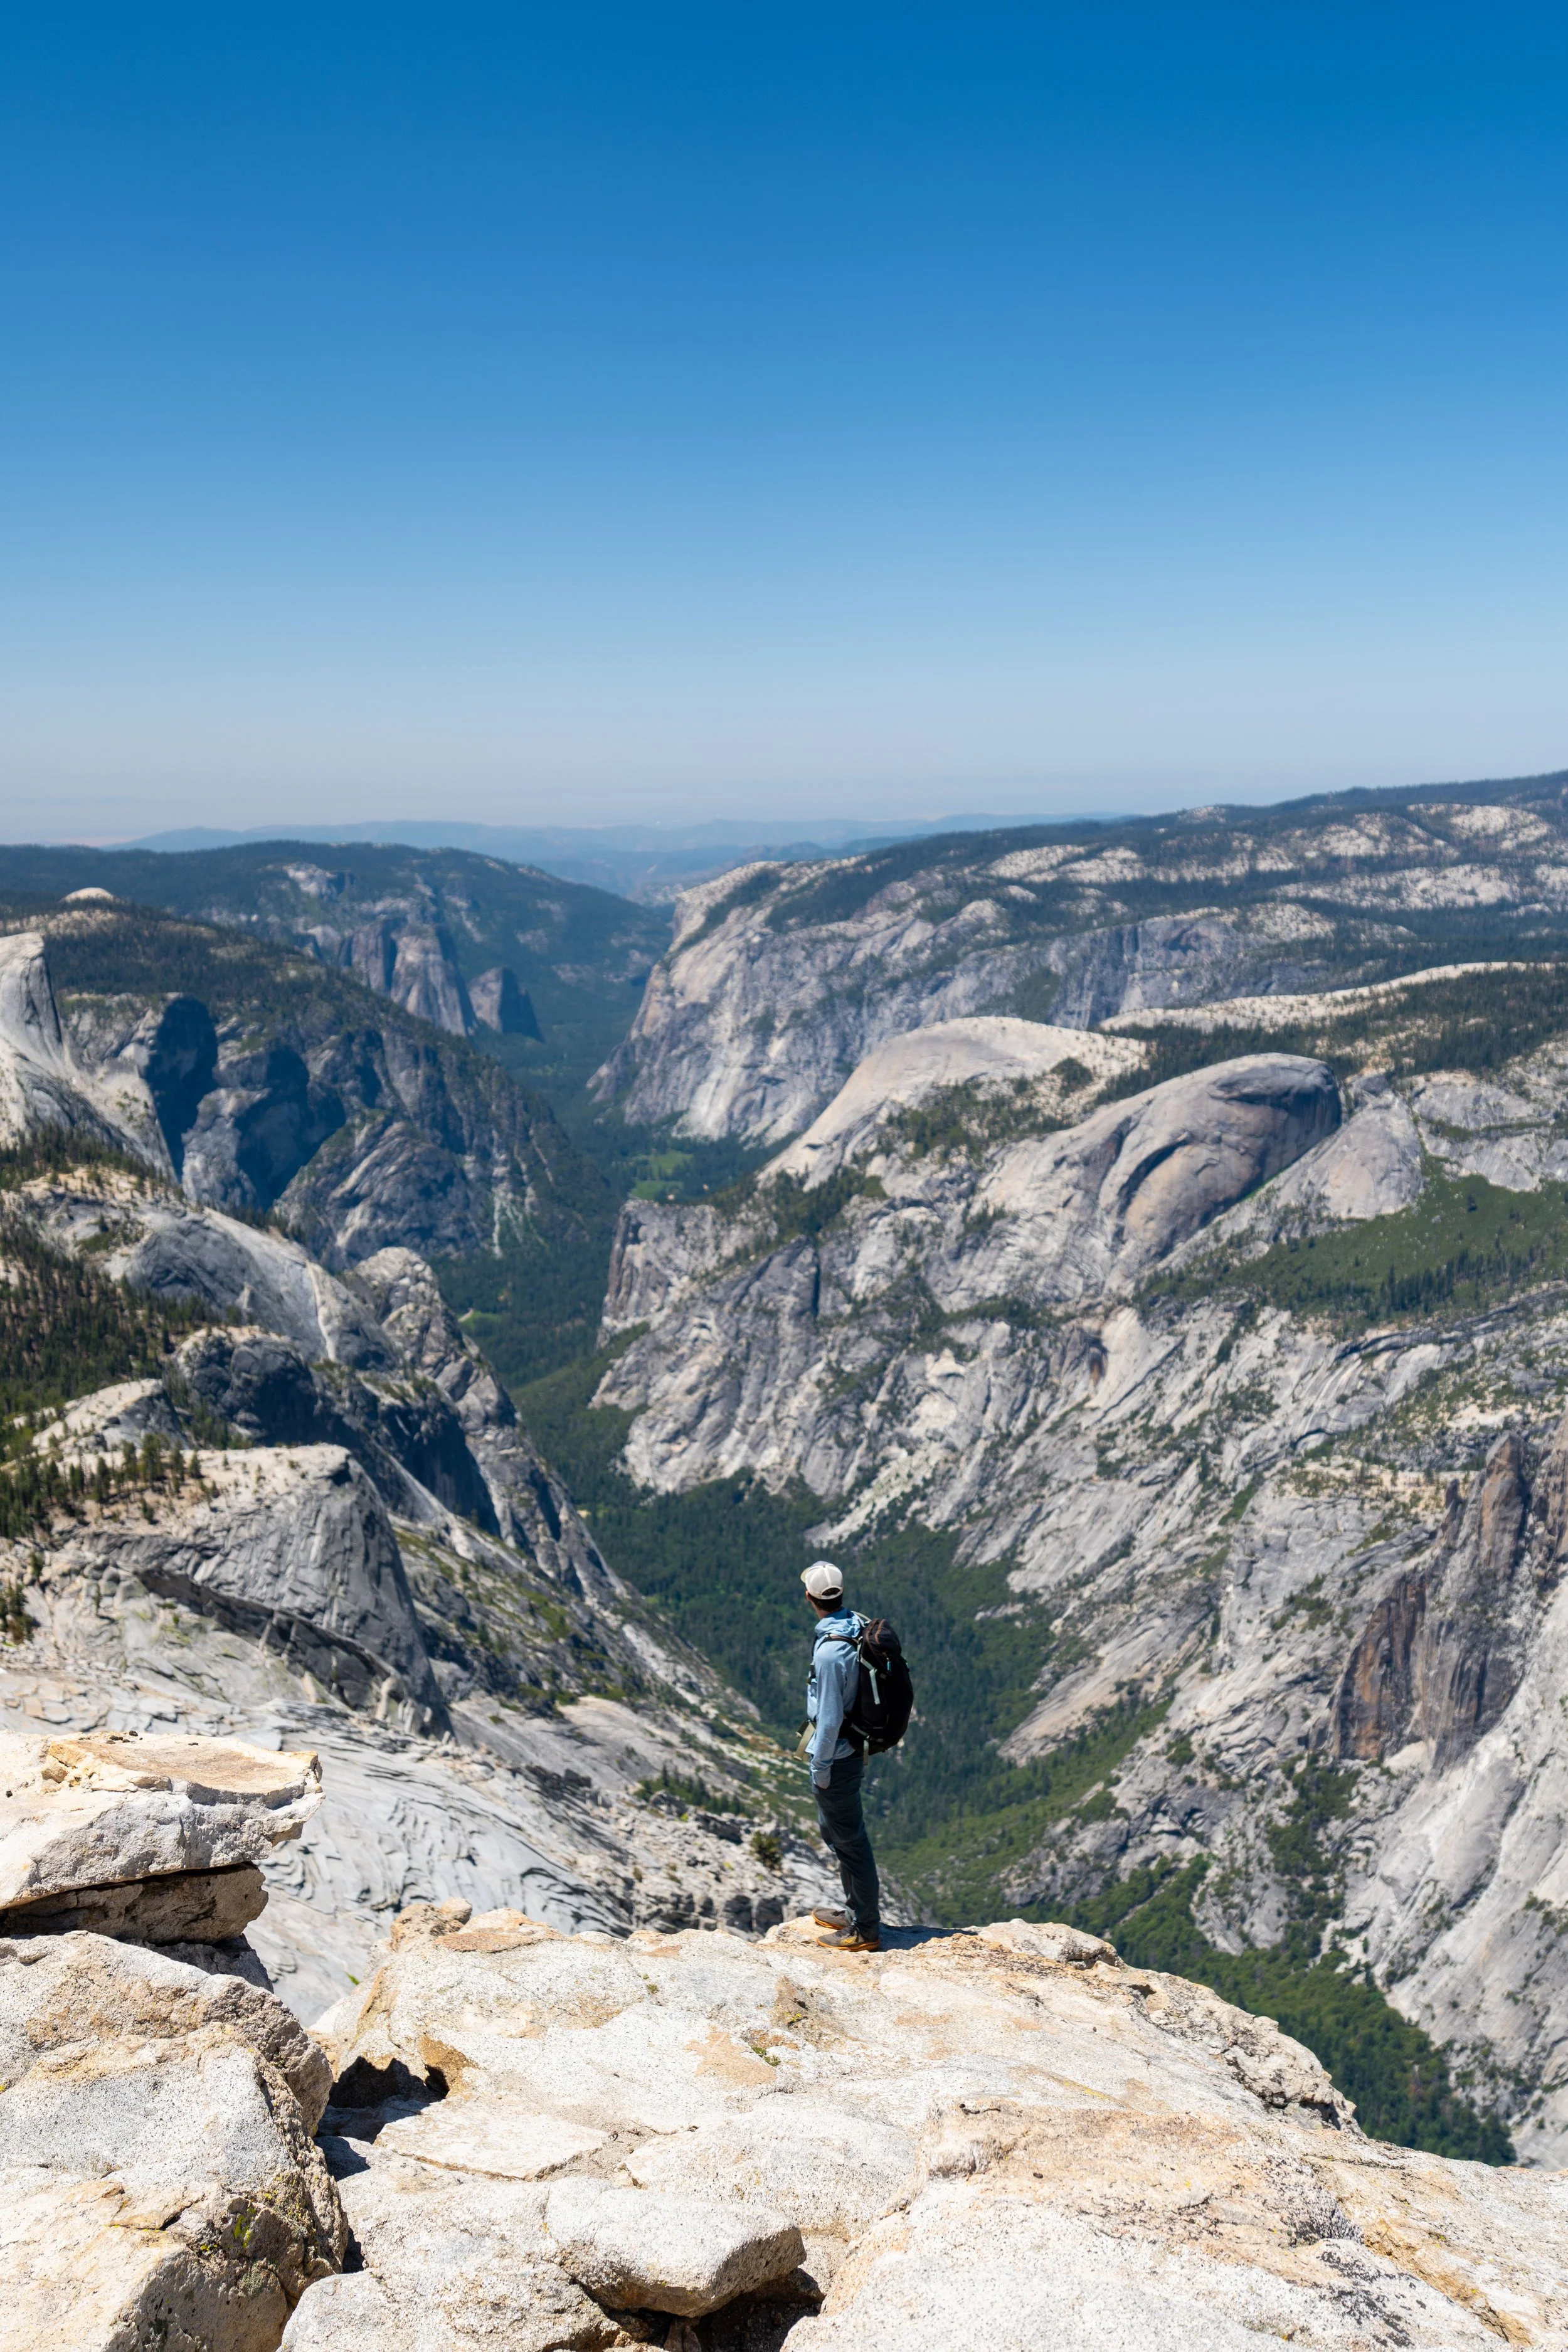
Other than the true summit, hikers can explore the south summit, as the whole Half Dome summit area feels like a football field—similar to the top of Devils Tower in Wyoming.