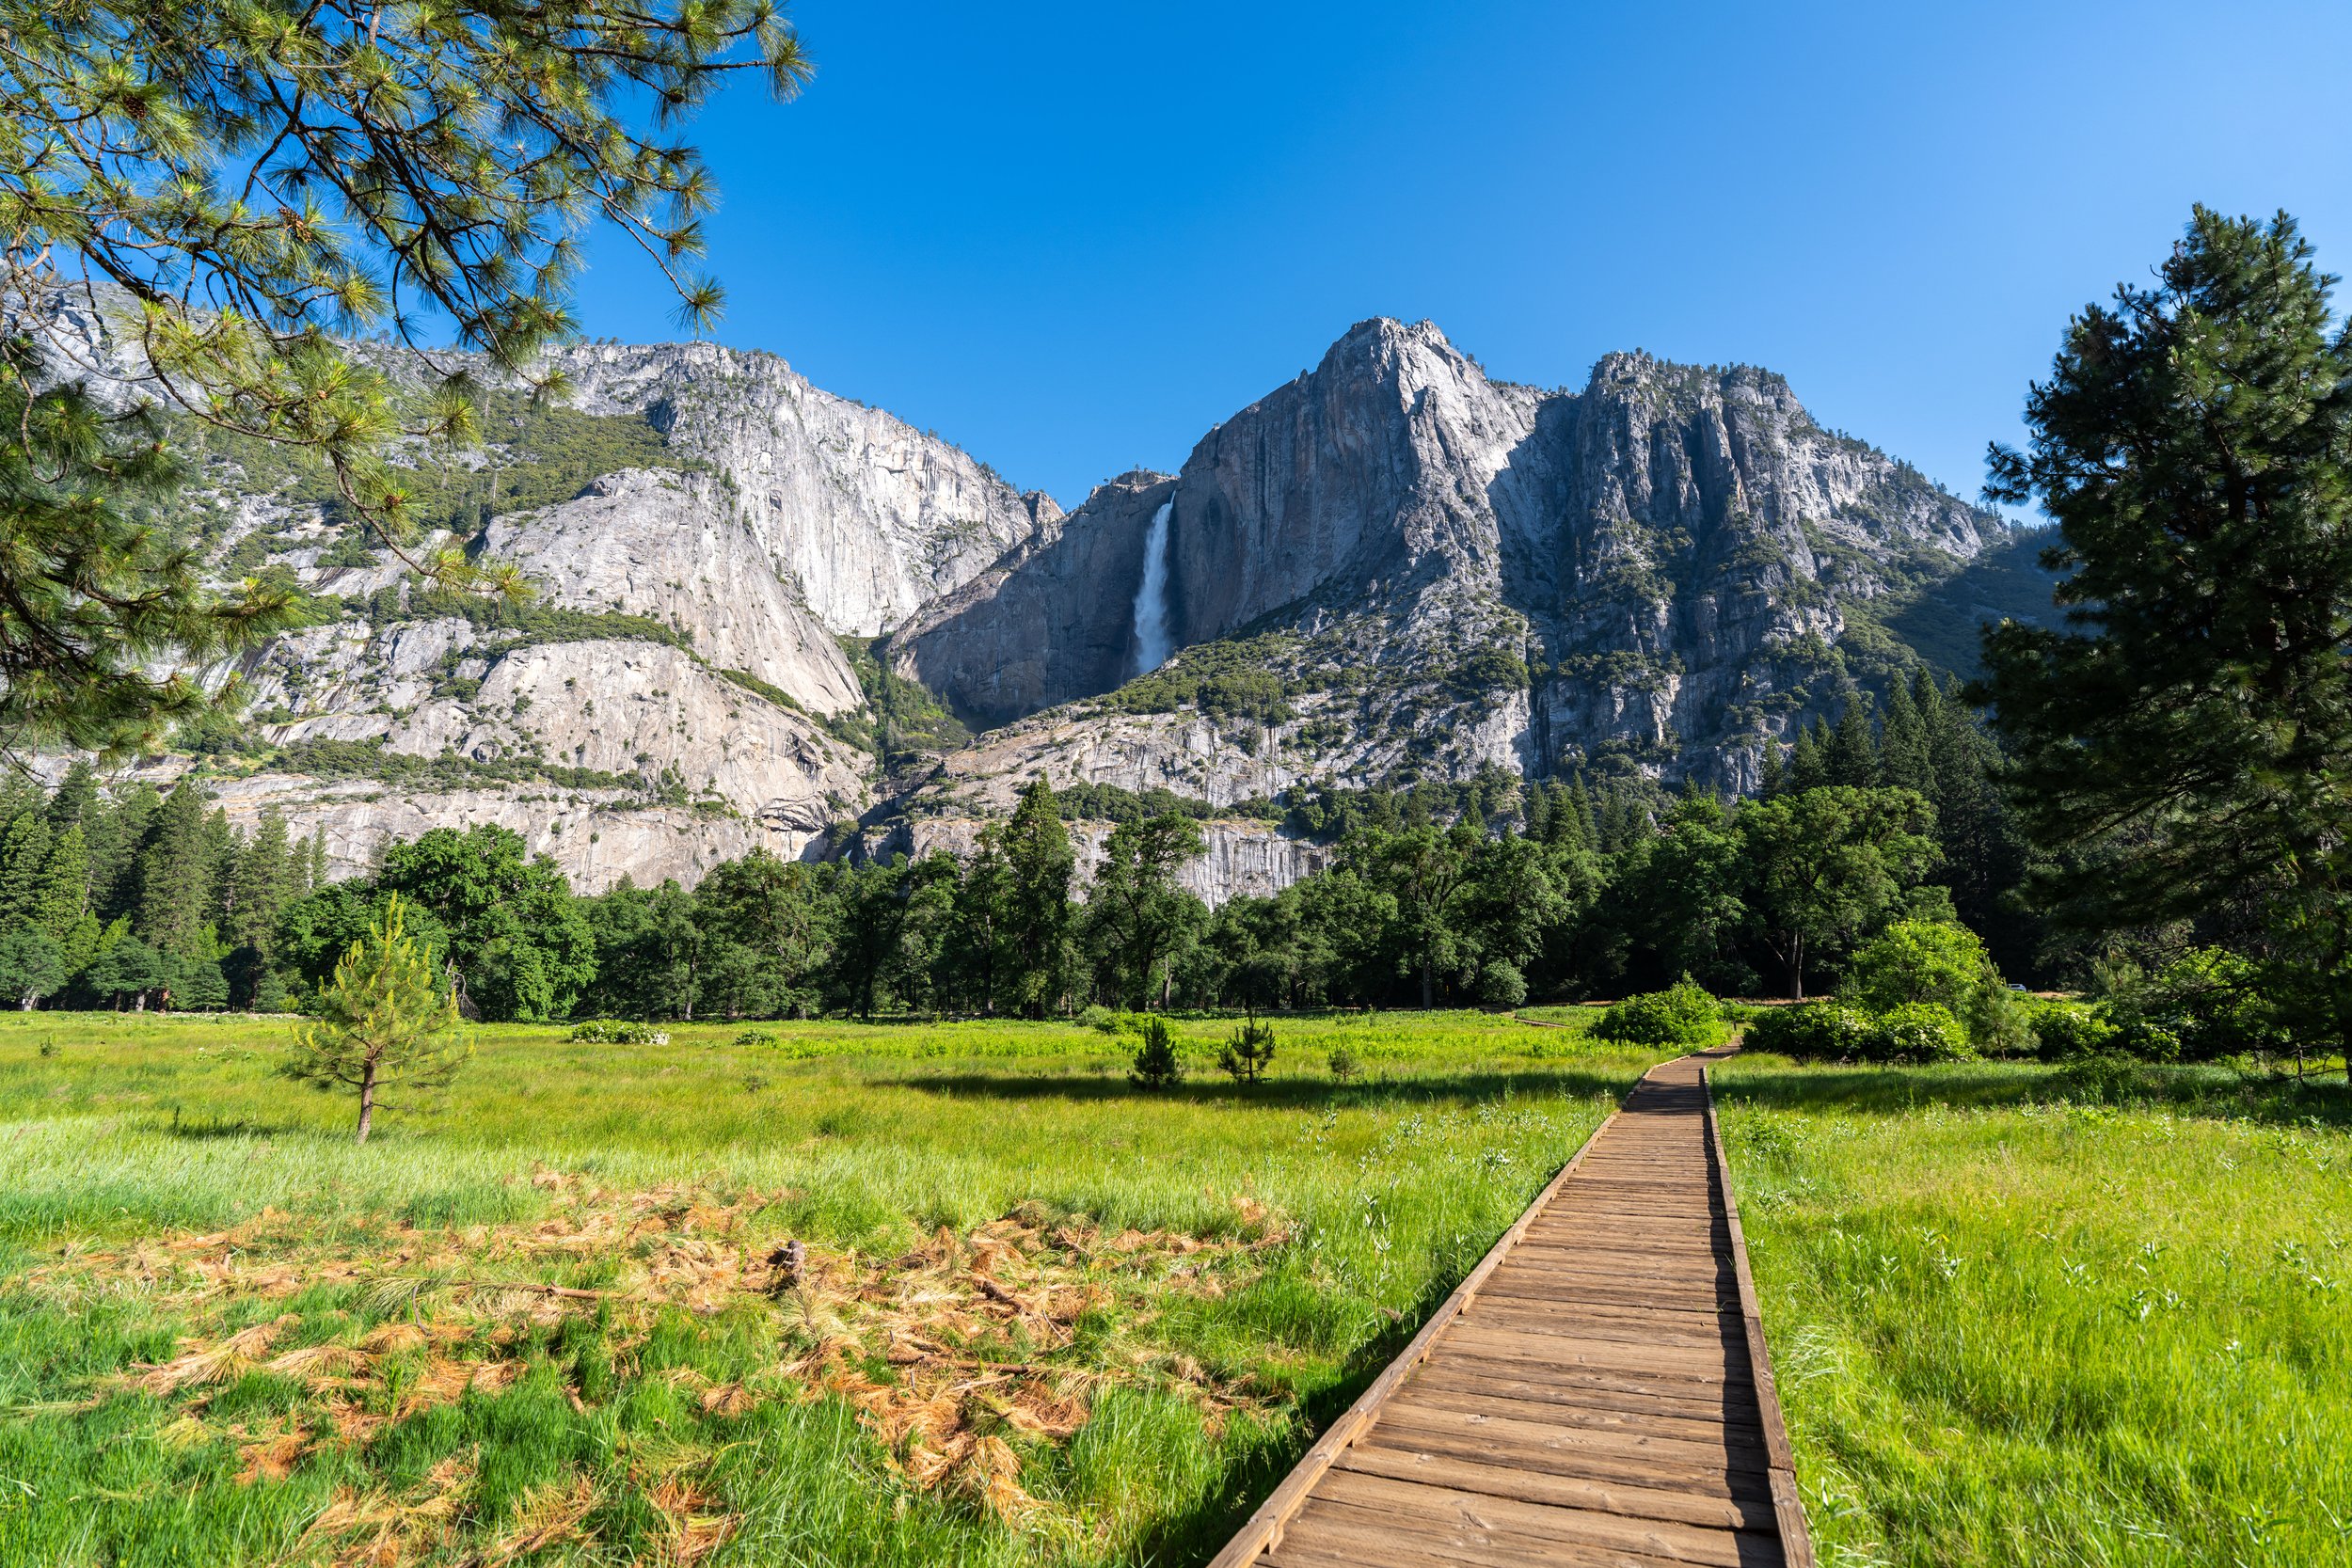
Hiking the Bridalveil Falls Trail in Yosemite National Park
Distance (Main Trail): 0.6 miles / 1.0 km
Distance (East Trail): 0.8 miles / 1.3 km
The Bridalveil Falls Trail in Yosemite National Park is a short and easy day hike at the beginning of Yosemite Valley that leads to the iconic, picturesque waterfall visible from Tunnel View!
For this reason, Bridalveil Falls is one of the most popular day hikes in Yosemite Valley, because it’s such a quick and easily accessible trail—not to mention it’s the very first place to stop when entering the Valley from either direction.
That is why I highly recommend visiting Bridalveil Falls either early or late in the day, but if you care most about getting the best photos, visit late in the day. I say this because the steep cliff sides of Yosemite Valley block the sun for much of the morning, making the evening light ideal for great photos at Bridalveil Falls!
What Time of Year is Bridalveil Falls Dry?
Bridalveil Falls does not flow year-round.
In fact, it—along with other waterfalls in Yosemite Valley—is dependent on snowmelt, with November - July being the best months to visit and August - October being the driest times of the year.
Bridalveil Falls Trailhead Parking
Parking for the Bridalveil Falls Trail is located in one of two places off Southside Drive.
First, there is the main parking area at the West Bridalveil Falls Trailhead, but if that is full, additional parking can be found just down the road where the Yosemite Valley Loop Trail crosses Southside Drive.
Before arriving, know that both parking areas can be incredibly difficult places to find a spot, as Bridalveil Falls is one of the first things to do when entering Yosemite Valley from either Mariposa or when coming down from Tunnel View.
This is why I recommend arriving first thing in the morning, which is something I say for most adventures in and around Yosemite Valley.
Google Maps Directions: West Bridalveil Falls Trailhead / East Bridalveil Falls Trailhead
Hiking Checklist - Yosemite
Here is a complete list of must-have things that you will want for any hike in Yosemite National Park.
That said, bear spray is purposefully excluded from this list because, while the Sierra Nevadas are home to a large Black Bear population, bear spray is not allowed in Yosemite National Park.
Hiking the Bridalveil Falls Trail
The Bridalveil Falls Trail can be hiked from either the east or the west, which, in my opinion, should depend entirely on where it’s easiest to find parking.
That said, the first route shown below is the main Bridalveil Falls Trail from the west. However, if you’d prefer to see the trail from the other direction first, click the link below.
To skip ahead to the East Bridalveil Falls Trail, click here.
The main Bridalveil Falls Trail follows an entirely paved path, along with a short boardwalk, all the way to the waterfall—about 0.3 miles (0.5 km) each way.
There isn’t much in the way of elevation gain on the Bridalveil Falls Trail, which isn’t something often said about most day hikes that begin in Yosemite Valley.
On the far side of the boardwalk, there’s the option to either go right to see Bridalveil Falls from the first viewpoint shown below, or go straight to continue toward the base of the waterfall.
This is the first Bridalveil Falls viewpoint, but in my opinion, there are much better, unique angles of Bridalveil Falls throughout the short trail, which can be found by simply looking toward the waterfall as you walk the 0.6-mile (1.0 km) loop.
Bridalveil Falls-Upper Historic Carriage Road Junction
After the viewpoint, go right to continue up to Bridalveil Falls, just a short distance ahead.
Just before the waterfall, the Bridalveil Falls Trail gets a little steeper, but even then there is still a paved path that leads up to the viewpoint, making Bridalveil Falls one of the most accessible day hikes in Yosemite National Park!
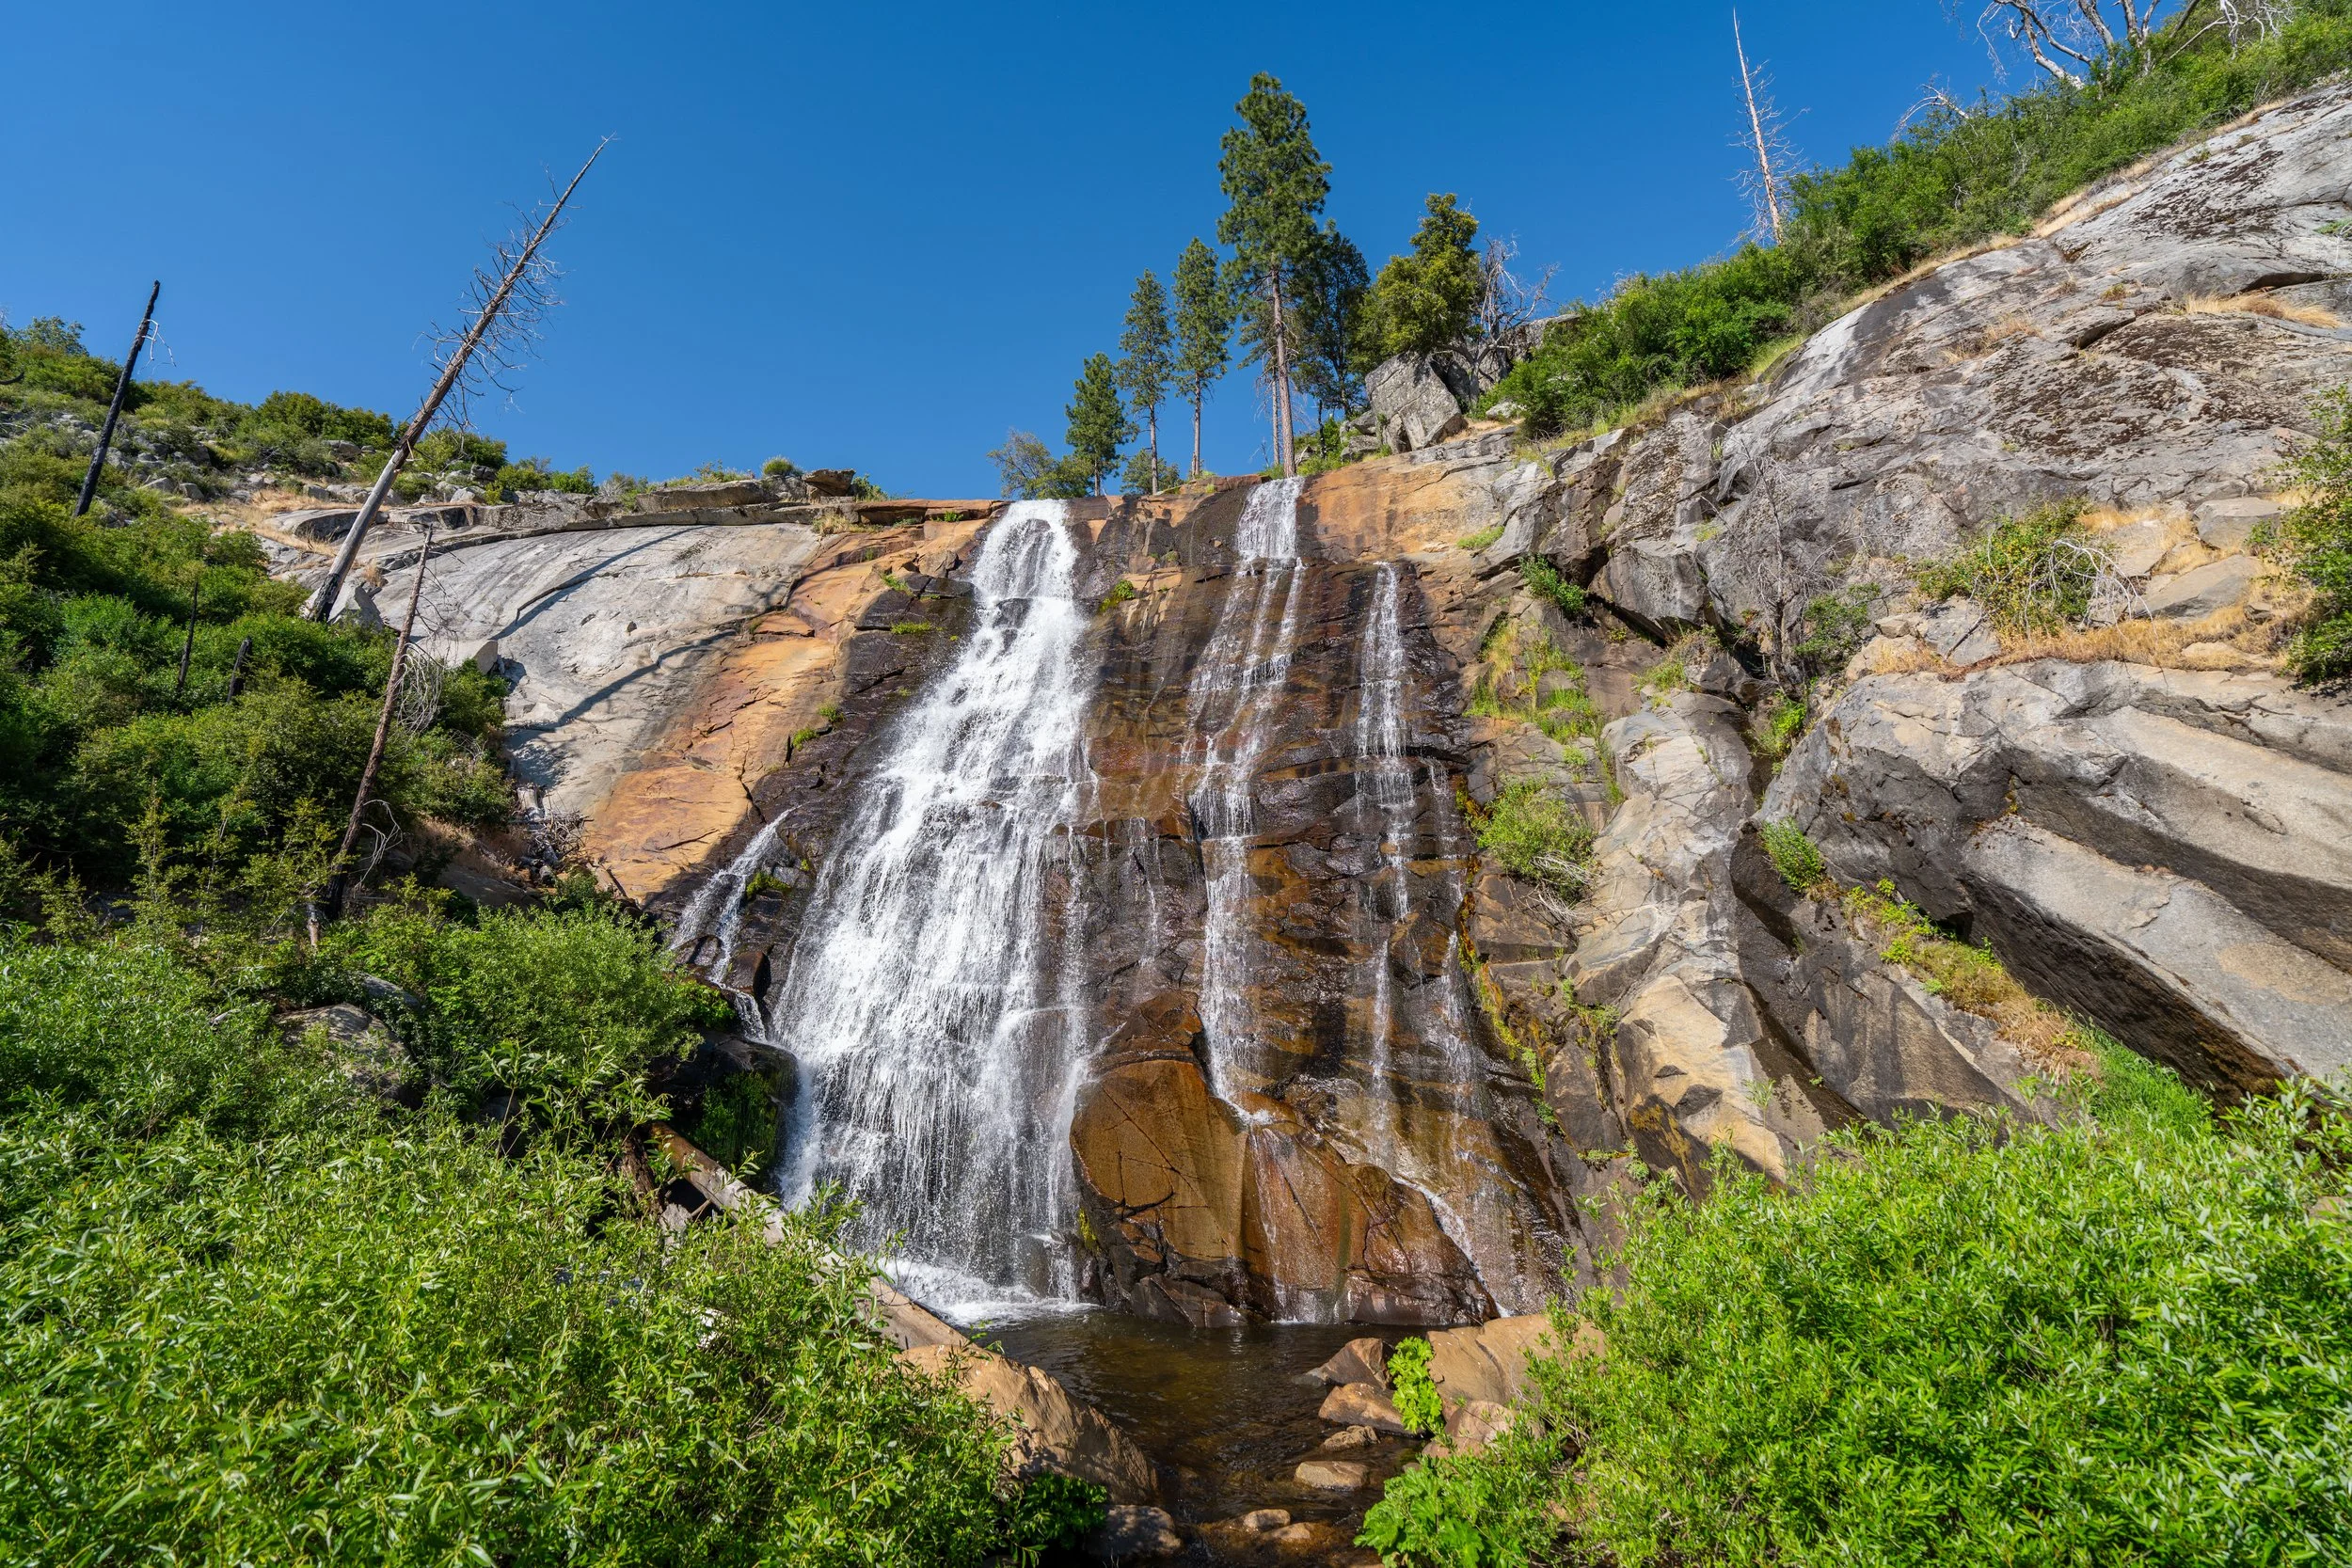
Bridalveil Falls
Bridalveil Falls is a single-drop waterfall measuring 620 ft. (189 m), unlike Yosemite Falls, which consists of Upper Yosemite Falls, Lower Yosemite Falls, and the middle cascades.
Bridalveil Falls-Historic Carriage Road Junction
Once back at the junction near the first viewpoint, hikers have the option to either go left to return to the main parking area on the same trail, or go right to make a loop of the Bridalveil Falls Trail on the Historic Carriage Road.
I chose to go right.
This is exactly what I meant about there being different, unique and often better angles of Bridalveil Falls than the main viewpoints.
East Bridalveil Falls-Lower Historic Carriage Road Junction
Once at the Historic Carriage Road, go left to return to the main trailhead, as the path to the right is simply the East Bridalveil Falls Trail from the other direction, as well as the route to the Yosemite Valley Loop Trail.
East Bridalveil Falls Trail
The East Bridalveil Falls Trail is not more or less popular or more or less difficult than the main trail, and, as previously mentioned, I truly believe picking one over the other should come down to wherever it's easiest to find parking.
In any case, the East Bridalveil Falls Trail begins on a flat 0.1-mile (0.2 km) path that leads toward both the Historic Carriage Road and the Yosemite Valley Loop Trail just ahead.
Bridalveil Falls-Yosemite Valley Loop Junction
This is where the Yosemite Valley Loop Trail branches away from the East Bridalveil Falls Trail.
Here, go right to begin the Historic Carriage Road toward Bridalveil Falls.
Read My Separate Post: Yosemite Valley Loop Trail
East Bridalveil Falls-Lower Historic Carriage Road Junction
The next time the trail splits is when the East Bridalveil Falls Trail reaches the path that leads toward the waterfall, which is the same path used to create a loop out of the main Bridalveil Falls Trail shown above.
That said, go left here to continue hiking toward Bridalveil Falls.
This split on the path up is nothing more than a shortcut to the first viewpoint, before the actual waterfall.
Bridalveil Falls-Upper Historic Carriage Road Junction
The final split on the Bridalveil Falls Trail is where it reaches the junction that leads directly to the base of the falls.
This is the same split shown earlier in this article, which you can return to using the link below.
To skip back to this same junction shown previously, click here.