Hiking the Emerald Pools Trail in Zion National Park
Distance: 2.4 miles / 3.9 km
The Emerald Pools Trail in Zion National Park is a beautiful and unique desert oasis in the middle of Zion Canyon that features three distinct pools—sometimes with waterfalls—known as the Lower, Middle, and Upper Emerald Pools!
That said, the Emerald Pools Trail is really a loop trail, though the vast majority of those who set out on the hike do not complete the full loop.
This is because what often seems like an out-of-the-way trail past the Middle Emerald Pool is ignored by many, and instead, most visitors opt to return the same way they came up. However, I recommend against this in favor of completing the full loop, as the full Emerald Pools Trail, as outlined in this article, is a much quieter, easier, and more relaxing hike than simply treating it as an out-and-back adventure!
Do the Waterfalls at the Emerald Pools Flow Year-Round?
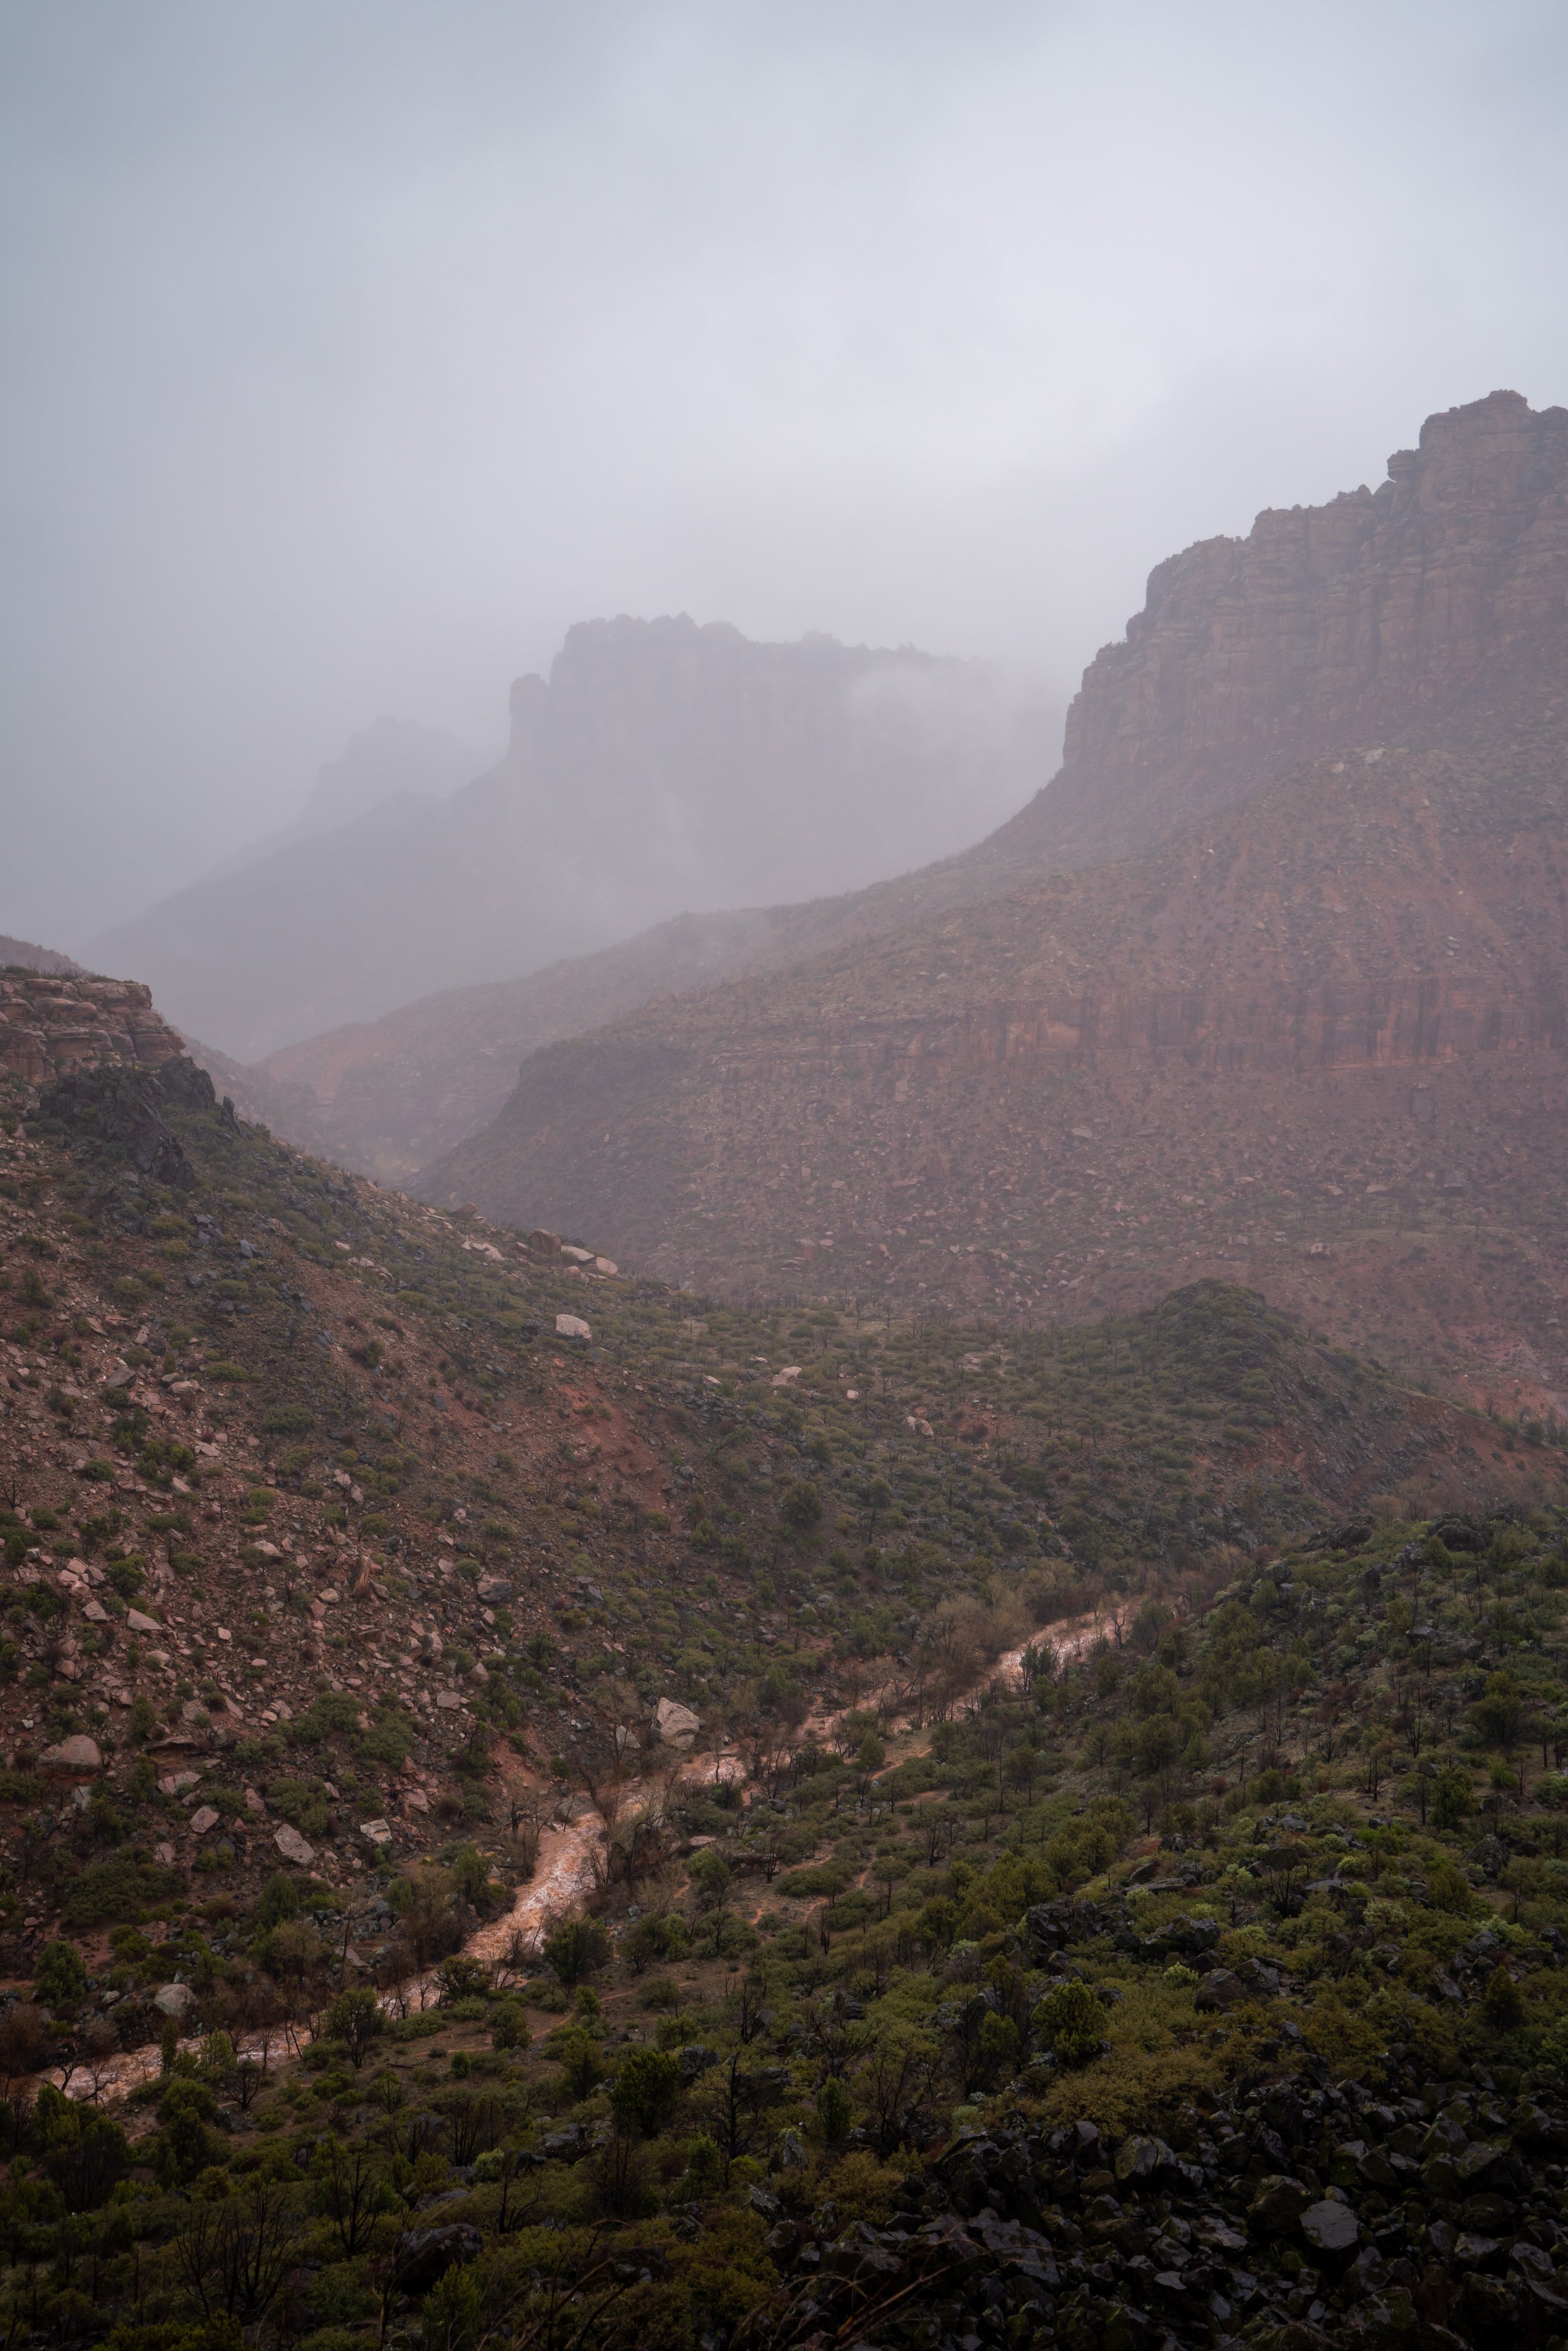
No. The waterfalls at the Emerald Pools are dependent on either snowmelt or heavy rain, which is why the best time to hike the Emerald Pools Trail and see the waterfalls is during the spring or after a heavy rainstorm.
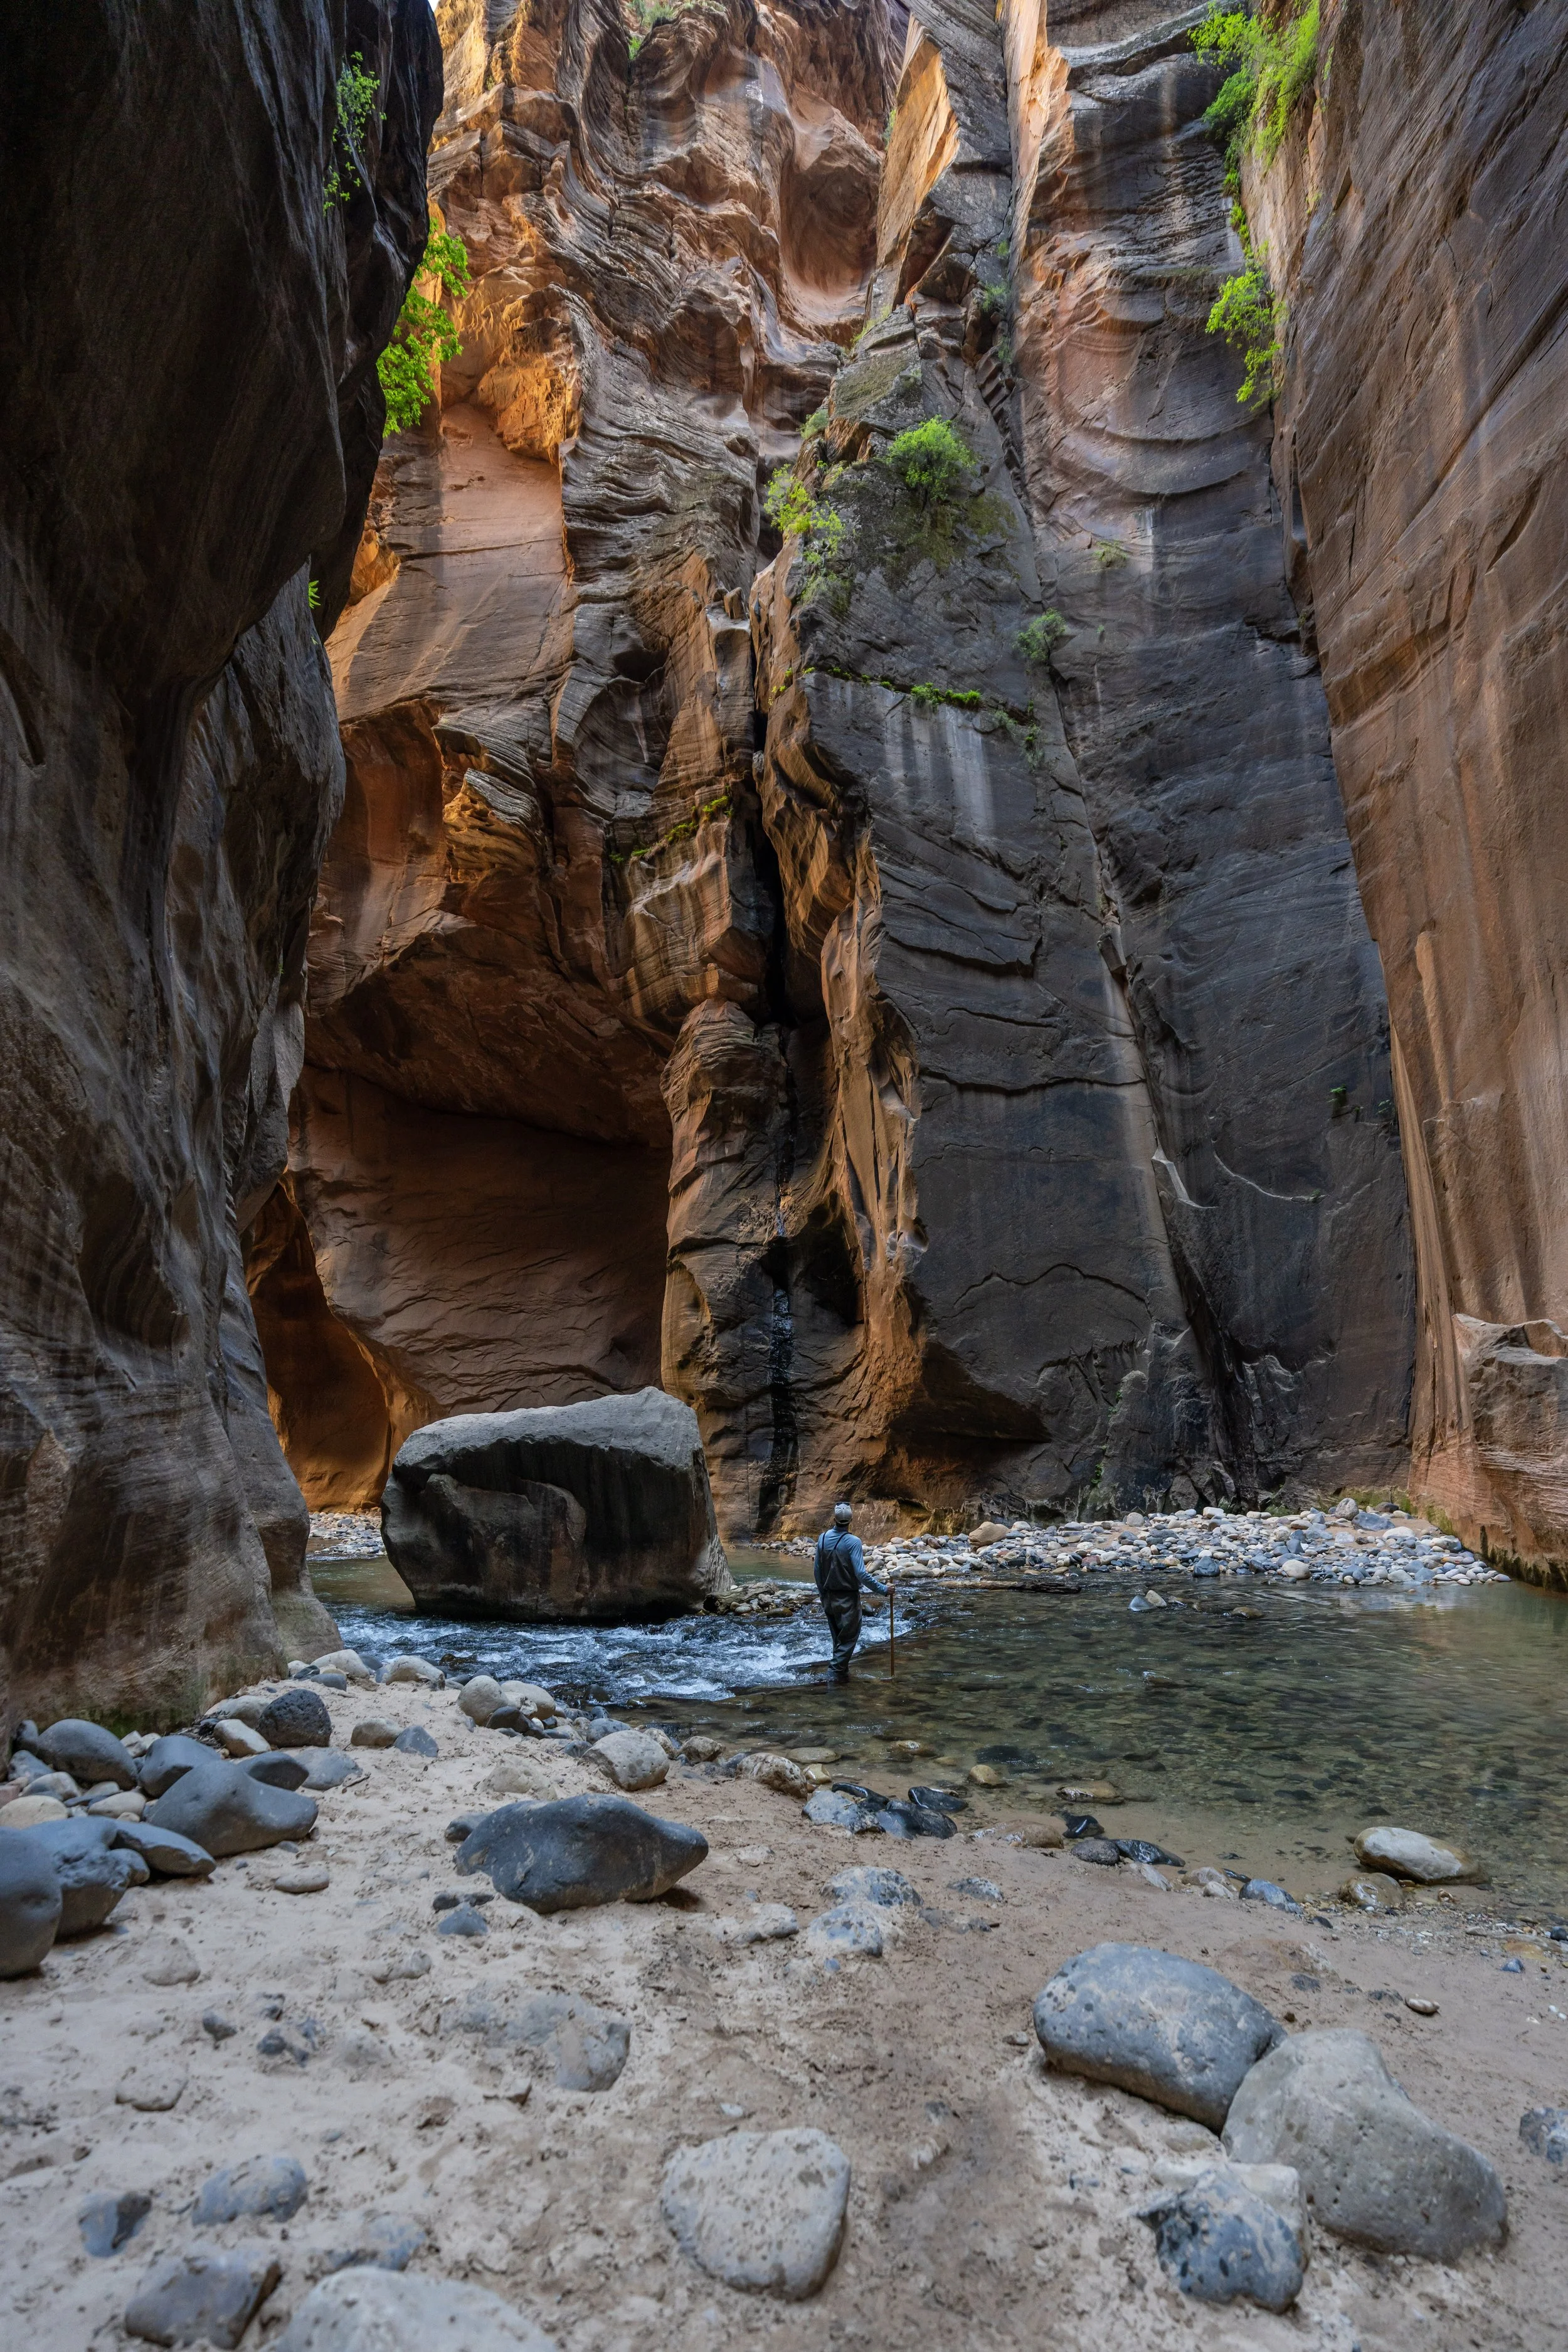
However, this is also what makes Zion National Park one of the best year-round destinations, because when certain things, like Kolob Terrace Road and The Narrows, are closed because of snow and snowmelt, respectively, other things, like the waterfalls at the Emerald Pools and Weeping Rock, are best enjoyed!
Emerald Pools Trailhead Parking
When the Zion Canyon Shuttle is operating, parking for any trail off Zion Canyon Scenic Drive is only possible with a valid parking pass. This is because the 6.2-mile (10.0 km) road up Zion Canyon has very small parking lots at each trailhead and simply cannot handle the number of vehicles that Zion National Park receives on a daily basis. Even those with reservations to stay at Zion Lodge are not permitted to drive past the lodge to park at any of the trailheads farther up the canyon.
That said, the vast majority of visitors will need to find parking outside of Zion Canyon Scenic Drive and ride the free shuttle to Stop 5. The Zion Visitor Center and Zion Human History Museum are the best two spots to find parking inside the park.
During the busiest times of the year, the Zion Visitor Center parking lot typically fills completely by 7:30 a.m., with nearby parking spots filling shortly thereafter.
If you do have a valid Zion Canyon parking pass, parking for the Emerald Pools Trail can be found in the same guest parking lot that serves the Zion Lodge or across the road directly adjacent to the trailhead. This is the only trailhead in Zion Canyon that guests at the lodge can legally park. I have been given a valid Zion Canyon parking pass before, and I can tell you from experience that you don’t get one just because you want one. Parking passes for Zion Canyon Scenic Drive are handed out on a very limited, case-by-case basis, and frankly, it is not appropriate for me to disclose any more details.
Google Maps Directions: Emerald Pools Trailhead / Zion Visitor Center
Hiking Checklist - Zion
Here is a complete list of must-have things that you will want for any hike in Zion National Park.
Hiking the Emerald Pools Trail
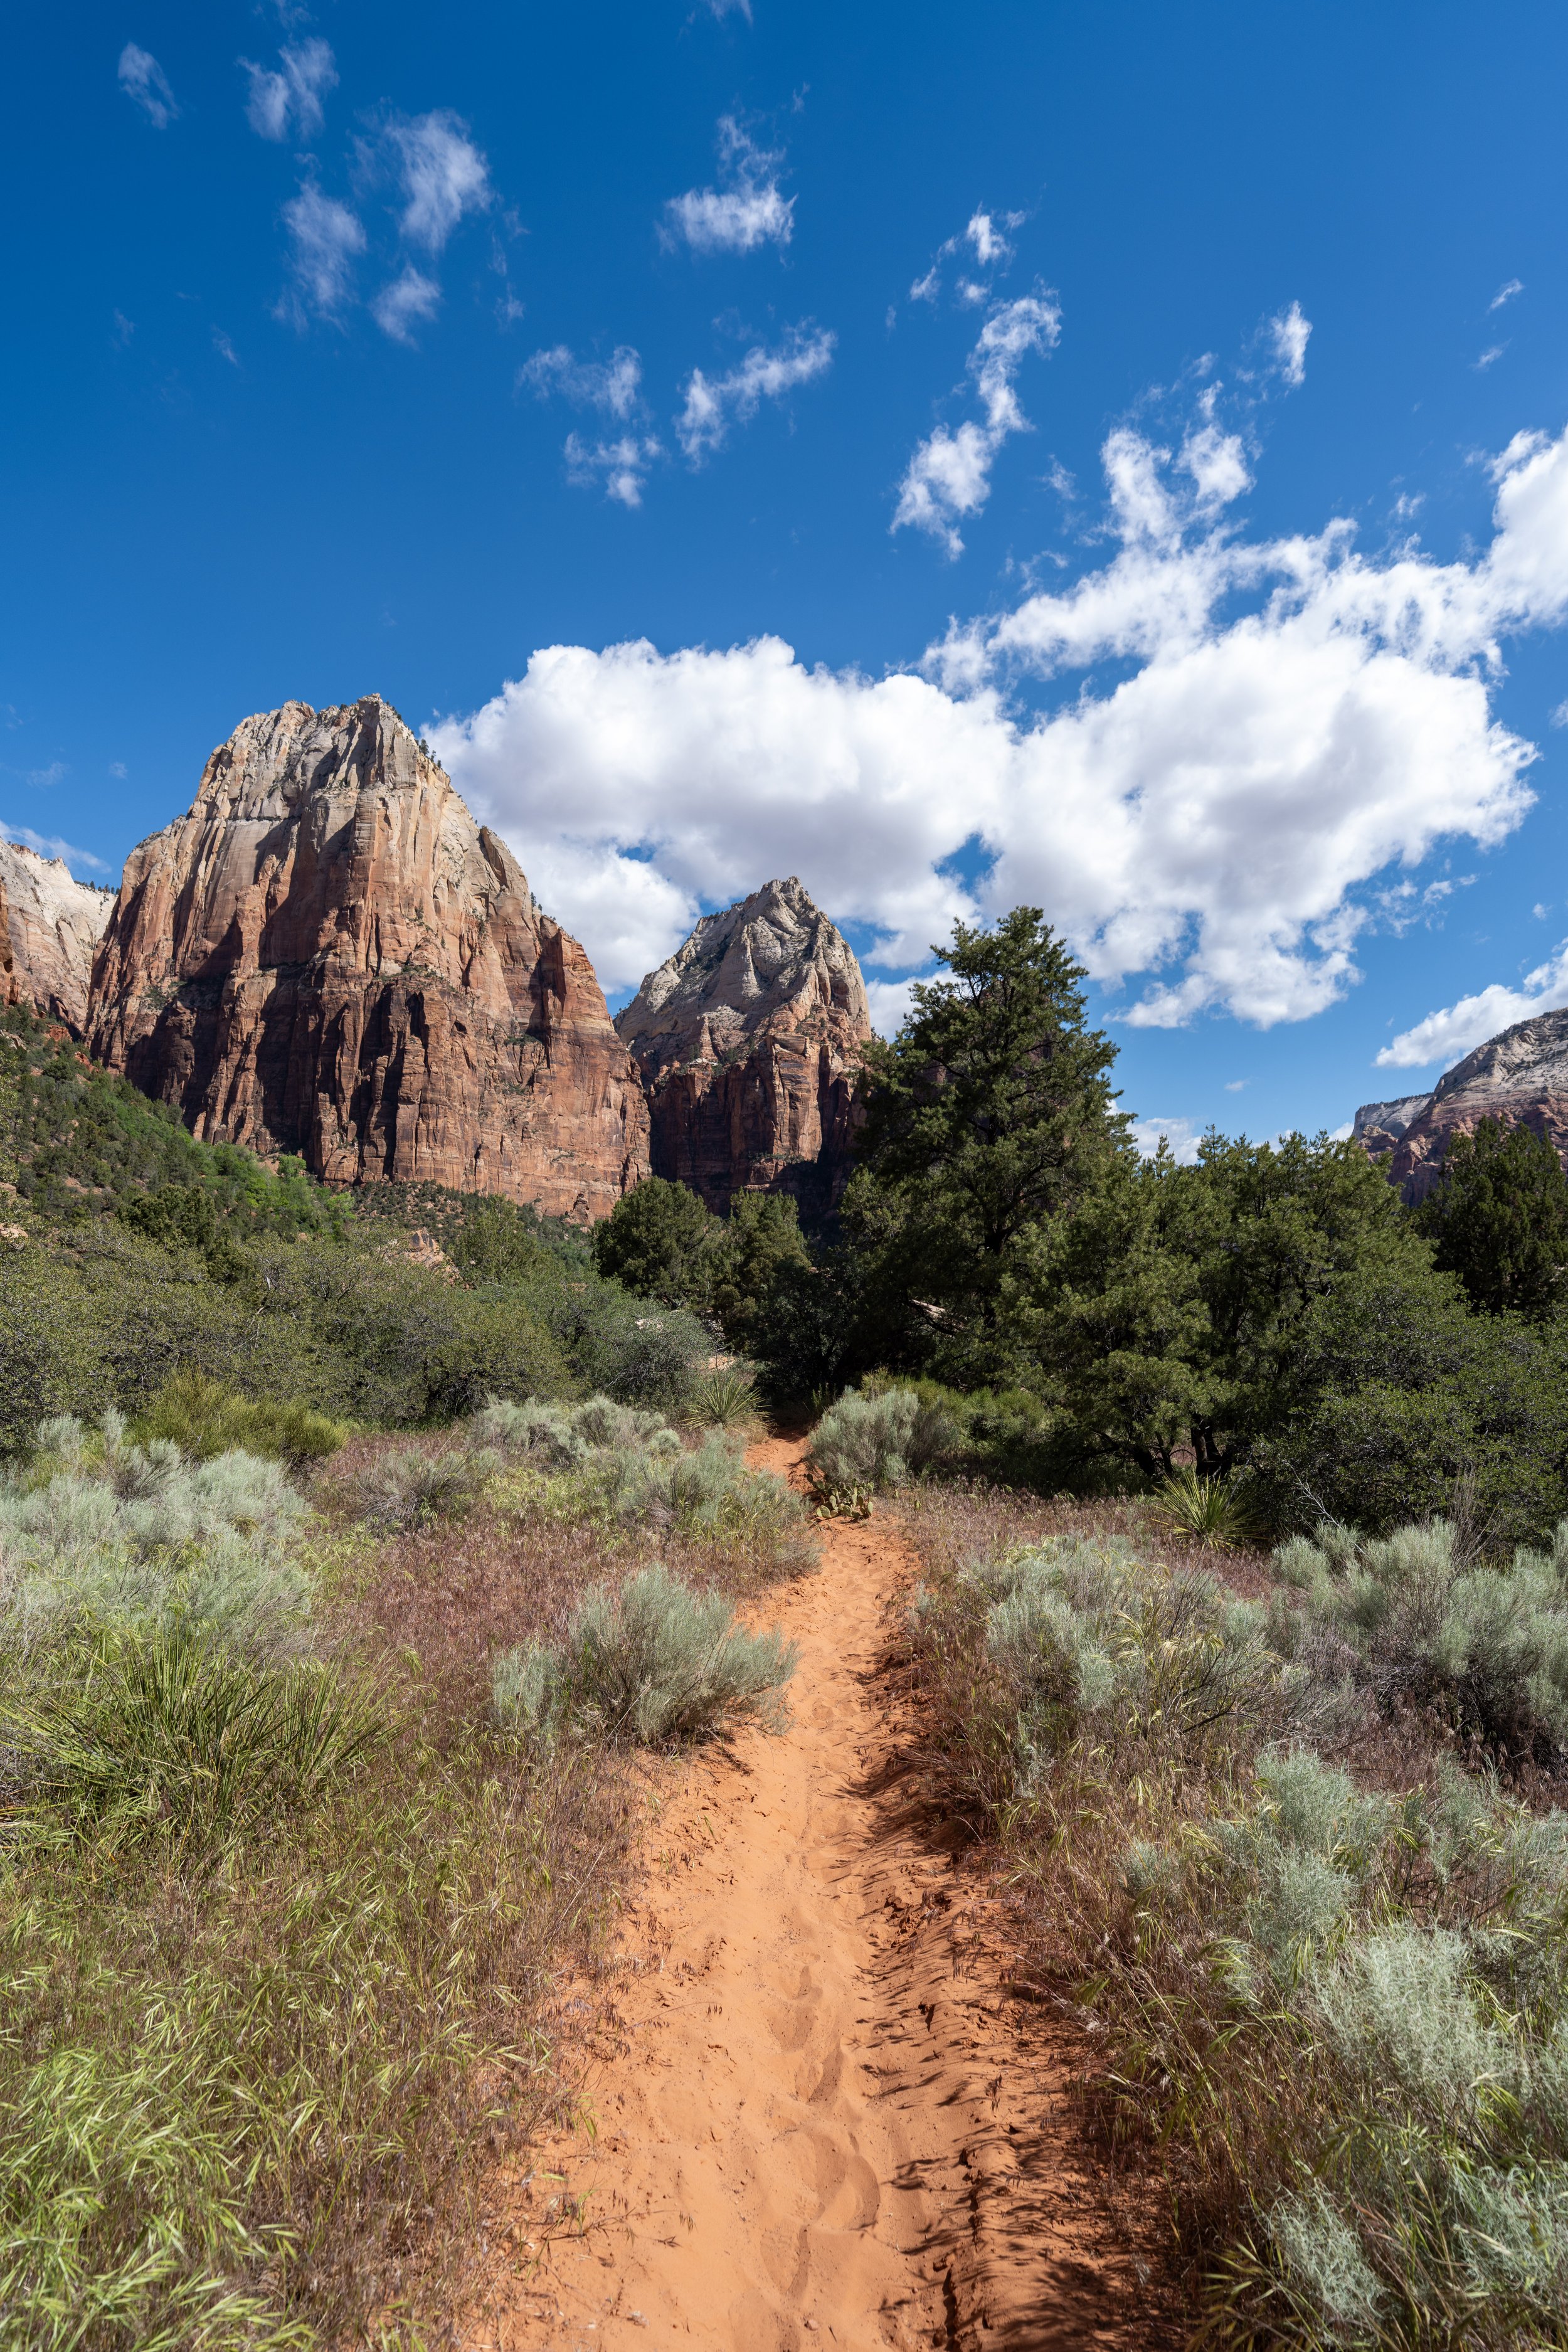
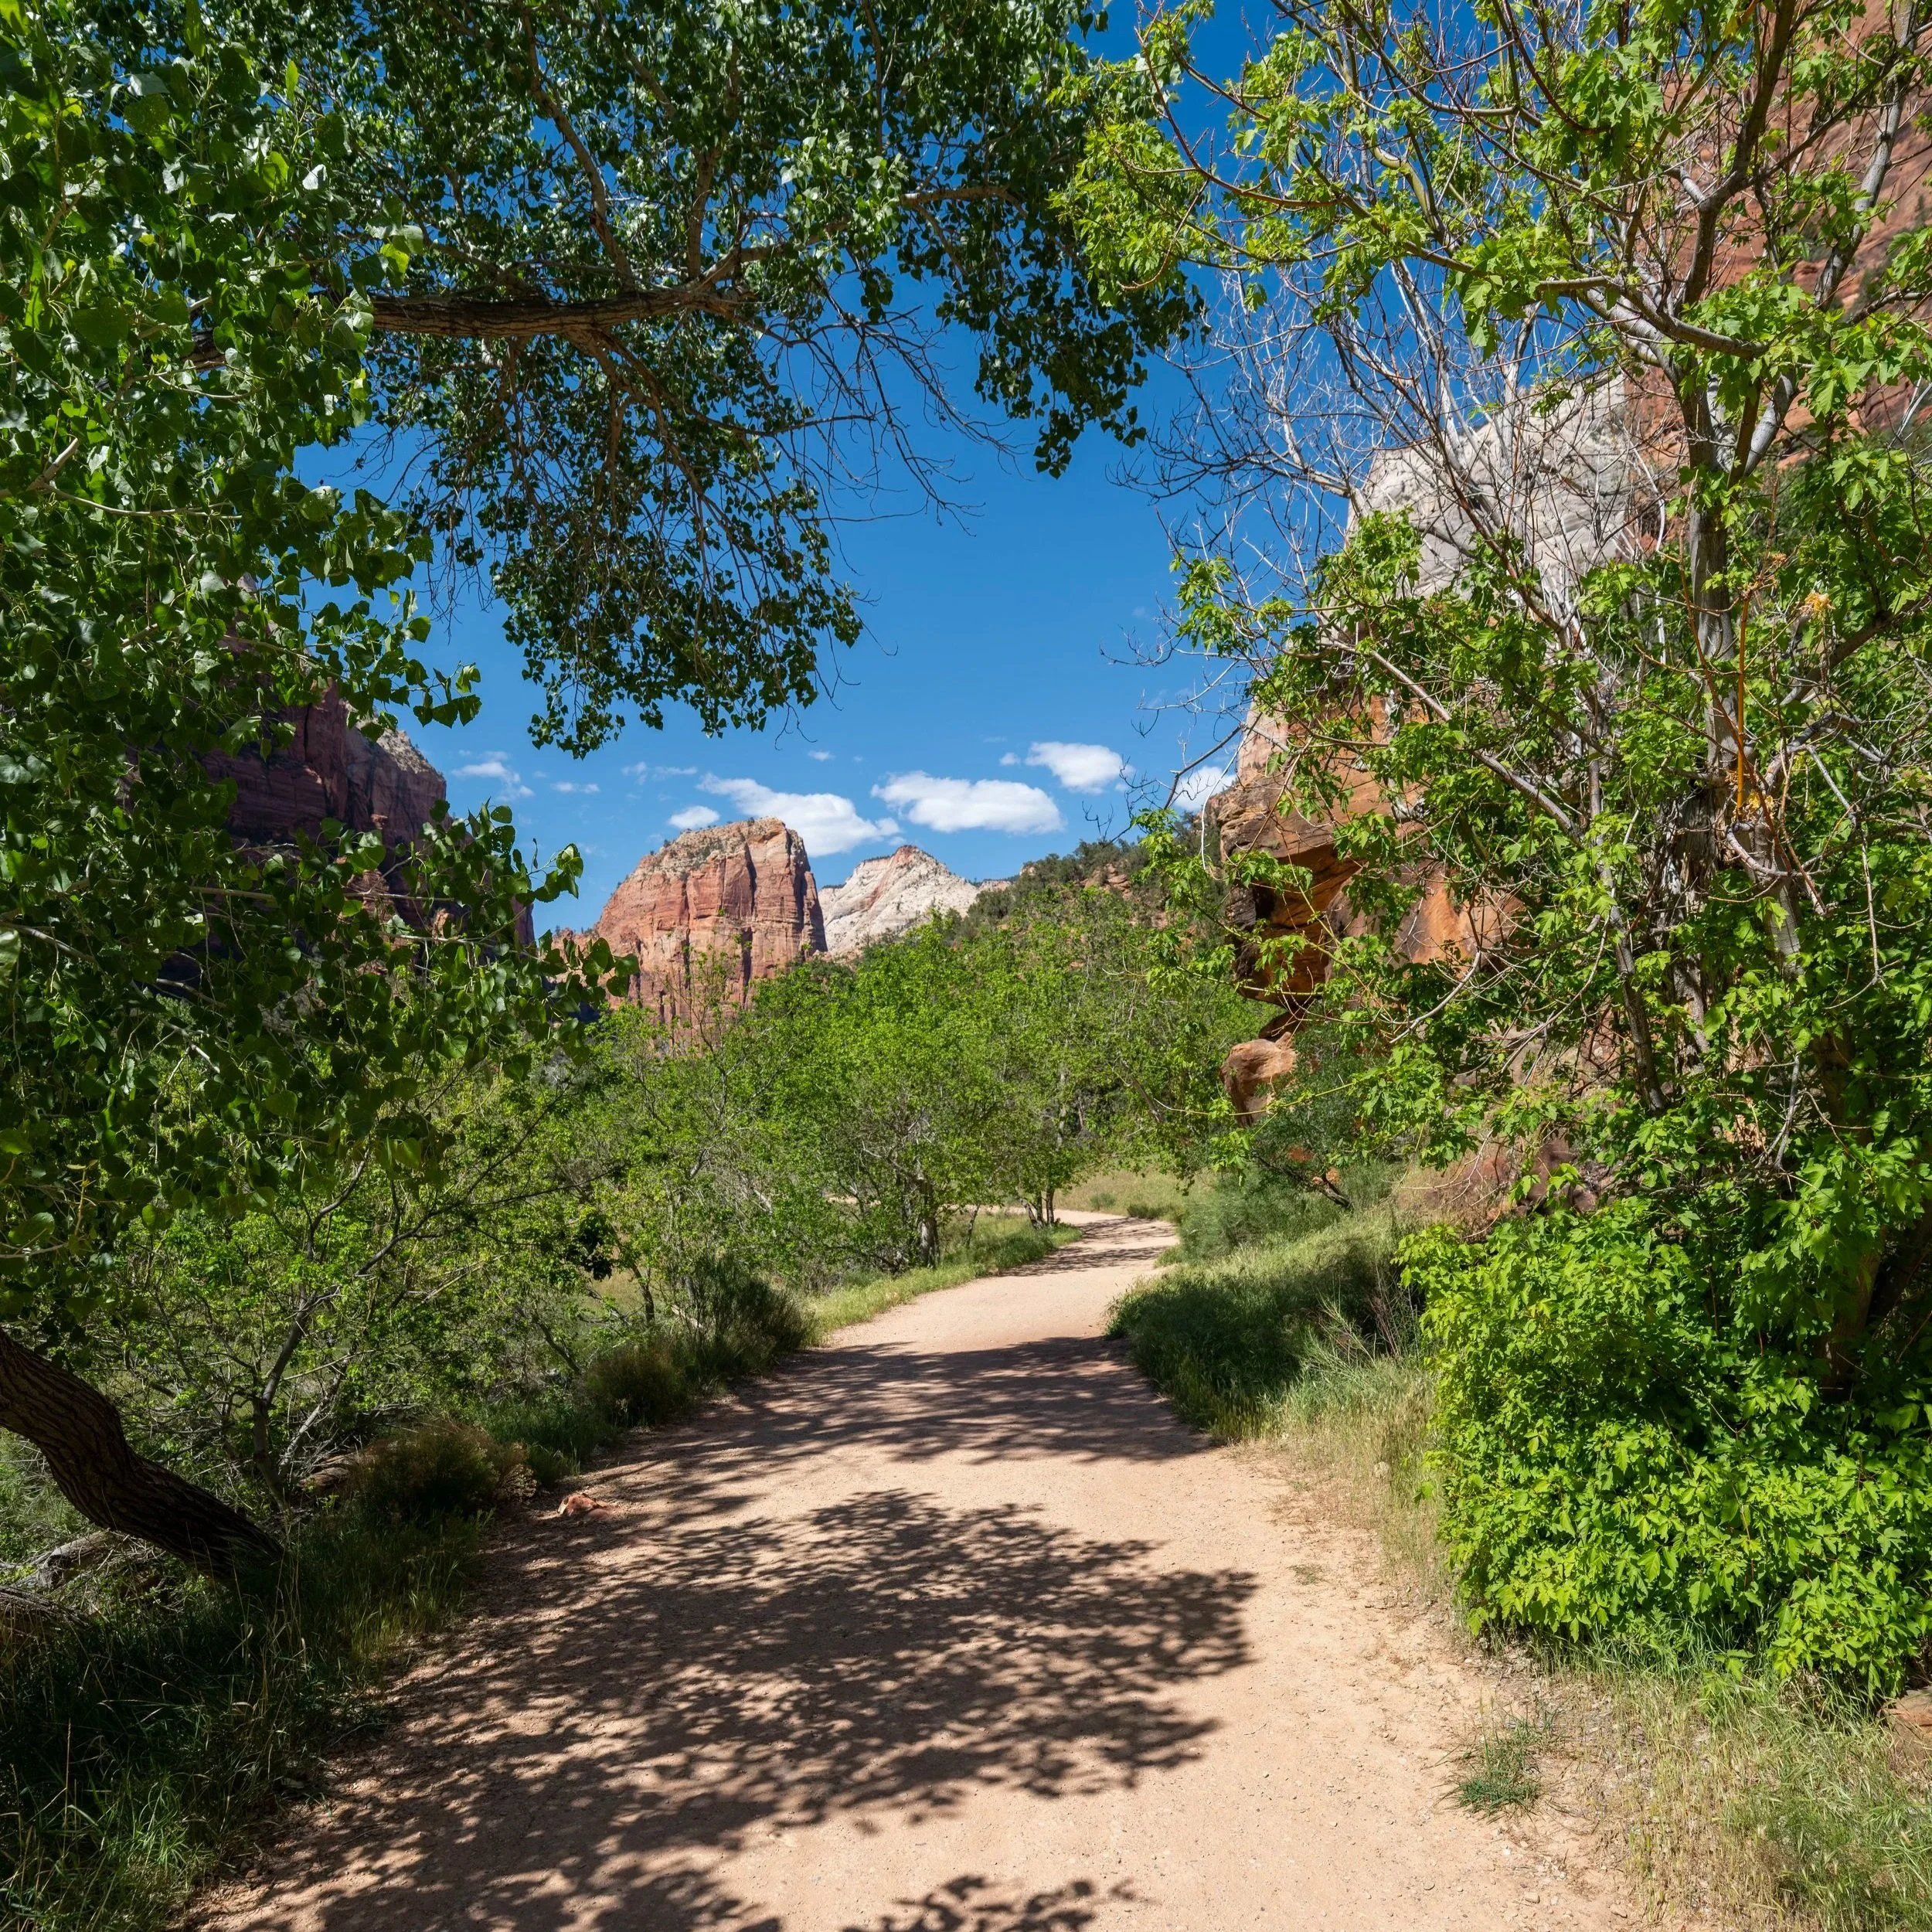
The Emerald Pools Trail begins at the joint trailhead that serves both the Emerald Pools and the Sand Bench Trail, directly across Zion Canyon Scenic Drive from Zion Lodge.
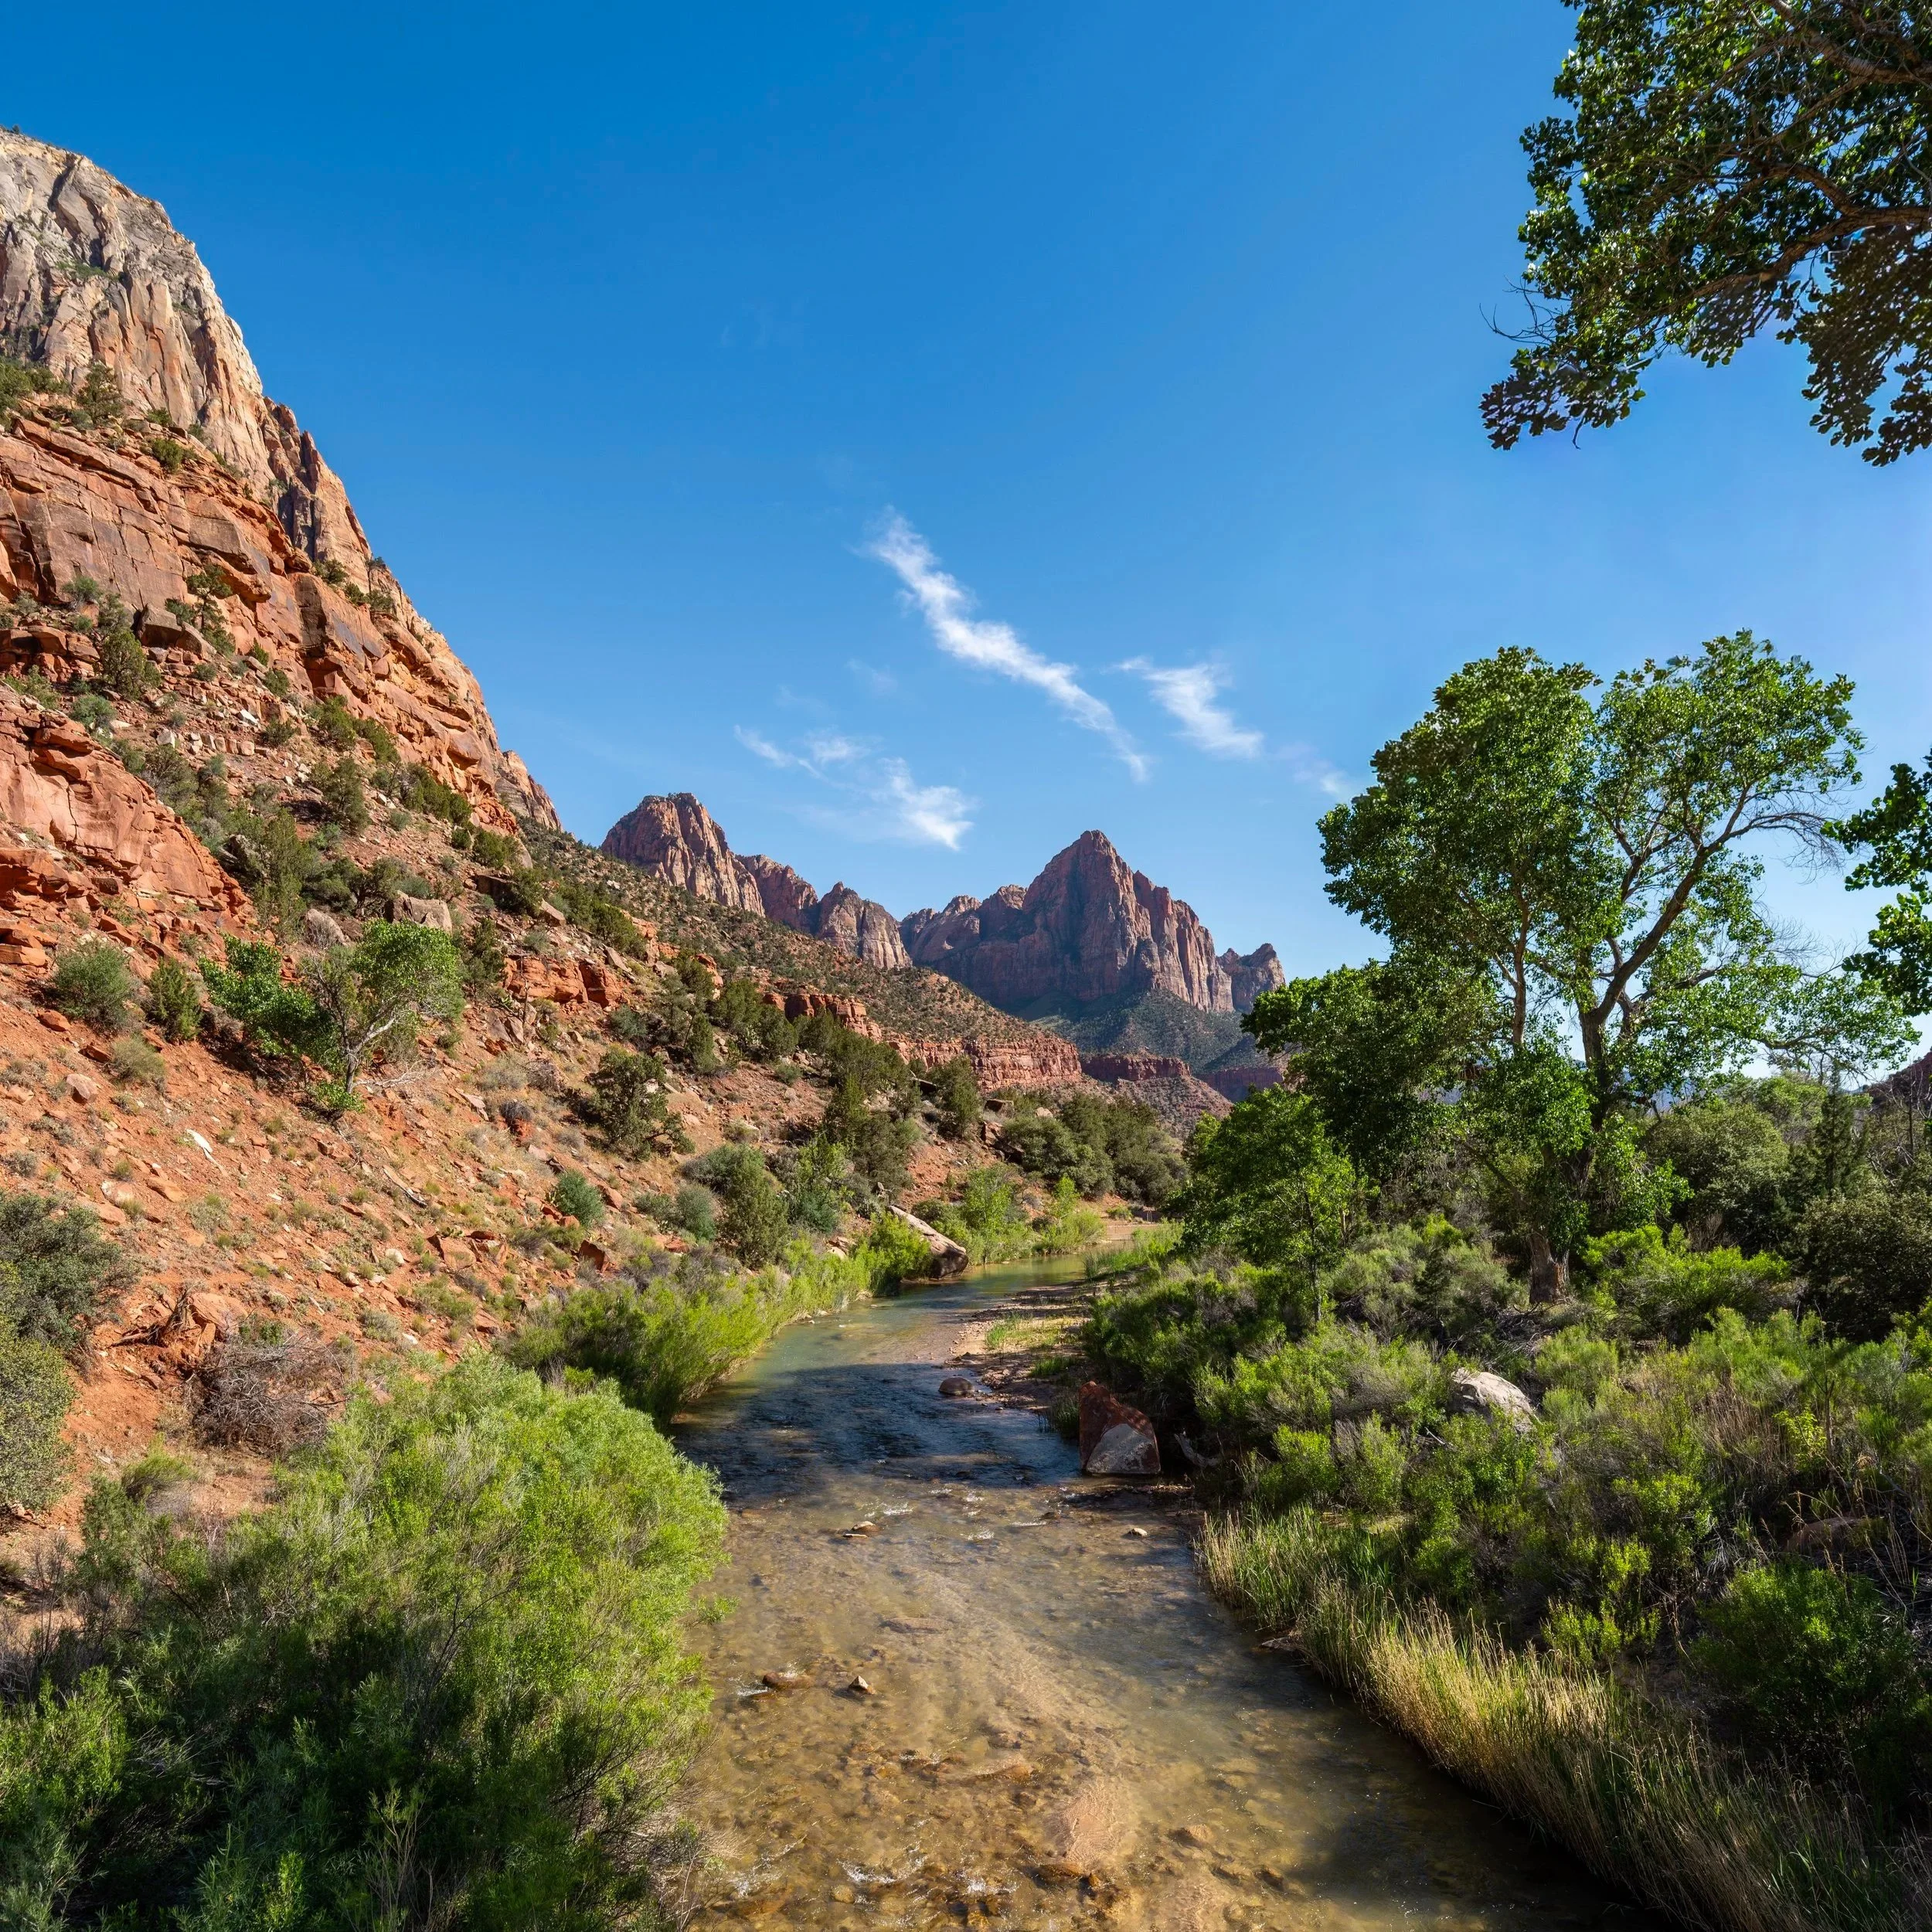
After just a few steps, the Emerald Pools Trail crosses over the Virgin River, similar to the beginning of the Angels Landing Trail, just a short distance up the canyon.
Lower-Middle Emerald Pools Junction
After crossing the bridge over the Virgin River, hikers have the option to either go right to begin the Lower Emerald Pools Trail first or left to hike directly to the Middle Emerald Pool.
Personally, I recommend going right on the Lower Emerald Pools Trail first because the Middle Emerald Pools Trail makes for a much quieter, more relaxing return hike after visiting the Upper Pool since far fewer visitors complete the loop, as mentioned in the beginning.
Lower Emerald Pools Trail
The Lower Emerald Pools Trail is the easiest of the three trails that make up the full loop, as the first 0.6 miles (1.0 km) to the Lower Emerald Pool is mostly flat—something that certainly cannot be said about the rest of the hike past the first waterfall.
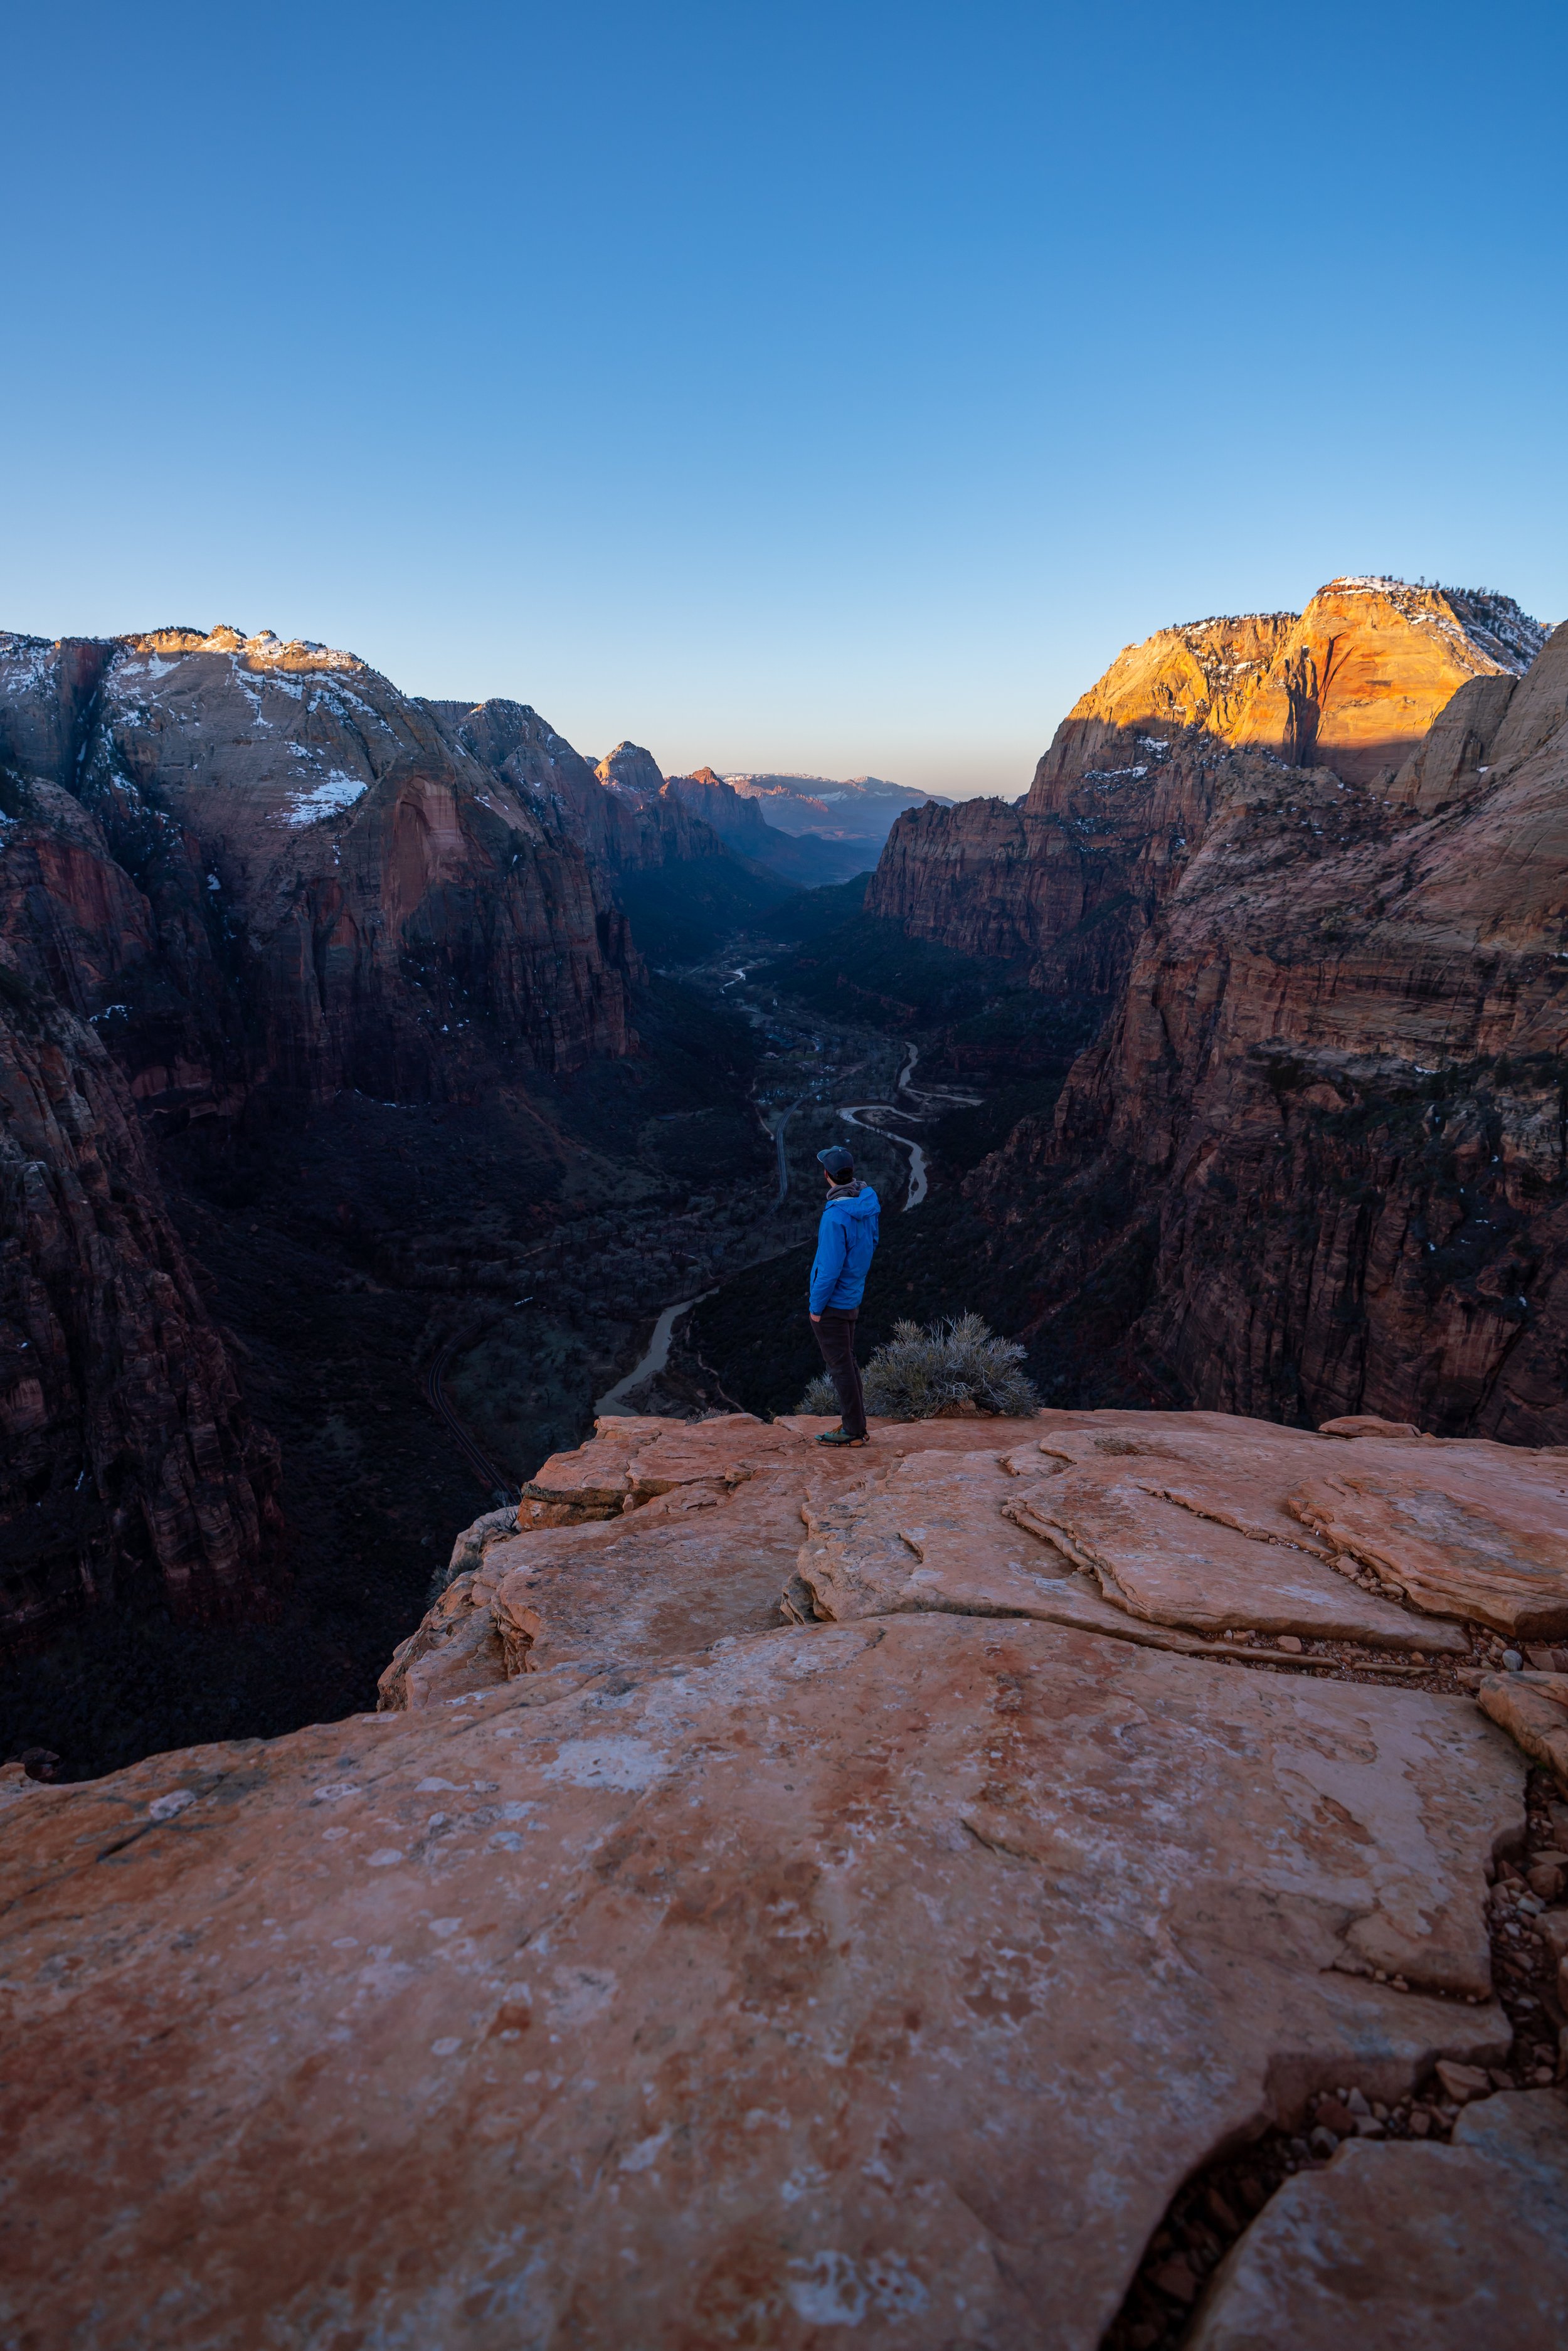
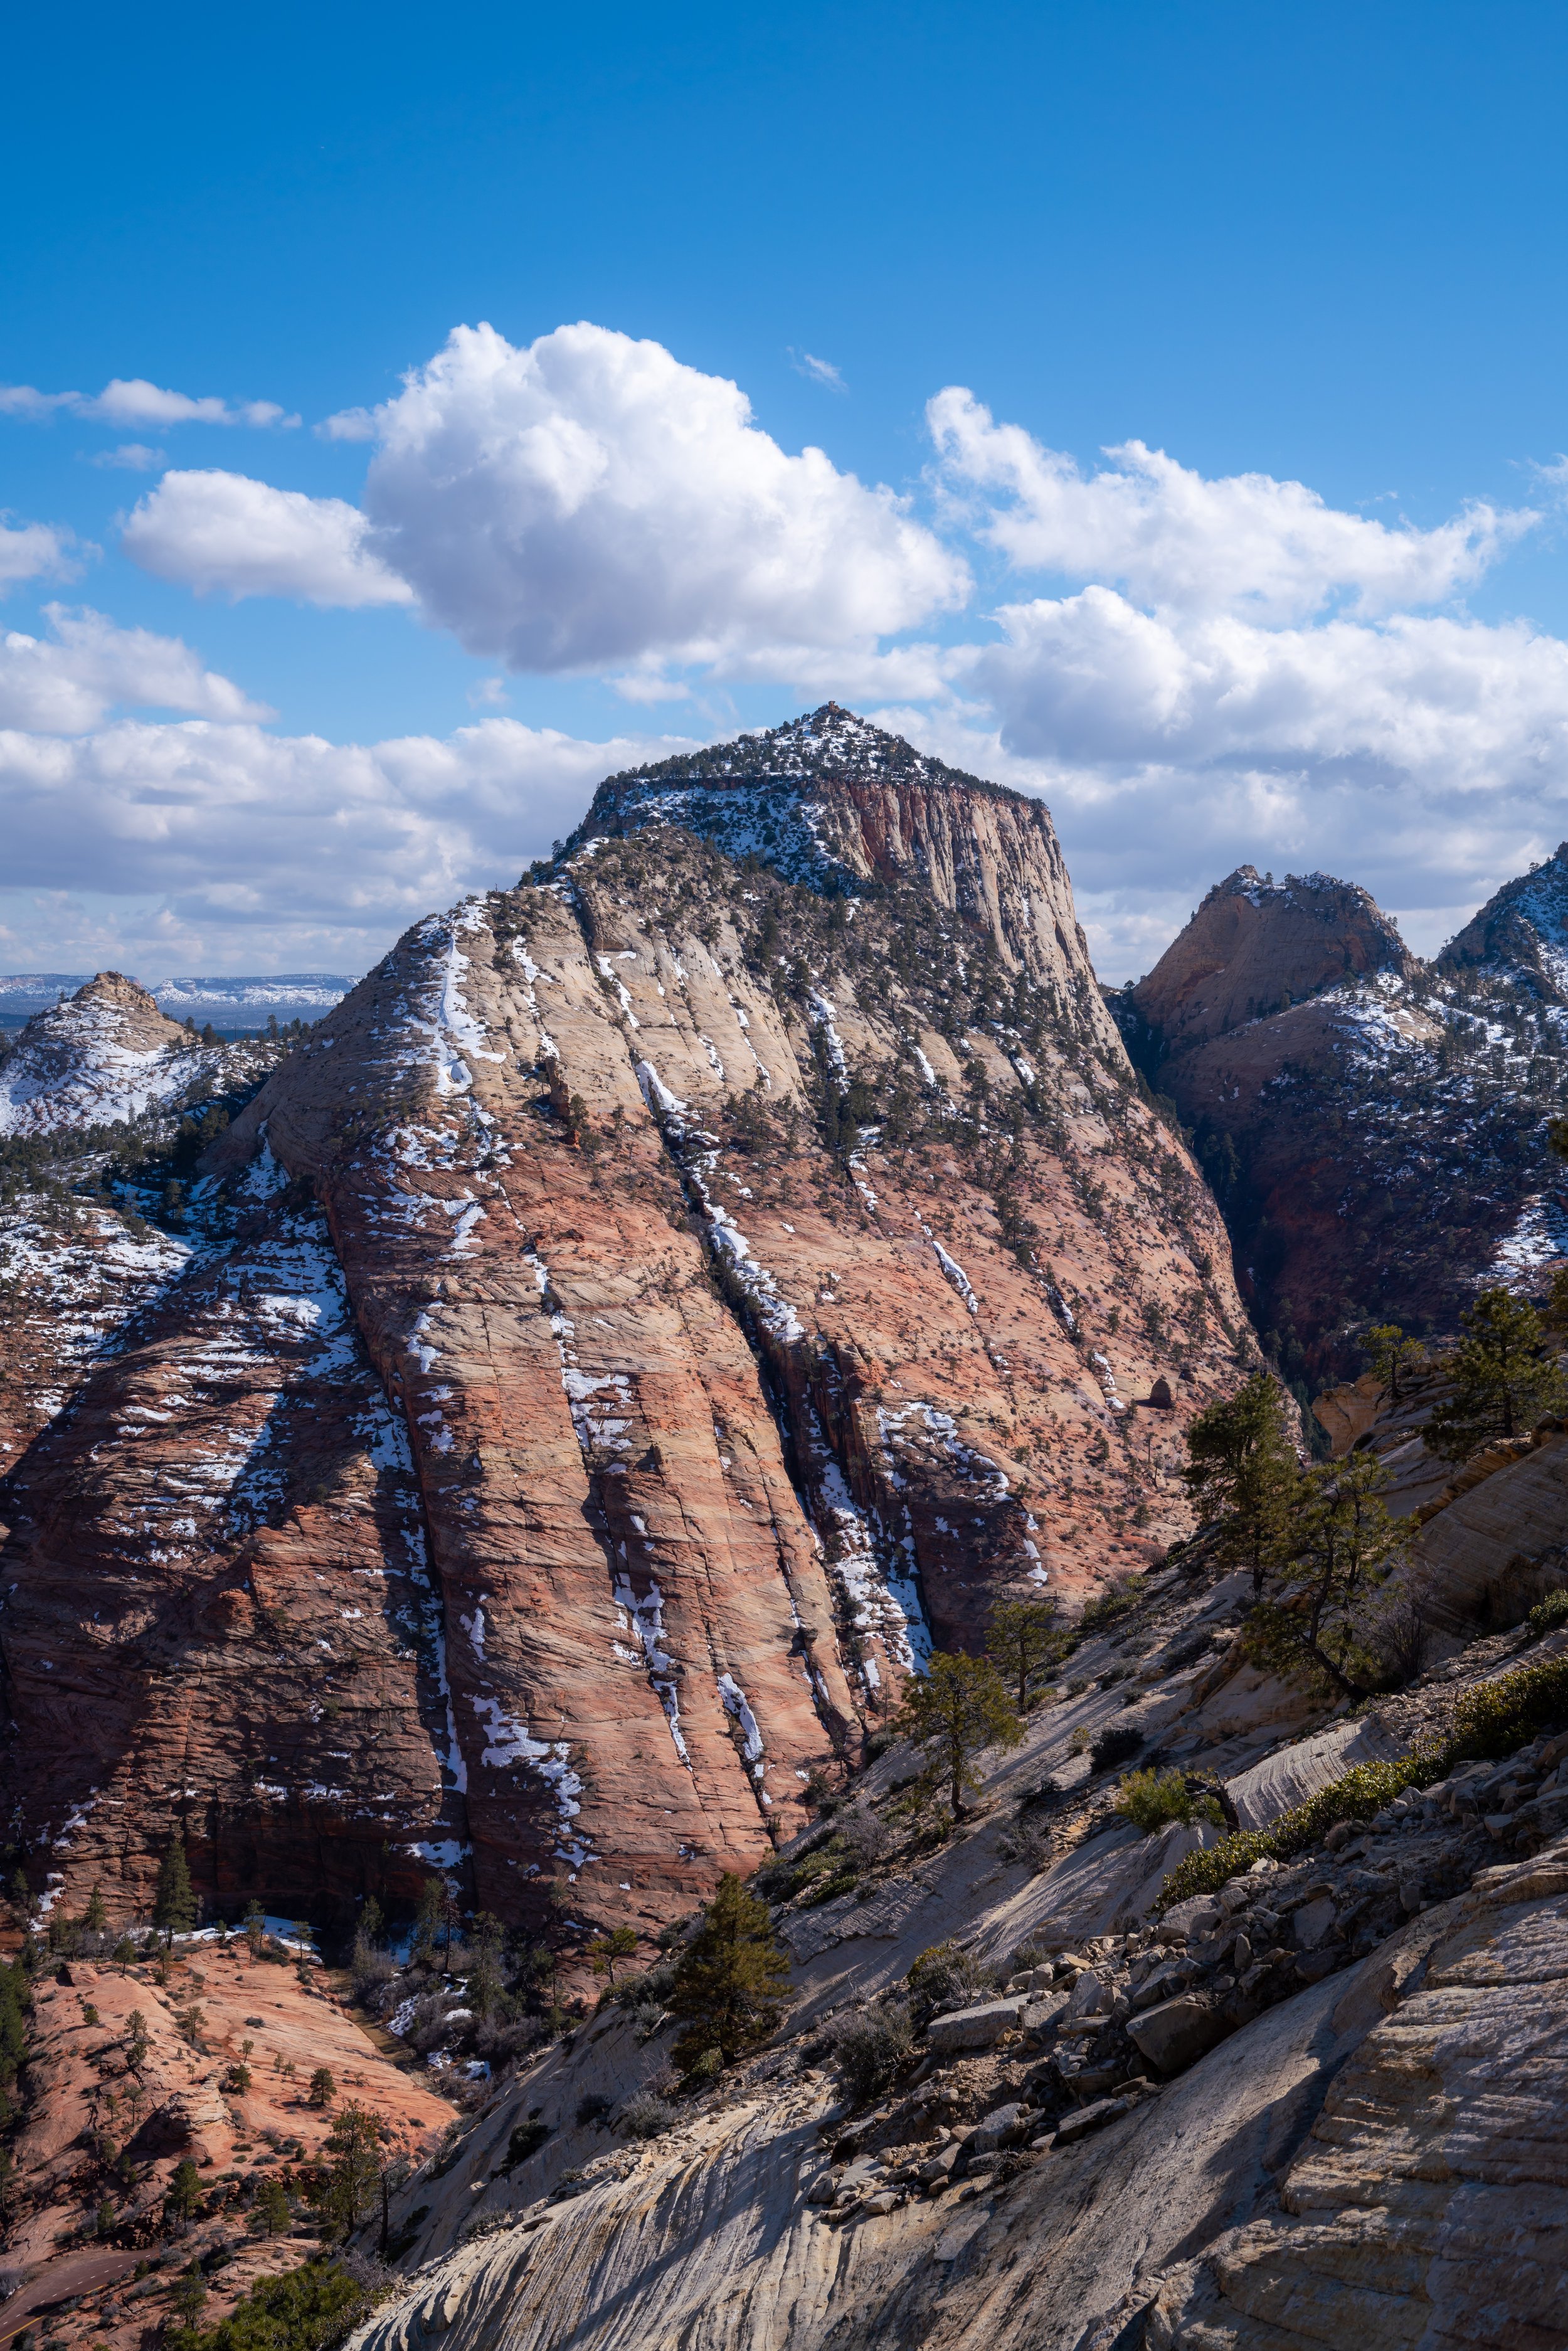
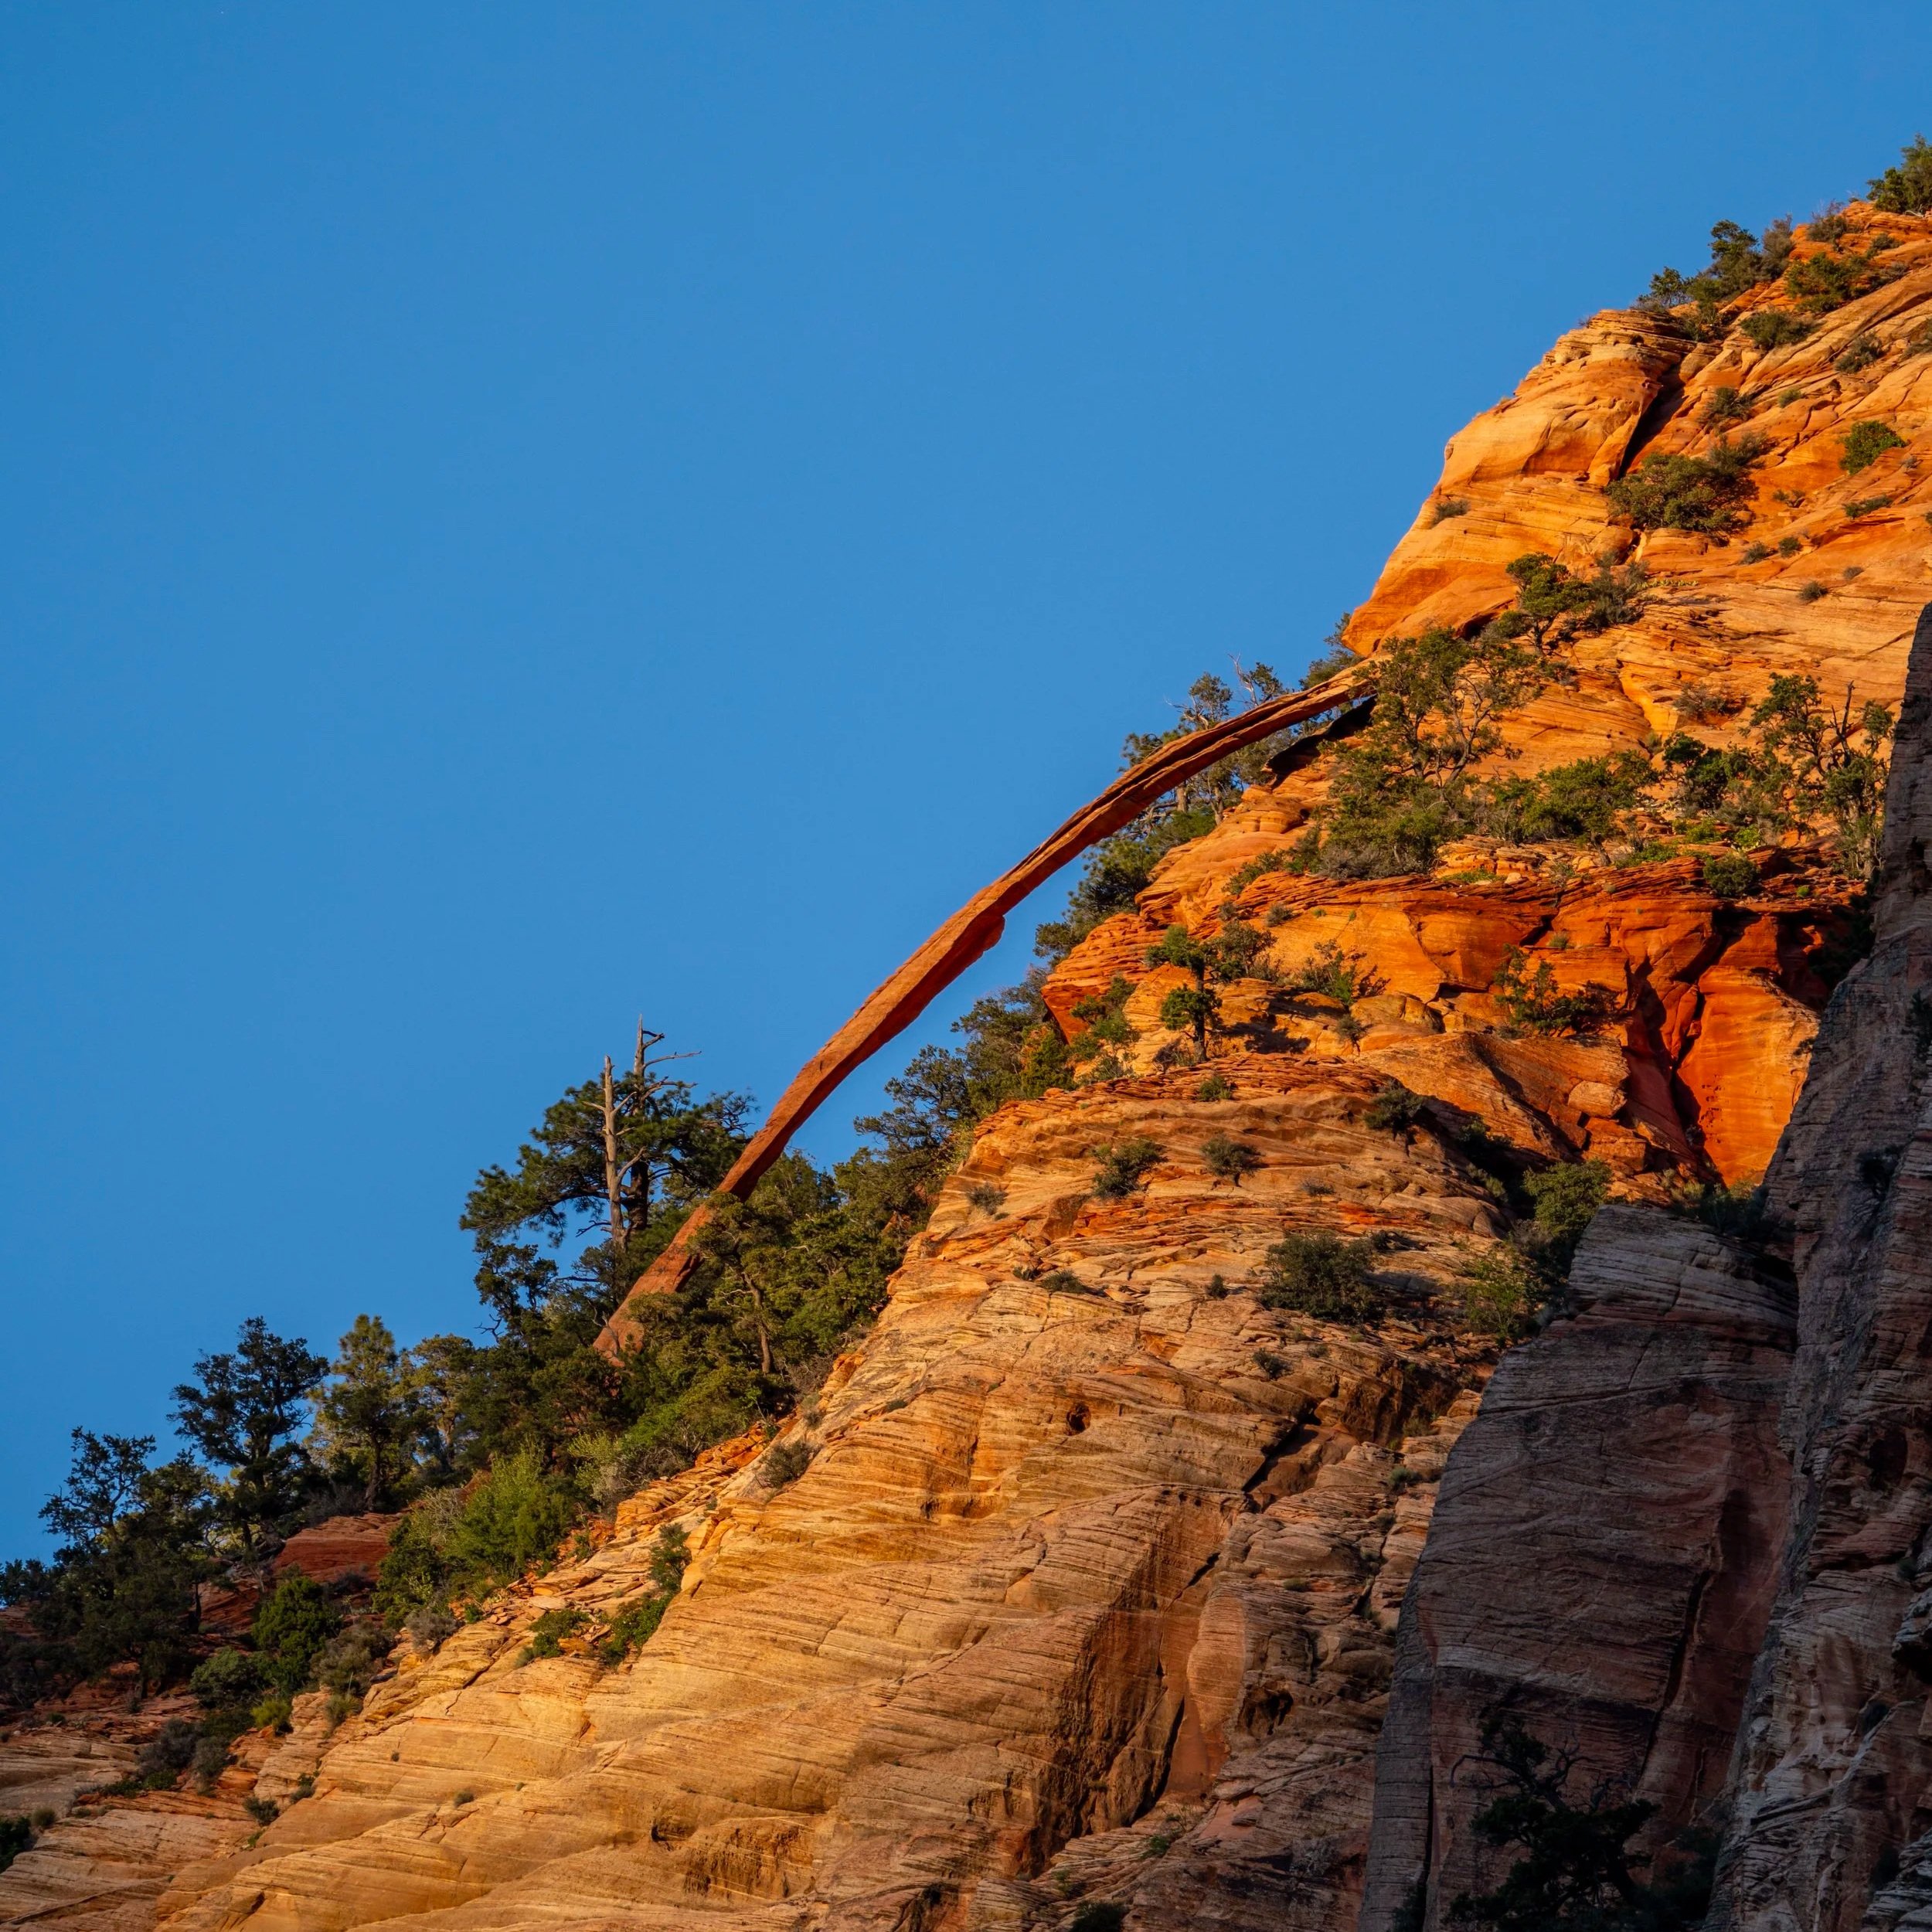
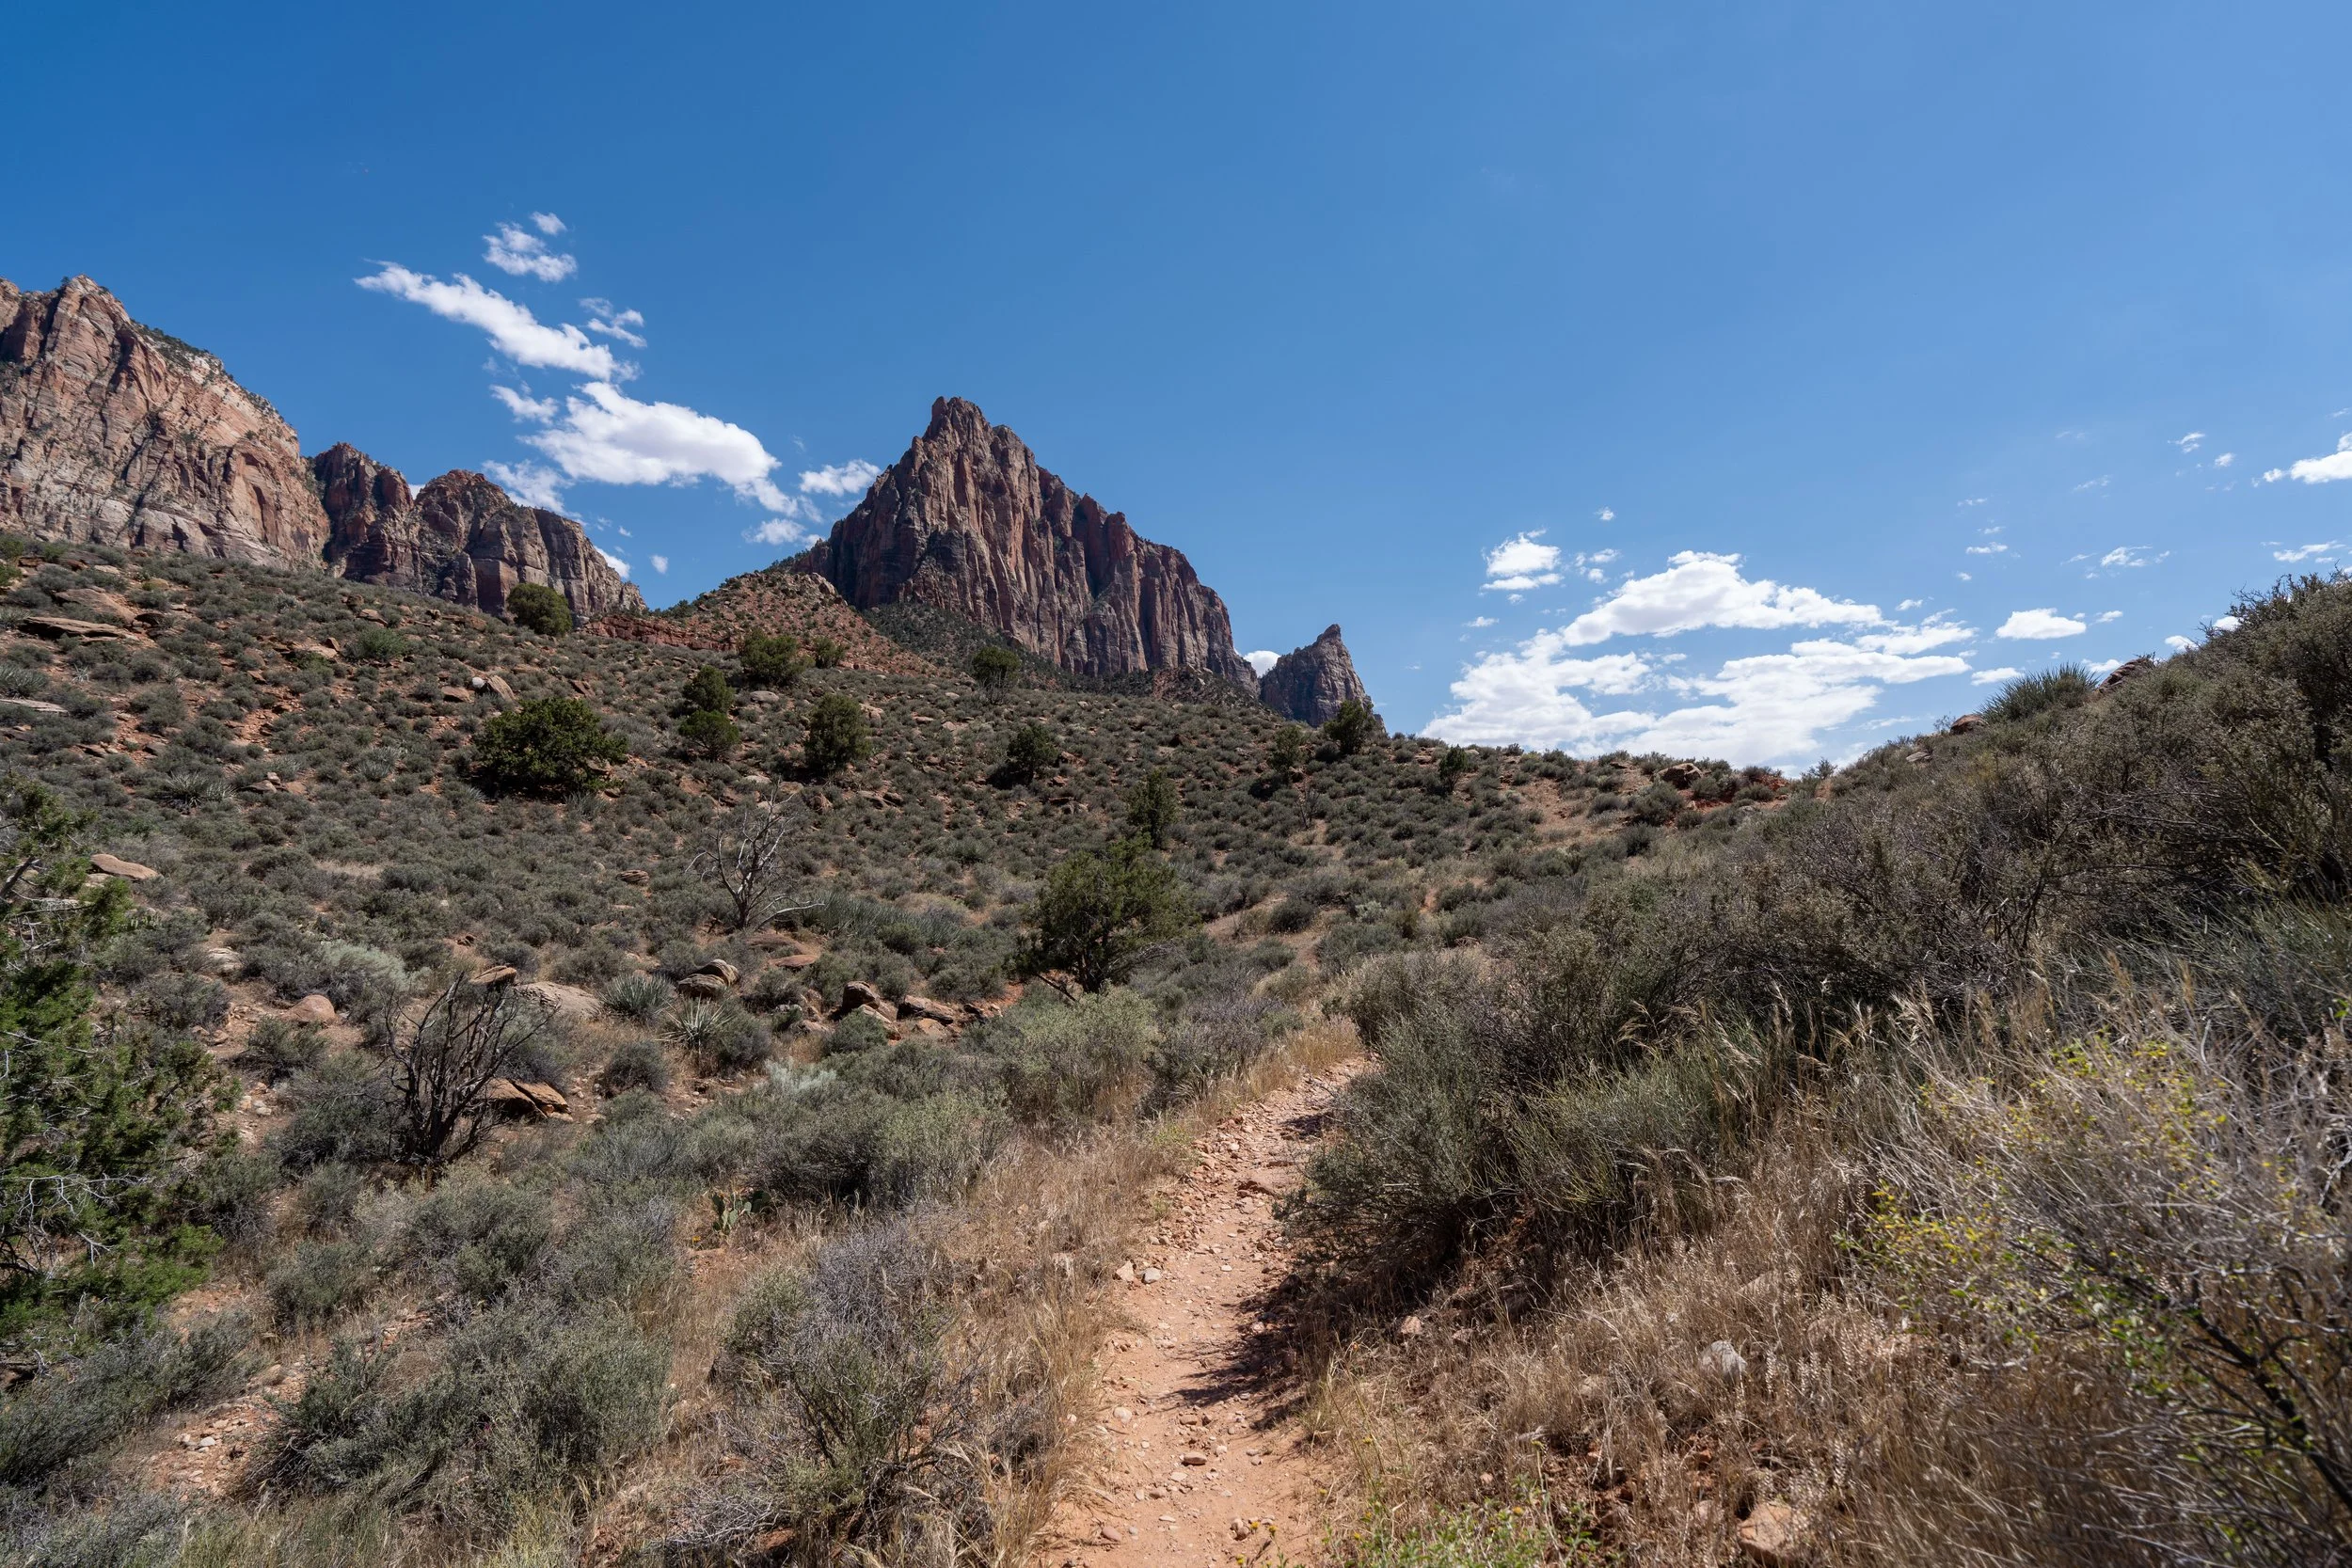
This is the view looking up Zion Canyon toward Angels Landing, and if you look closely, hikers can often be seen on the summit on a clear day!
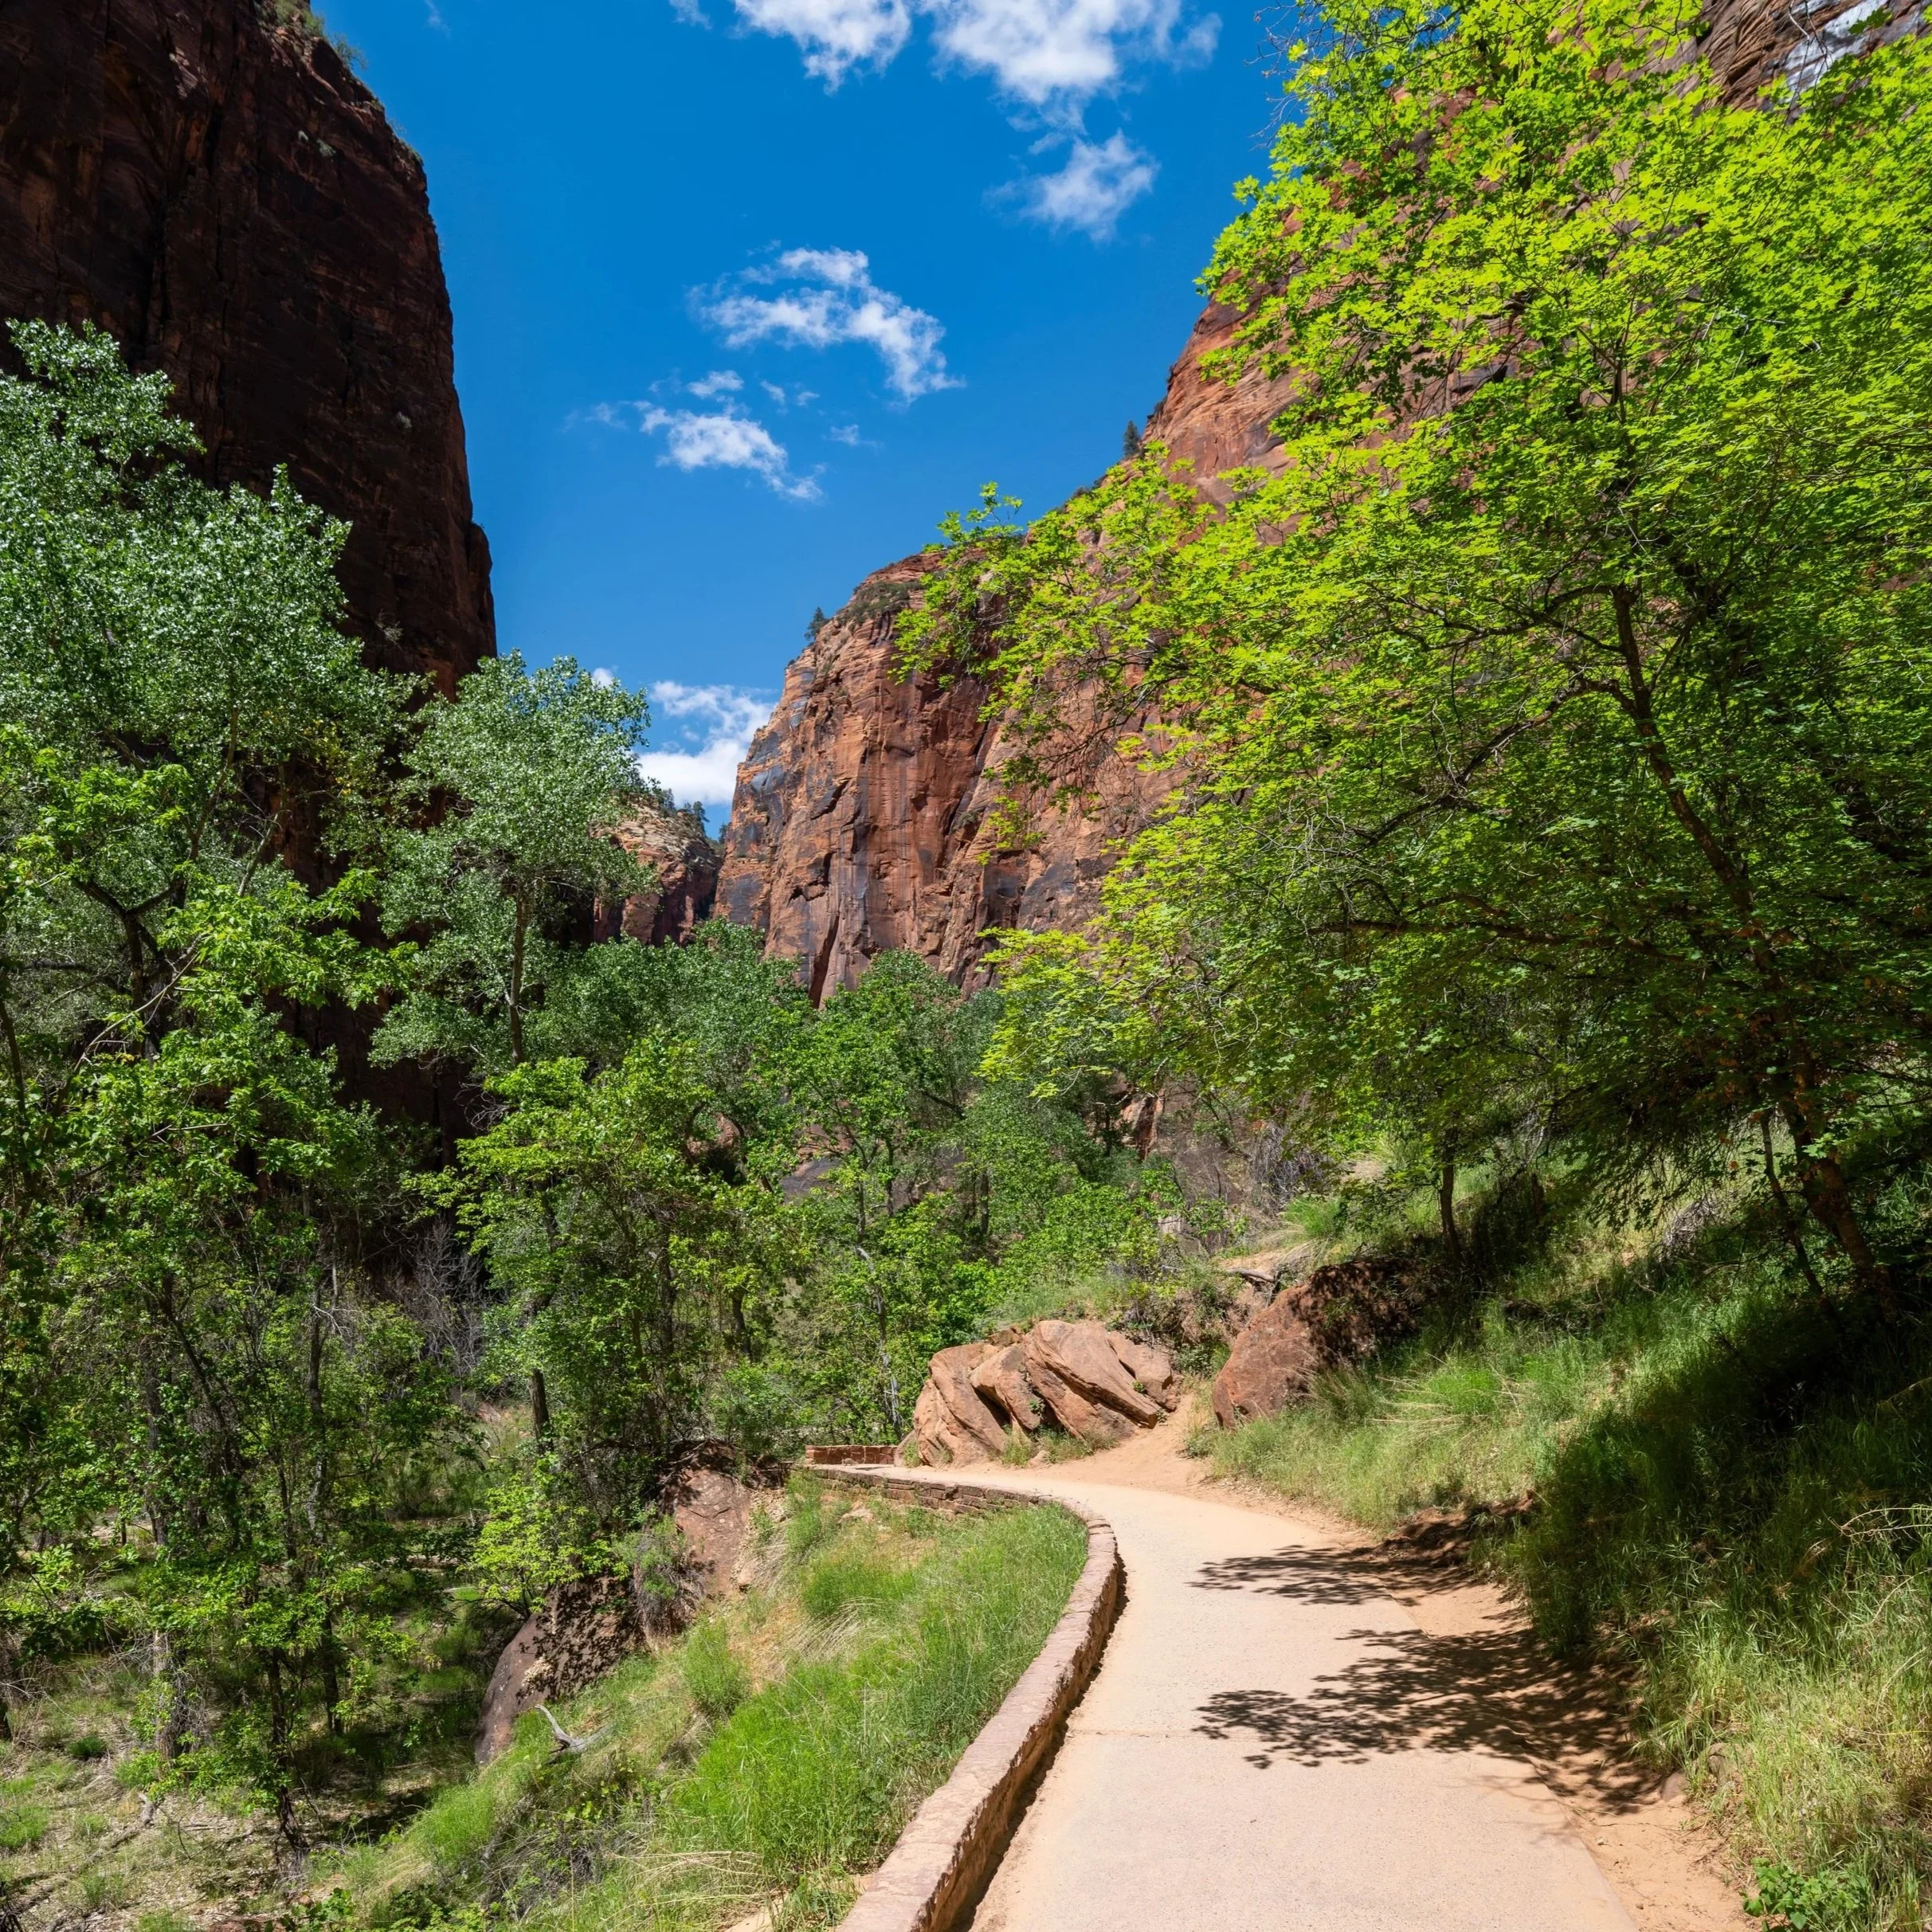
This is where the Emerald Pools Trail starts to head up and away from the Virgin River, which it will not parallel again until the Middle Emerald Pools Trail returns to the bottom of Zion Canyon at the end of the hike.
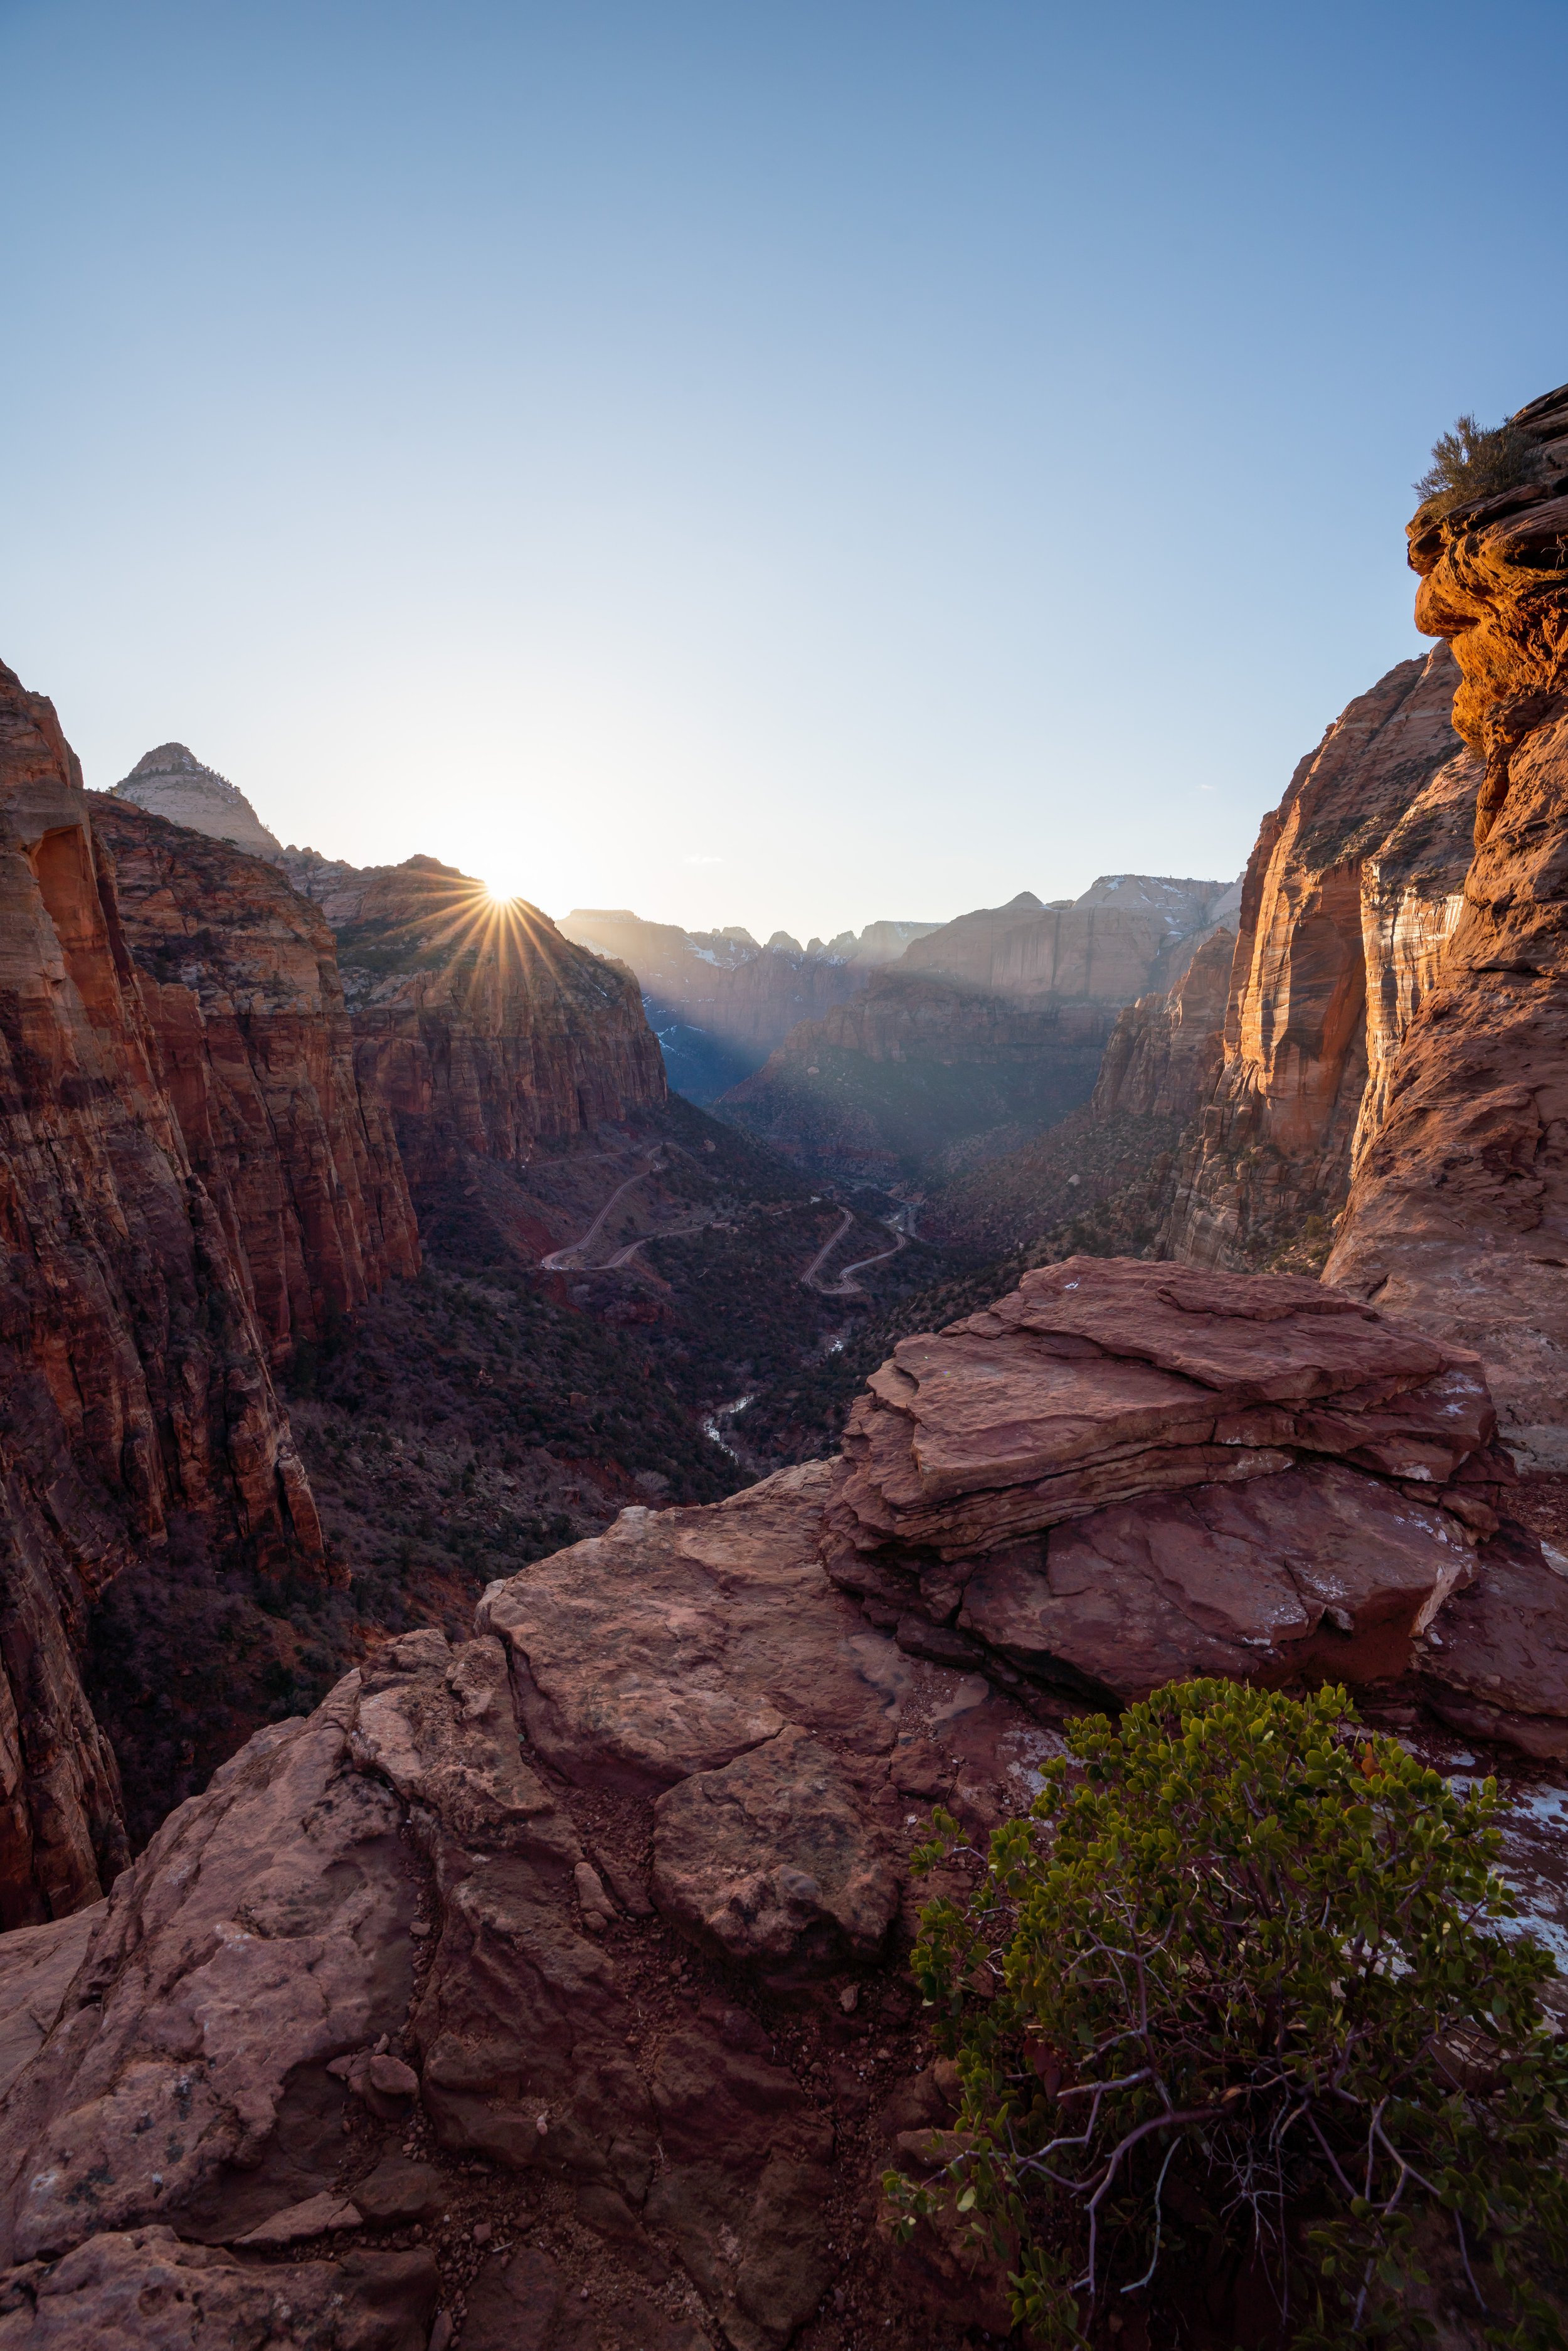
I think it’s worth highlighting that the Emerald Pools Trail is one of the first day hikes in Zion Canyon to receive direct sunlight early in the morning.
I mention this because, unless you plan to get a very early start, you’re more likely than not to spend a lot of time in the sun, which is why I recommend wearing a hooded sun shirt to stay safe—especially if you plan to hike all three trails that make up the Emerald Pools Trail.
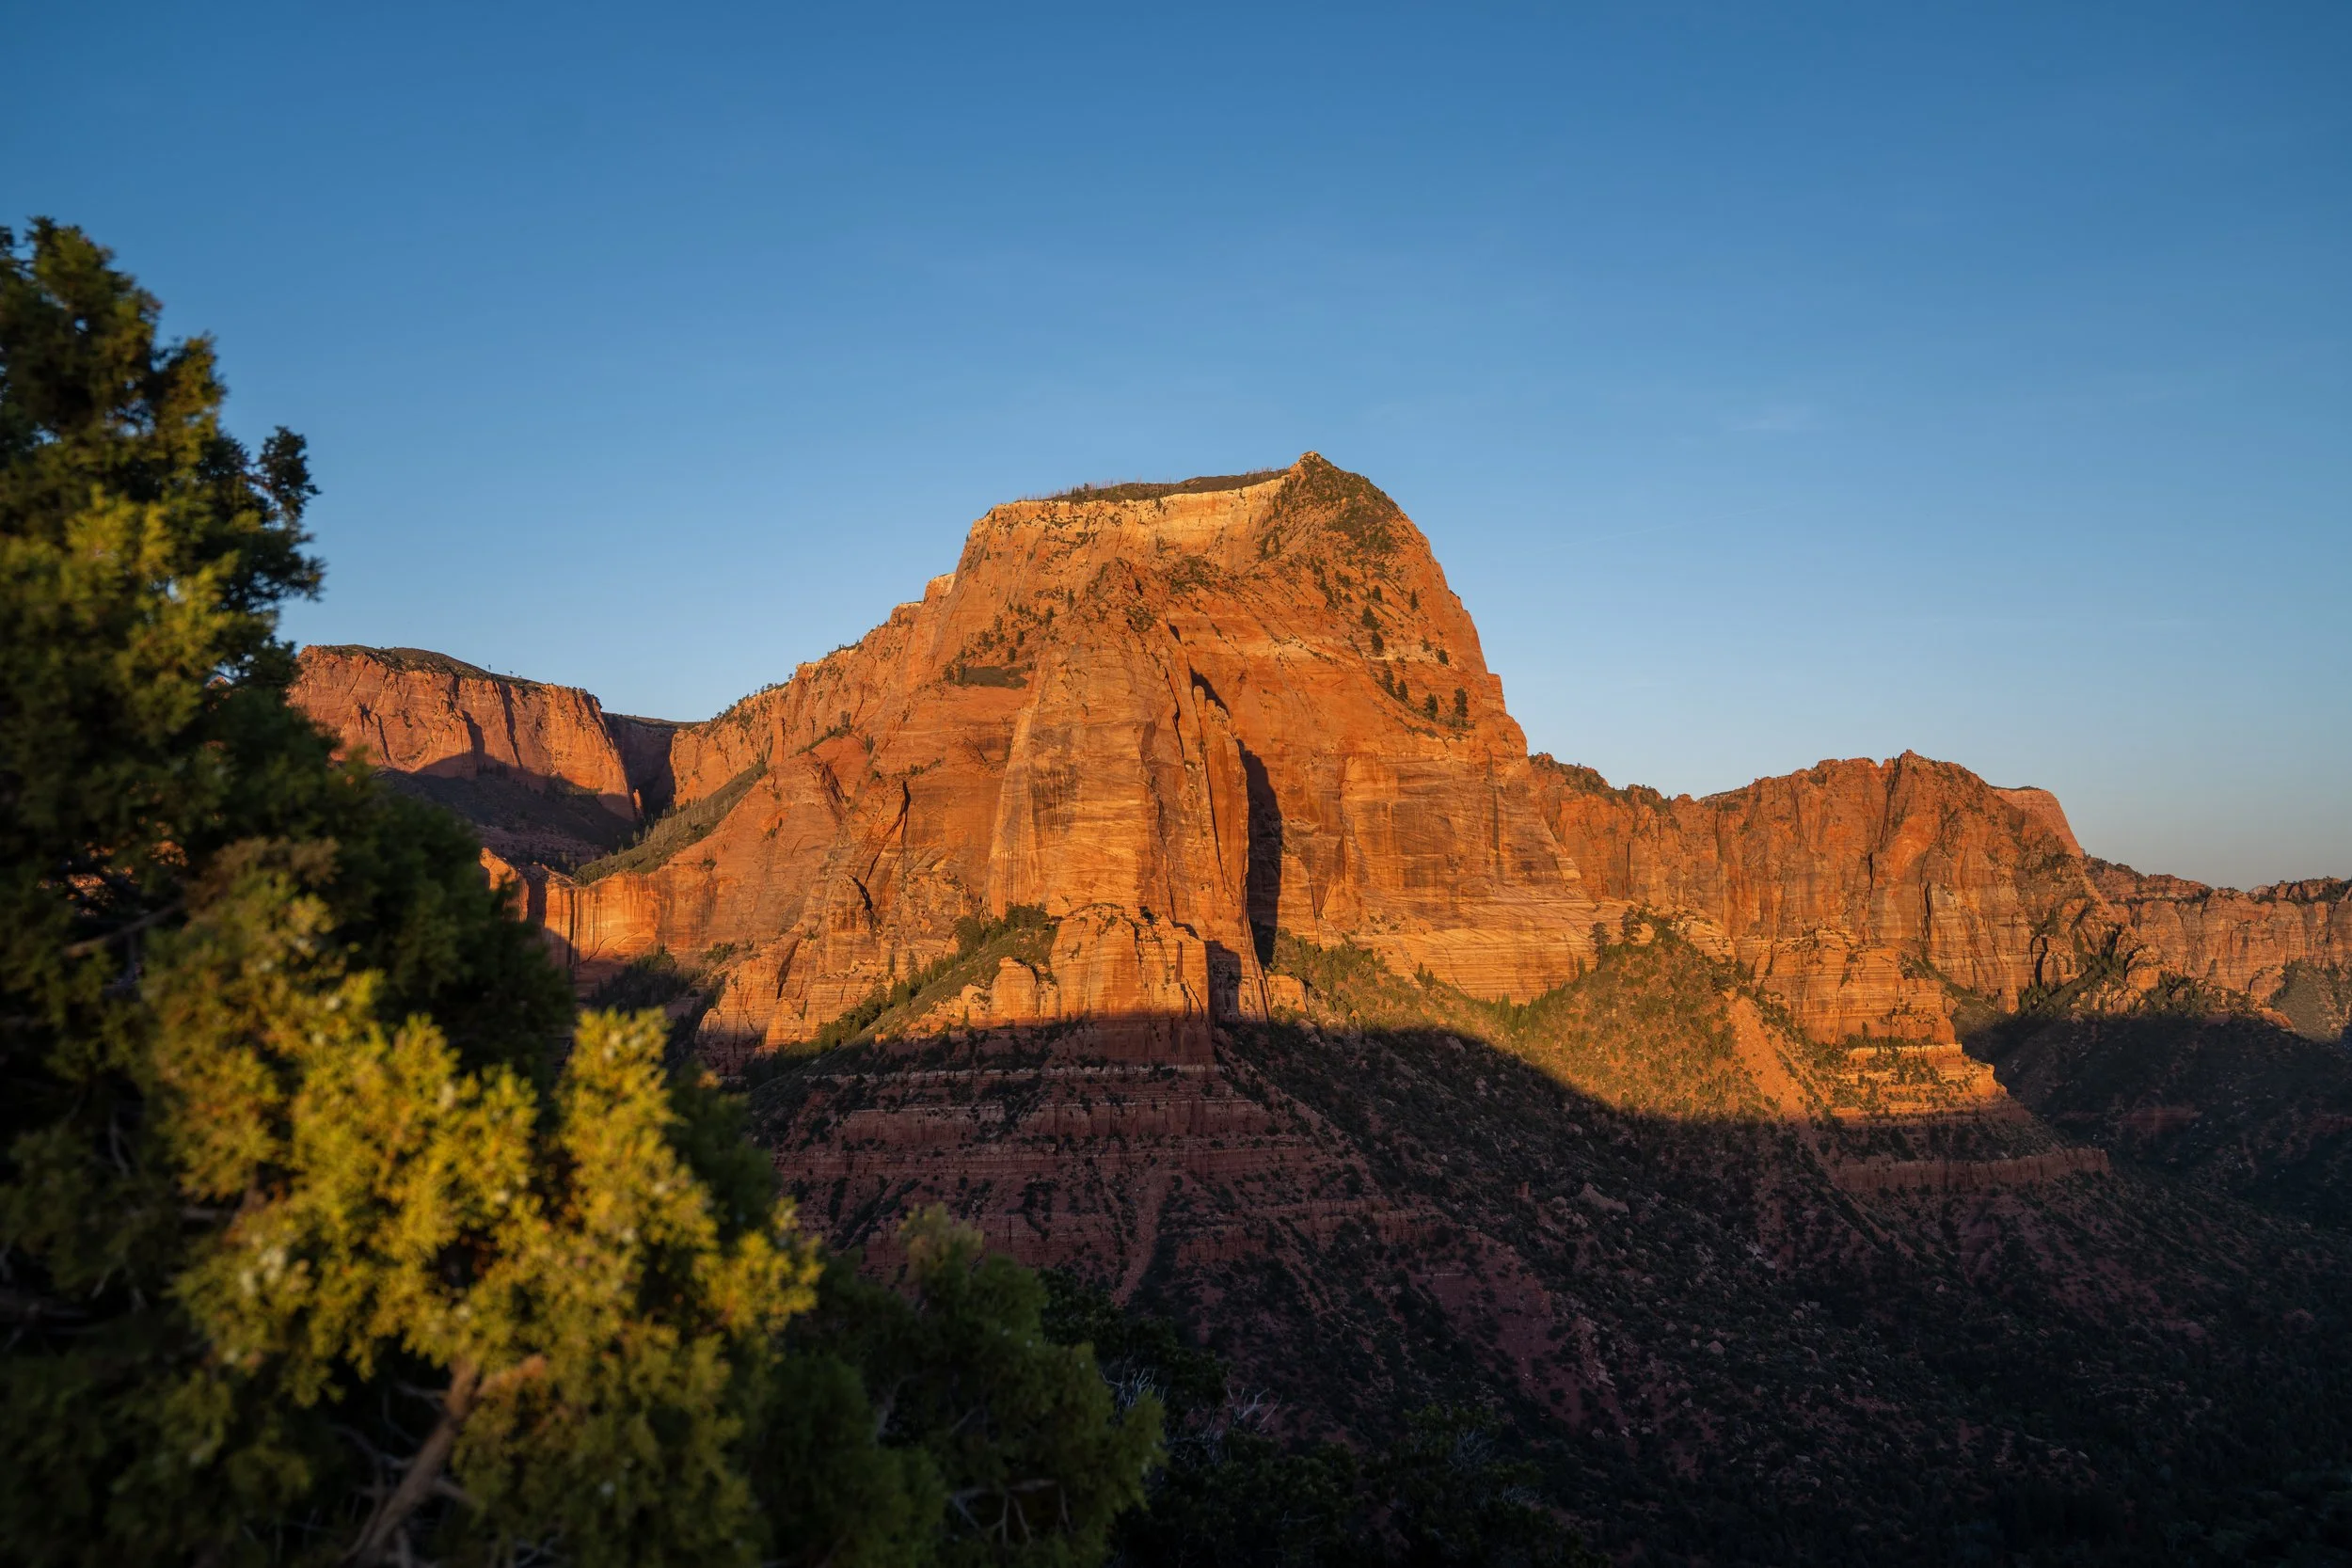
As the Emerald Pools Trail nears the Lower Emerald Pool, Angels Landing can no longer be seen, as it is blocked by Spearhead Mountain, the peak shown in the photo below.
Lower Emerald Pool
After 0.6 miles (1.0 km), the Emerald Pools Trail reaches the Lower Emerald Pool, which is by far the most popular of the three because it is the shortest hike and has the least amount elevation gain compared to both the Upper and Middle Emerald Pools.
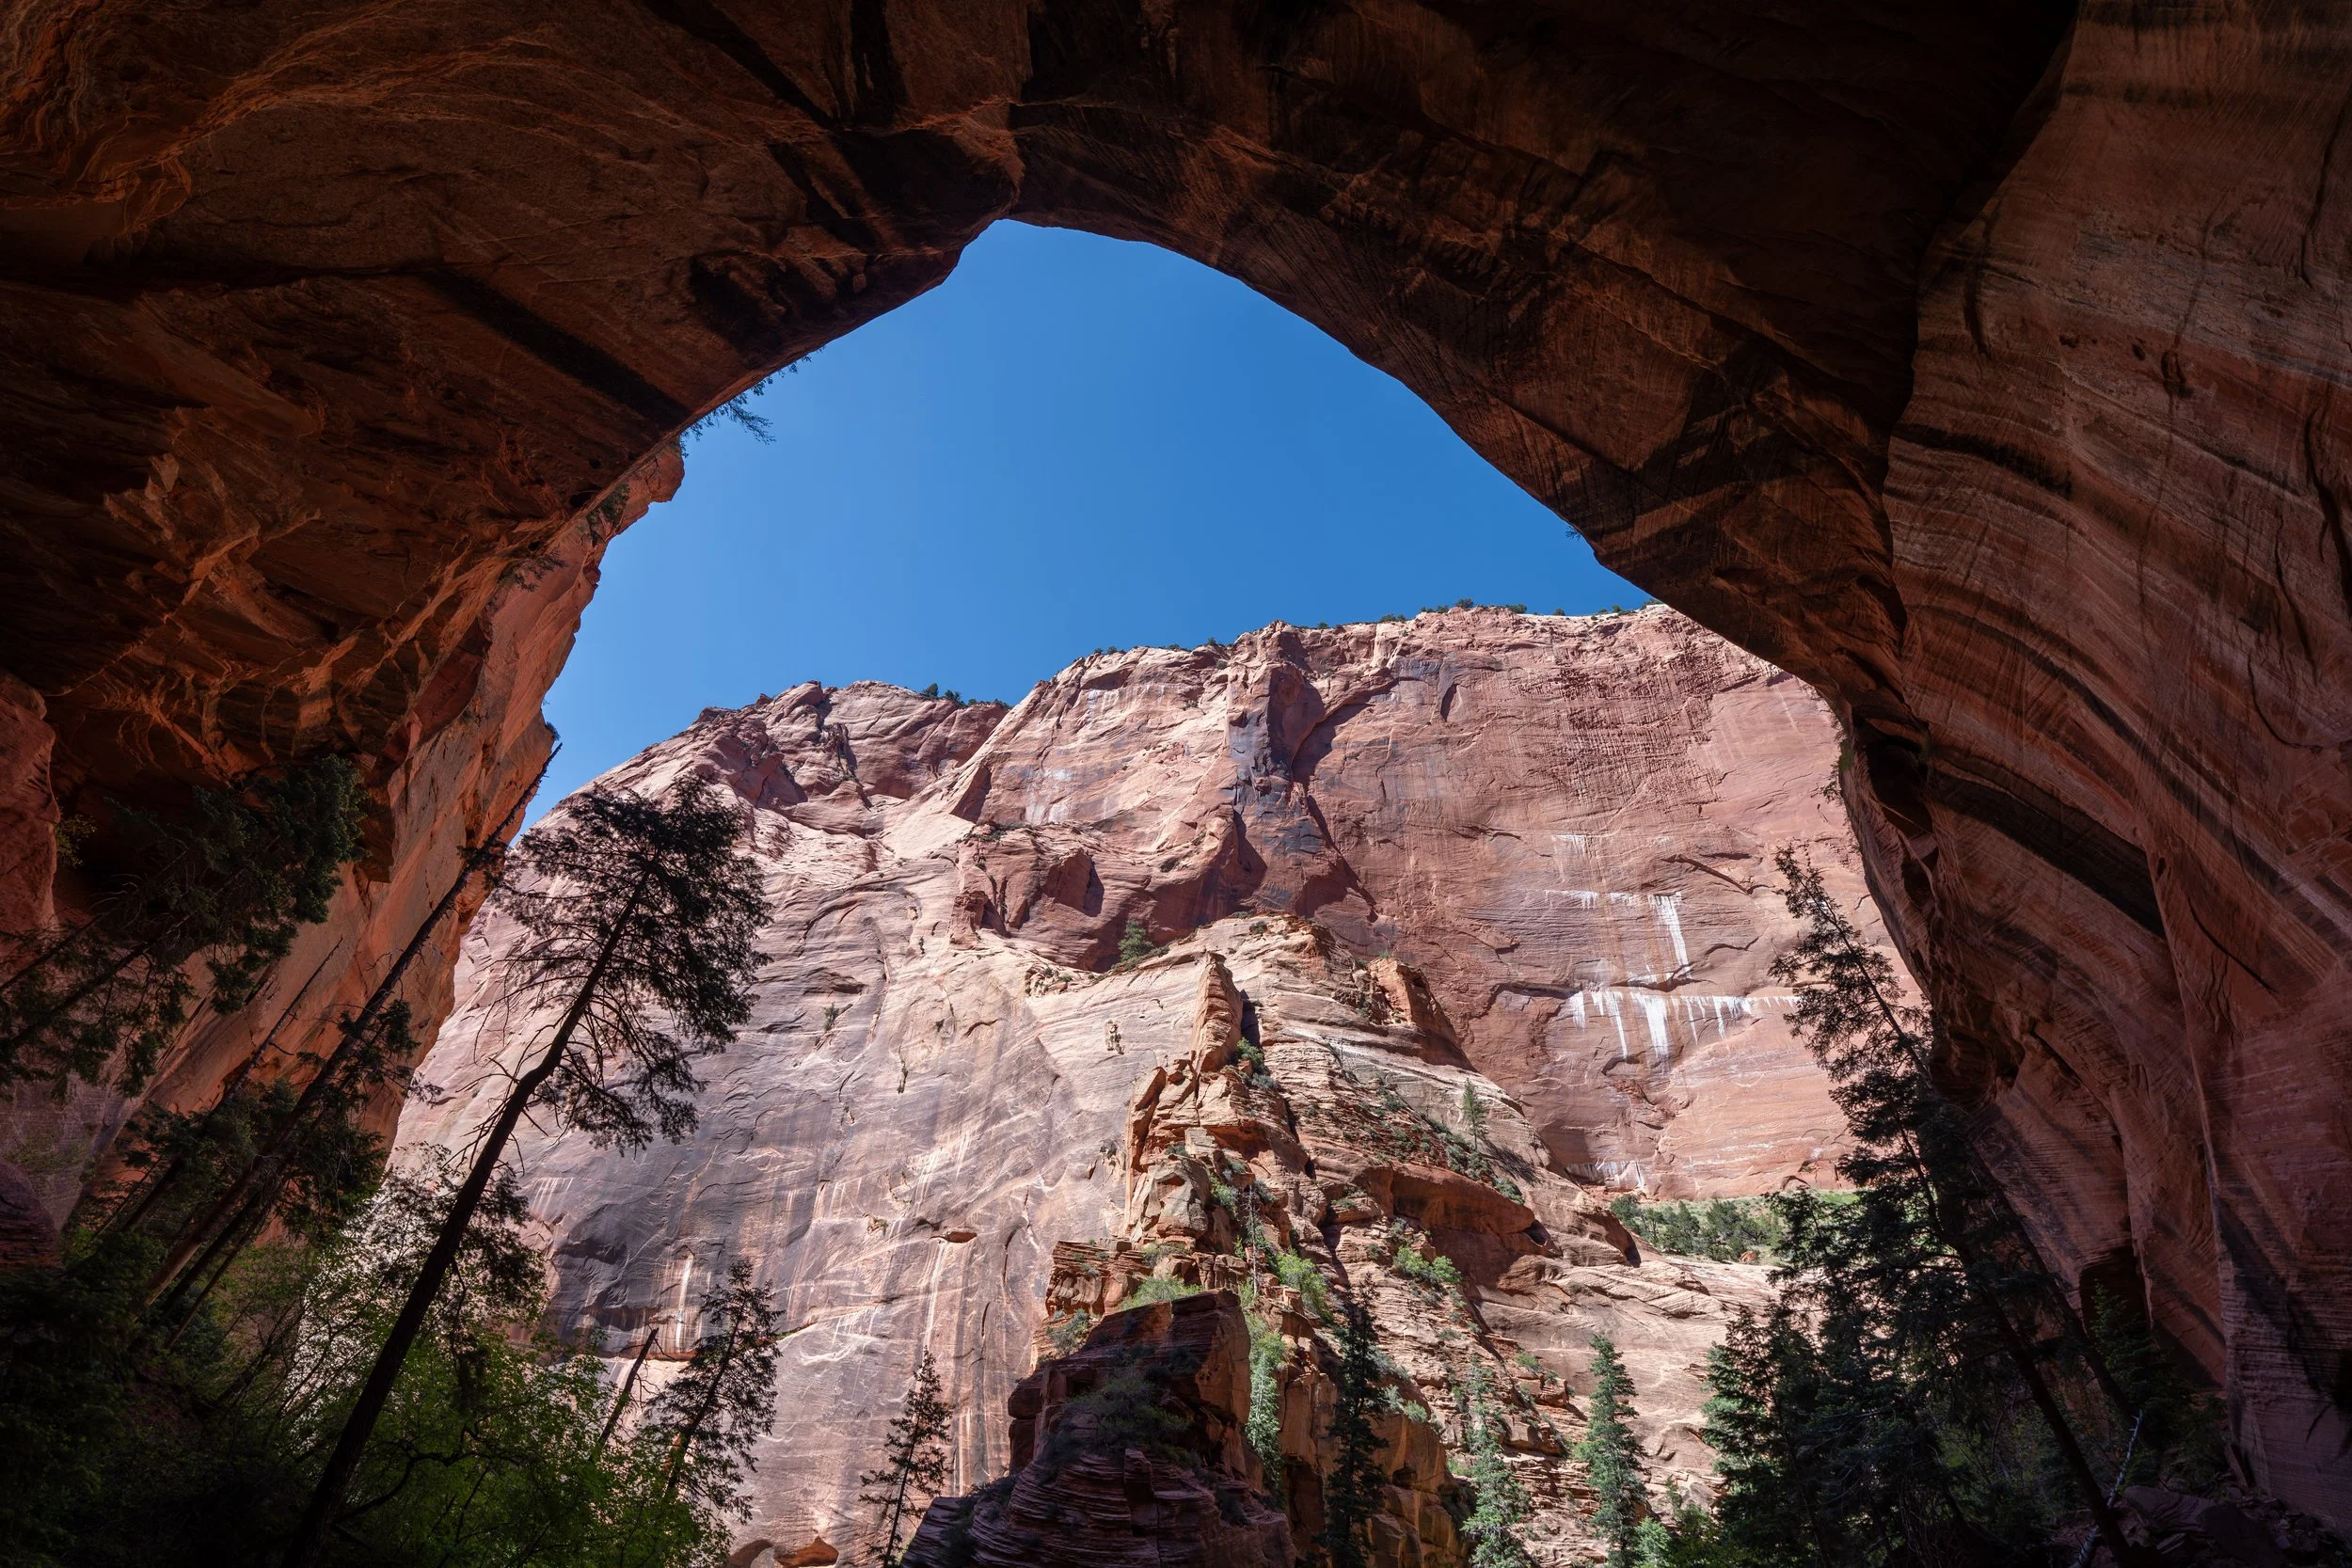
This is where the Lower Emerald Pools Trail passes beneath the alcove and waterfalls that cascade down from the Middle Pool, often one of the busiest sections of the entire hike.
On the far end of the alcove, the Lower Emerald Pools Trail begins a short, steep ascent up to the top of the alcove and the beginning of the Middle Emerald Pools Trail above.
This is where some—not all, but some—of the crowds start to thin out, as the elevation changes from this point to the Upper Emerald Pool are quite steep!
Lower Emerald Pools-Emerald Pools Viewpoint Junction
About halfway up the ascent from the Lower Emerald Pools, the trail splits with a path that leads out to a viewpoint of the alcove the trail previously passed under.
Once here, hikers either have the option to go right down to the viewpoint or left to continue up to the Middle and Upper Emerald Pools.
This is the short path down to the Emerald Pools Viewpoint.
Emerald Pools Viewpoint
From the Emerald Pools Viewpoint, hikers can see both the Upper and Lower Emerald Pools, which is particularly special during peak spring snowmelt, when both waterfalls are flowing into Zion Canyon!
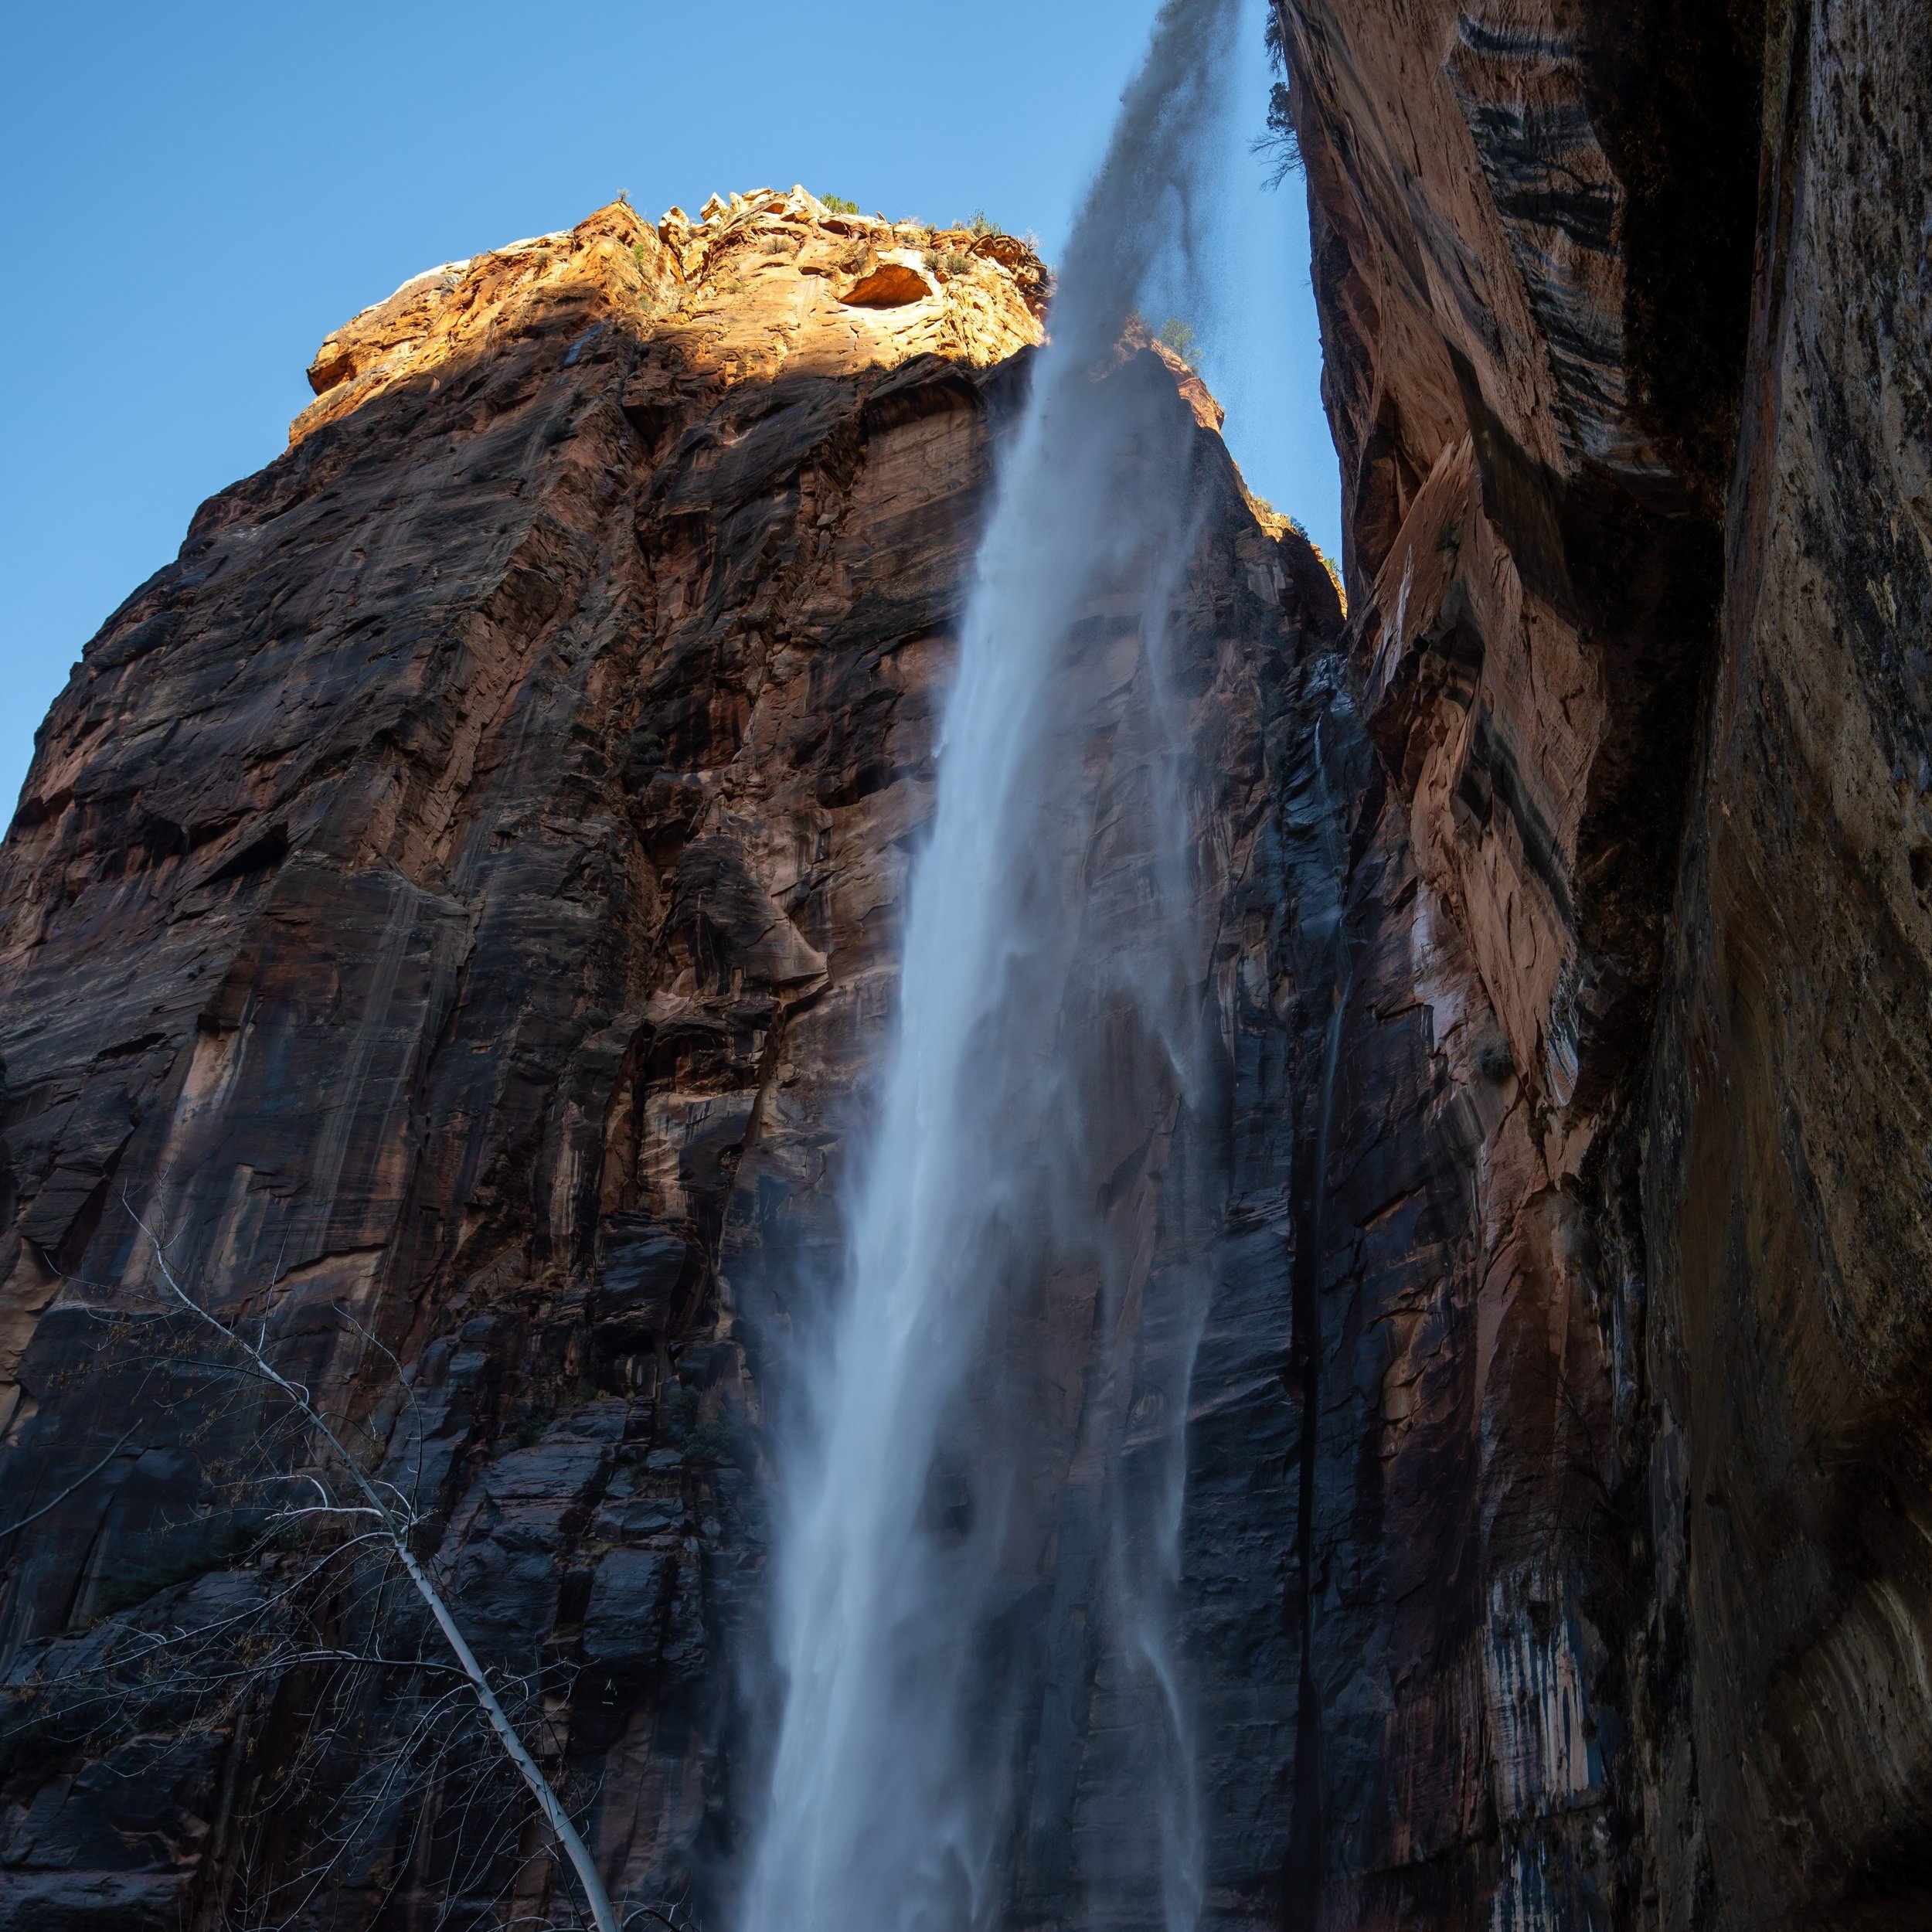
This is the view looking toward the Lower and Upper Emerald Pools, but the Upper Emerald Pool is far more prominent during the spring, when snowmelt creates a towering 500-ft. (152 m) waterfall from the cliffs above!
Lower Emerald Pools-Emerald Pools Viewpoint Junction
Once back at the previous viewpoint junction, go straight to continue up the steps to the Middle Emerald Pools Trail, just a short distance up the hill.
Since there is quite a bit of elevation change on the short Emerald Pools Loop, some hikers may want to use trekking poles, something that can certainly be useful on countless different adventures across Zion National Park.
Lower-Middle Emerald Pools-Kayenta Junction
When the Lower Emerald Pools Trail reaches the top of the initial ascent, the trail splits, with the Kayenta Trail to the right, which descends toward the popular Angels Landing Trail, and the Middle Emerald Pools Trail, which continues around the loop to the left.
That said, go left to continue hiking the Emerald Pools Trail toward both the Middle and Upper Pools.
Middle Emerald Pools Trail
This is where the trail officially changes from the Lower Emerald Pools Trail to the Middle Emerald Pools Trail, which is considerably flatter than the steep hike up from the Lower Pool to get to this point.
Behunin Creek
This is where the Emerald Pools Trail crosses Behunin Creek, sometimes referred to as the first Middle Emerald Pool.
However, the true Middle Emerald Pool is located just past the junction for the Upper Emerald Pool Trail, which branches away shortly after hiking up the hill on the other side of the creek.
Upper-Middle Emerald Pools Junction
After just a few steps from Behunin Creek, the loop passes the junction for the Upper Emerald Pool, the second most popular destination on the hike after the Lower Emerald Pool below.
That said, go right to begin the Upper Emerald Pools Trail, or go straight (left) to continue around the loop toward the second Middle Emerald Pool, just around the corner.
Upper Emerald Pools Trail
I chose to go right to begin the short 0.3-mile (0.5 km) trail to the Upper Emerald Pool.
I mentioned previously that the Emerald Pools Trail is one of the first areas in Zion Canyon to receive direct sunlight early in the morning, and I bring it up again because, if you were in the shade when you started, it’s much more likely that you’ll climb up into the sun at some point on the Upper Emerald Pools Trail.
This is important to keep in mind because, during the summer months, even the early morning sun can be quite strong, which is why I recommend hiking the Emerald Pools Trail in a hooded sun shirt.
This 0.3-mile (0.5 km) section between the loop below and the Upper Emerald Pool gains roughly 330 ft. (101 m), which can make the short hike quite challenging during the hottest times of the year.
Just before the Upper Emerald Pools Trail reaches the pool at the end, the trail drops down two fairly steep sections before leveling out.
This is why I want to remind once again that some hikers may want to use trekking poles on the Emerald Pools Trail, especially if you plan to hike the full loop.
This is the second, and even steeper, drop down to the Upper Emerald Pool.
Upper Emerald Pool
This is the end of the Upper Emerald Pools Trail, which, in the hotter summer months, is typically a stagnant pool, while during the spring months or following heavy rain, it becomes a beautiful stream and waterfall that drops some 500 ft. (152 m) from the cliff above!
Regardless of the time of year, the National Park Service discourages visitors from swimming in the pool, as all three pools on the Emerald Pools Trail are considered to be a very fragile ecosystem and an essential water source for wildlife in Zion Canyon.
Upper-Middle Emerald Pools Junction
Once back at the bottom of the Upper Emerald Pools Trail, most visitors simply go left to return to the Emerald Pools Trailhead and Zion Lodge the same way taken up.
However, I highly recommend going right at this split, as the full loop becomes much less crowded from this point onward—not to mention, the distances between the two routes are roughly the same!
Middle Emerald Pools Trail
Regarding my thoughts above, I chose to go right to continue on the Middle Emerald Pools Trail toward the Middle Pool, located just a short distance ahead.
Middle Emerald Pool
After just a few steps from the Upper Emerald Pools Trail, the loop passes over the true Middle Emerald Pool, located directly above the alcove that the Lower Emerald Pools Trail passed beneath at the beginning.
On the far side of the Middle Emerald Pool, the trail climbs a short hill, but this doesn’t last long, as the majority of the hike to the beginning of the loop is downhill from this point on.
This is where the Middle Emerald Pools Trail levels off and starts descending back to the bottom of Zion Canyon and the beginning of the loop.
If there’s one thing I hope these photos show more than anything else, it’s that there’s very little shade on this stretch of the trail, but in my opinion, it’s a very nice tradeoff, considering how few people venture past the Middle Pool to complete the full loop.
This is where the Middle Emerald Pools Trail passes above the initial bridge across the Virgin River from the beginning of the trail.
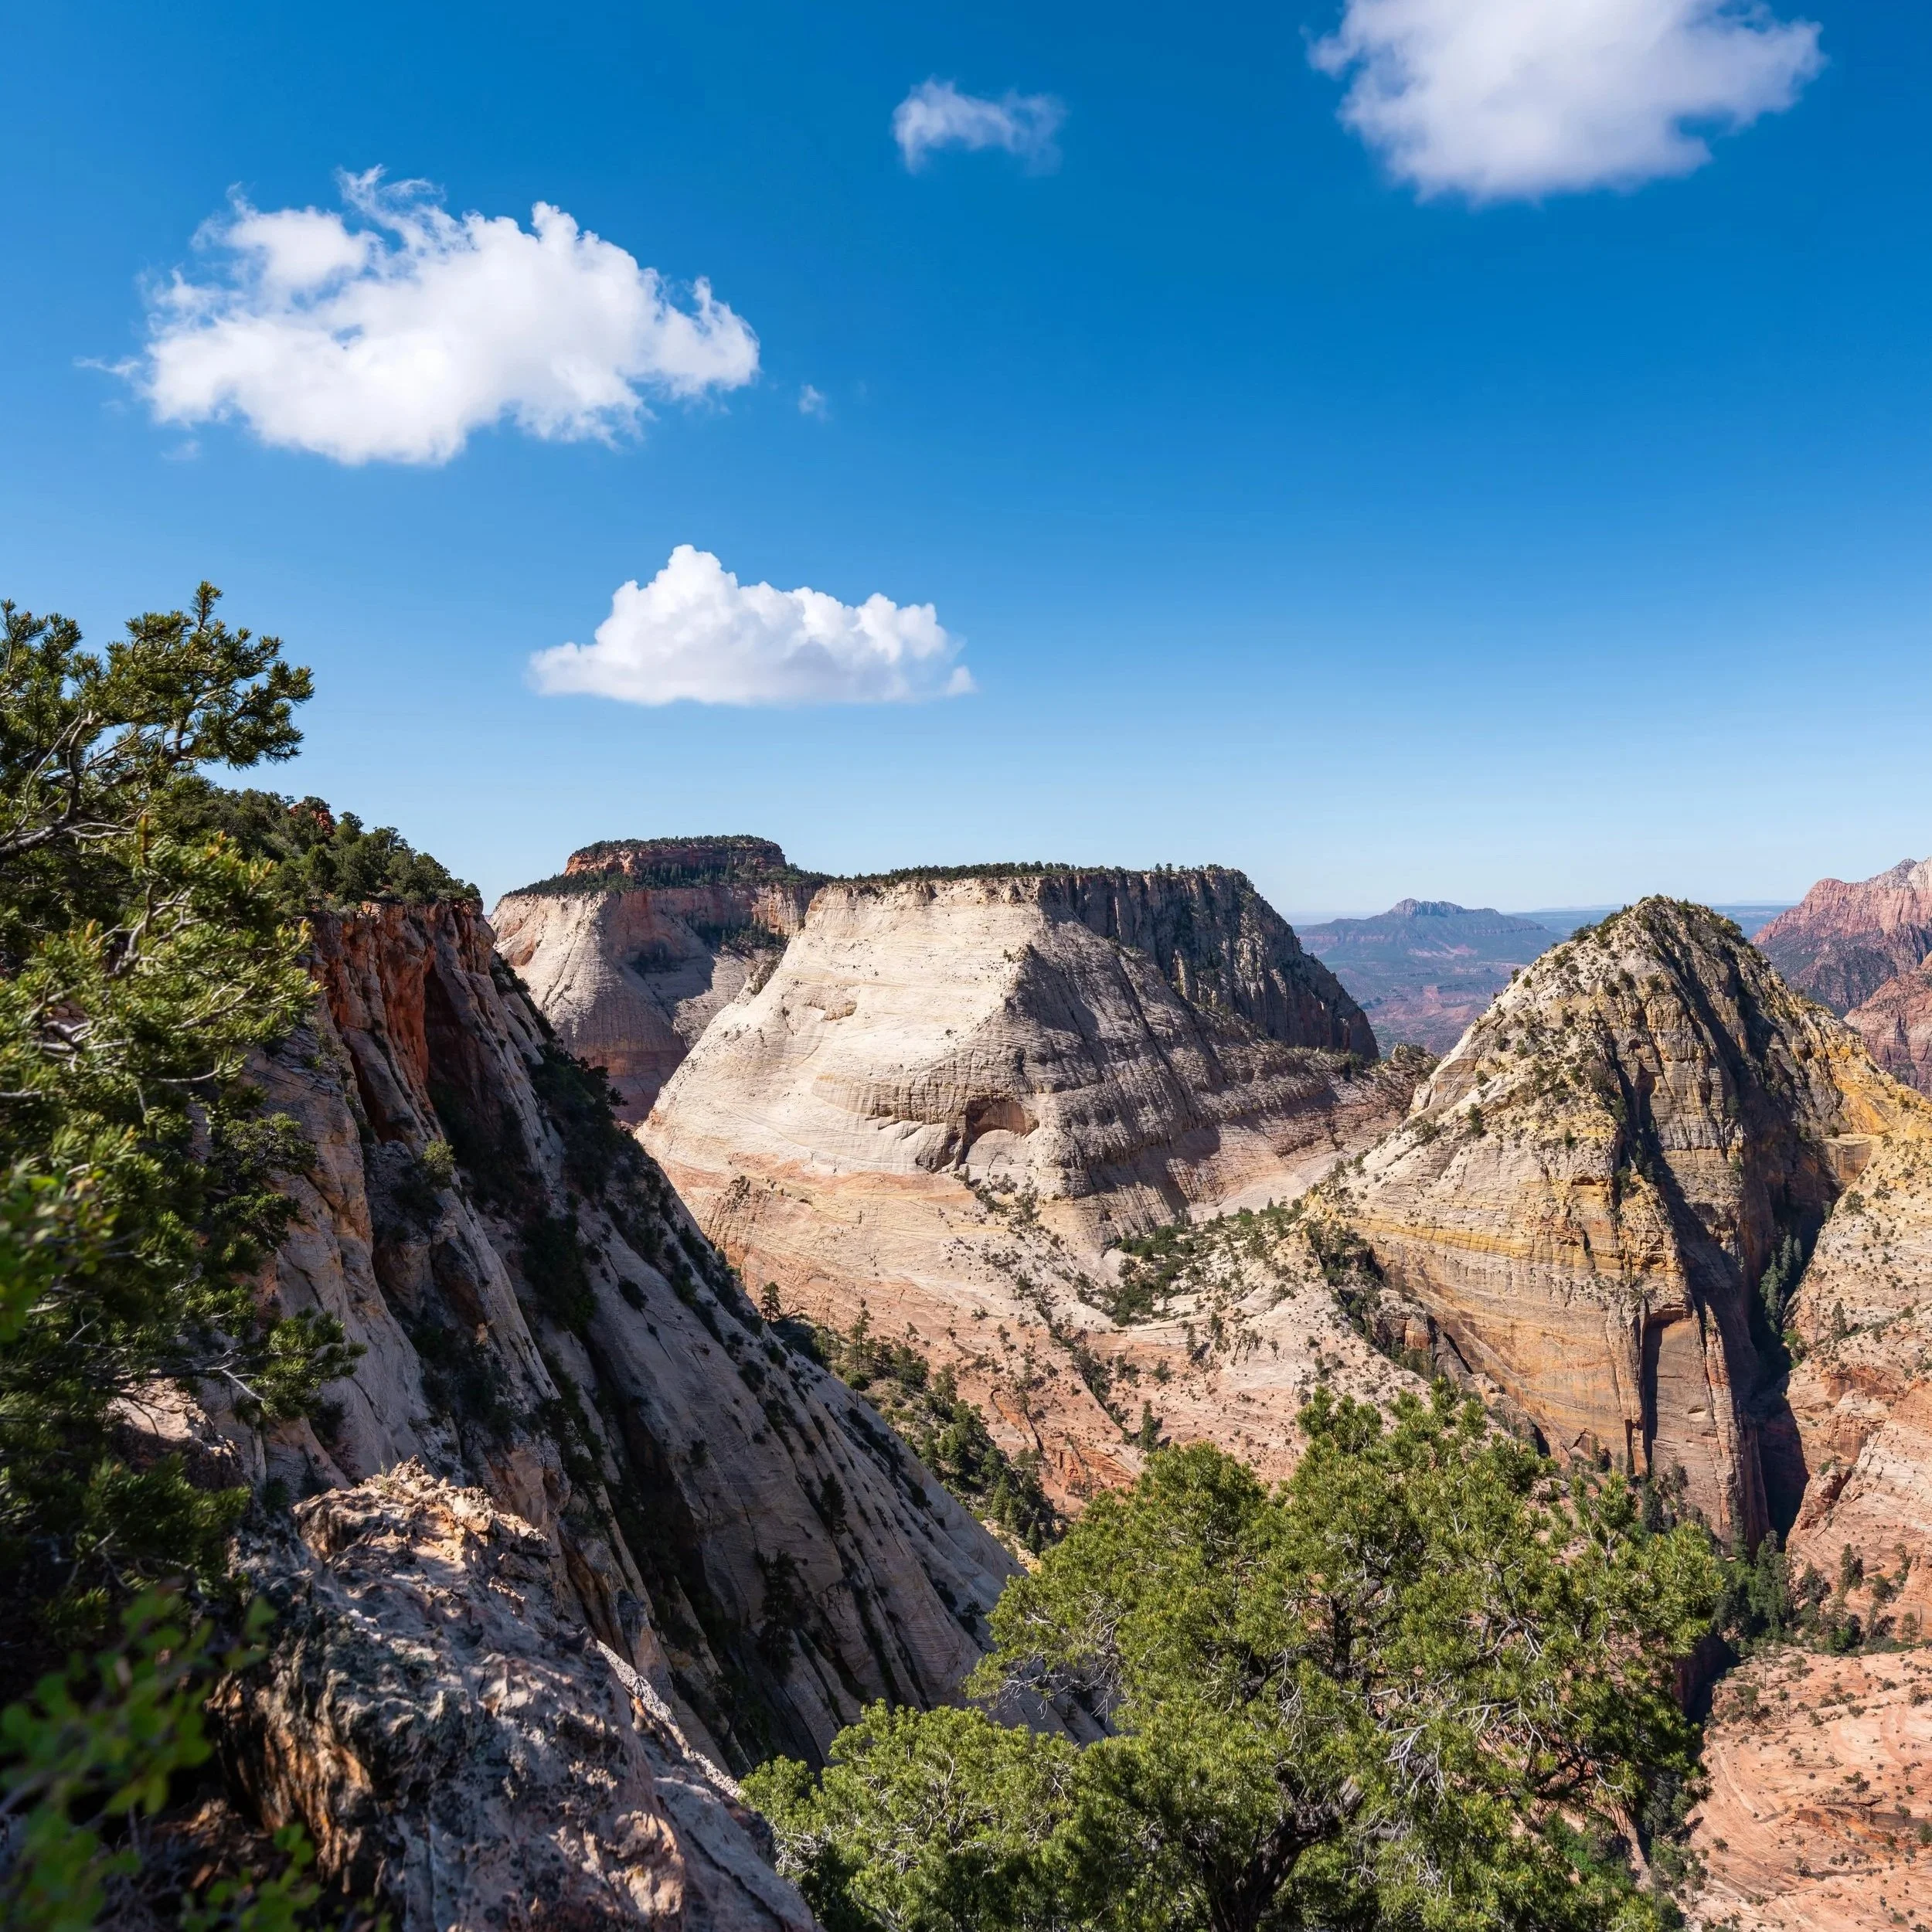
This is the view looking across Zion Canyon toward Zion Lodge and Deertrap Mountain on the far side.
Shortly before the Middle Emerald Pools Trail returns to the bottom of Zion Canyon, the loop gets much steeper on the descent, which is a nice sign that the Virgin River and the initial bridge are not far ahead!
Middle Emerald Pools-Sand Bench Junction
This is the final junction before the Middle Emerald Pools Trail returns to the beginning, which is also the start of the Sand Bench Trail via Zion Lodge.
That said, go straight (left) at this split to return to the beginning of the loop, about 0.1 miles (0.2 km) from this junction.
Read My Separate Post: Sand Bench Trail
Lower-Middle Emerald Pools Junction
This is where the Middle Emerald Pools Trail returns to the Lower Emerald Pools Trail and the beginning of the loop.
From here, go right to cross over the Virgin River and return to the Zion Lodge and the shuttle stop on the other side of Zion Canyon Scenic Drive.