Climbing Gannett Peak via Titcomb Basin: The Tallest Peak in Wyoming
Distance: 44.3 miles / 71.3 km
Gannett Peak in the Wind River Range of northwest Wyoming is a very remote, glaciated peak that is often seen as the most challenging and trickiest state high point to summit in the lower 48 states!
I say this to emphasize remote, because an attempt to climb Gannett Peak should not be taken lightly.
Only those with the mountaineering skills to scramble on rock, snow, and ice, as well as proficiency in all things related to glacier travel, should attempt to climb Gannett Peak. In addition, all climbers must be comfortable traversing numerous highly exposed sections on the upper mountain in less-than-ideal conditions, and I say 'less-than-ideal' because the soft, poor-quality snow during the best climbing season makes climbing Gannett Peak particularly dangerous.
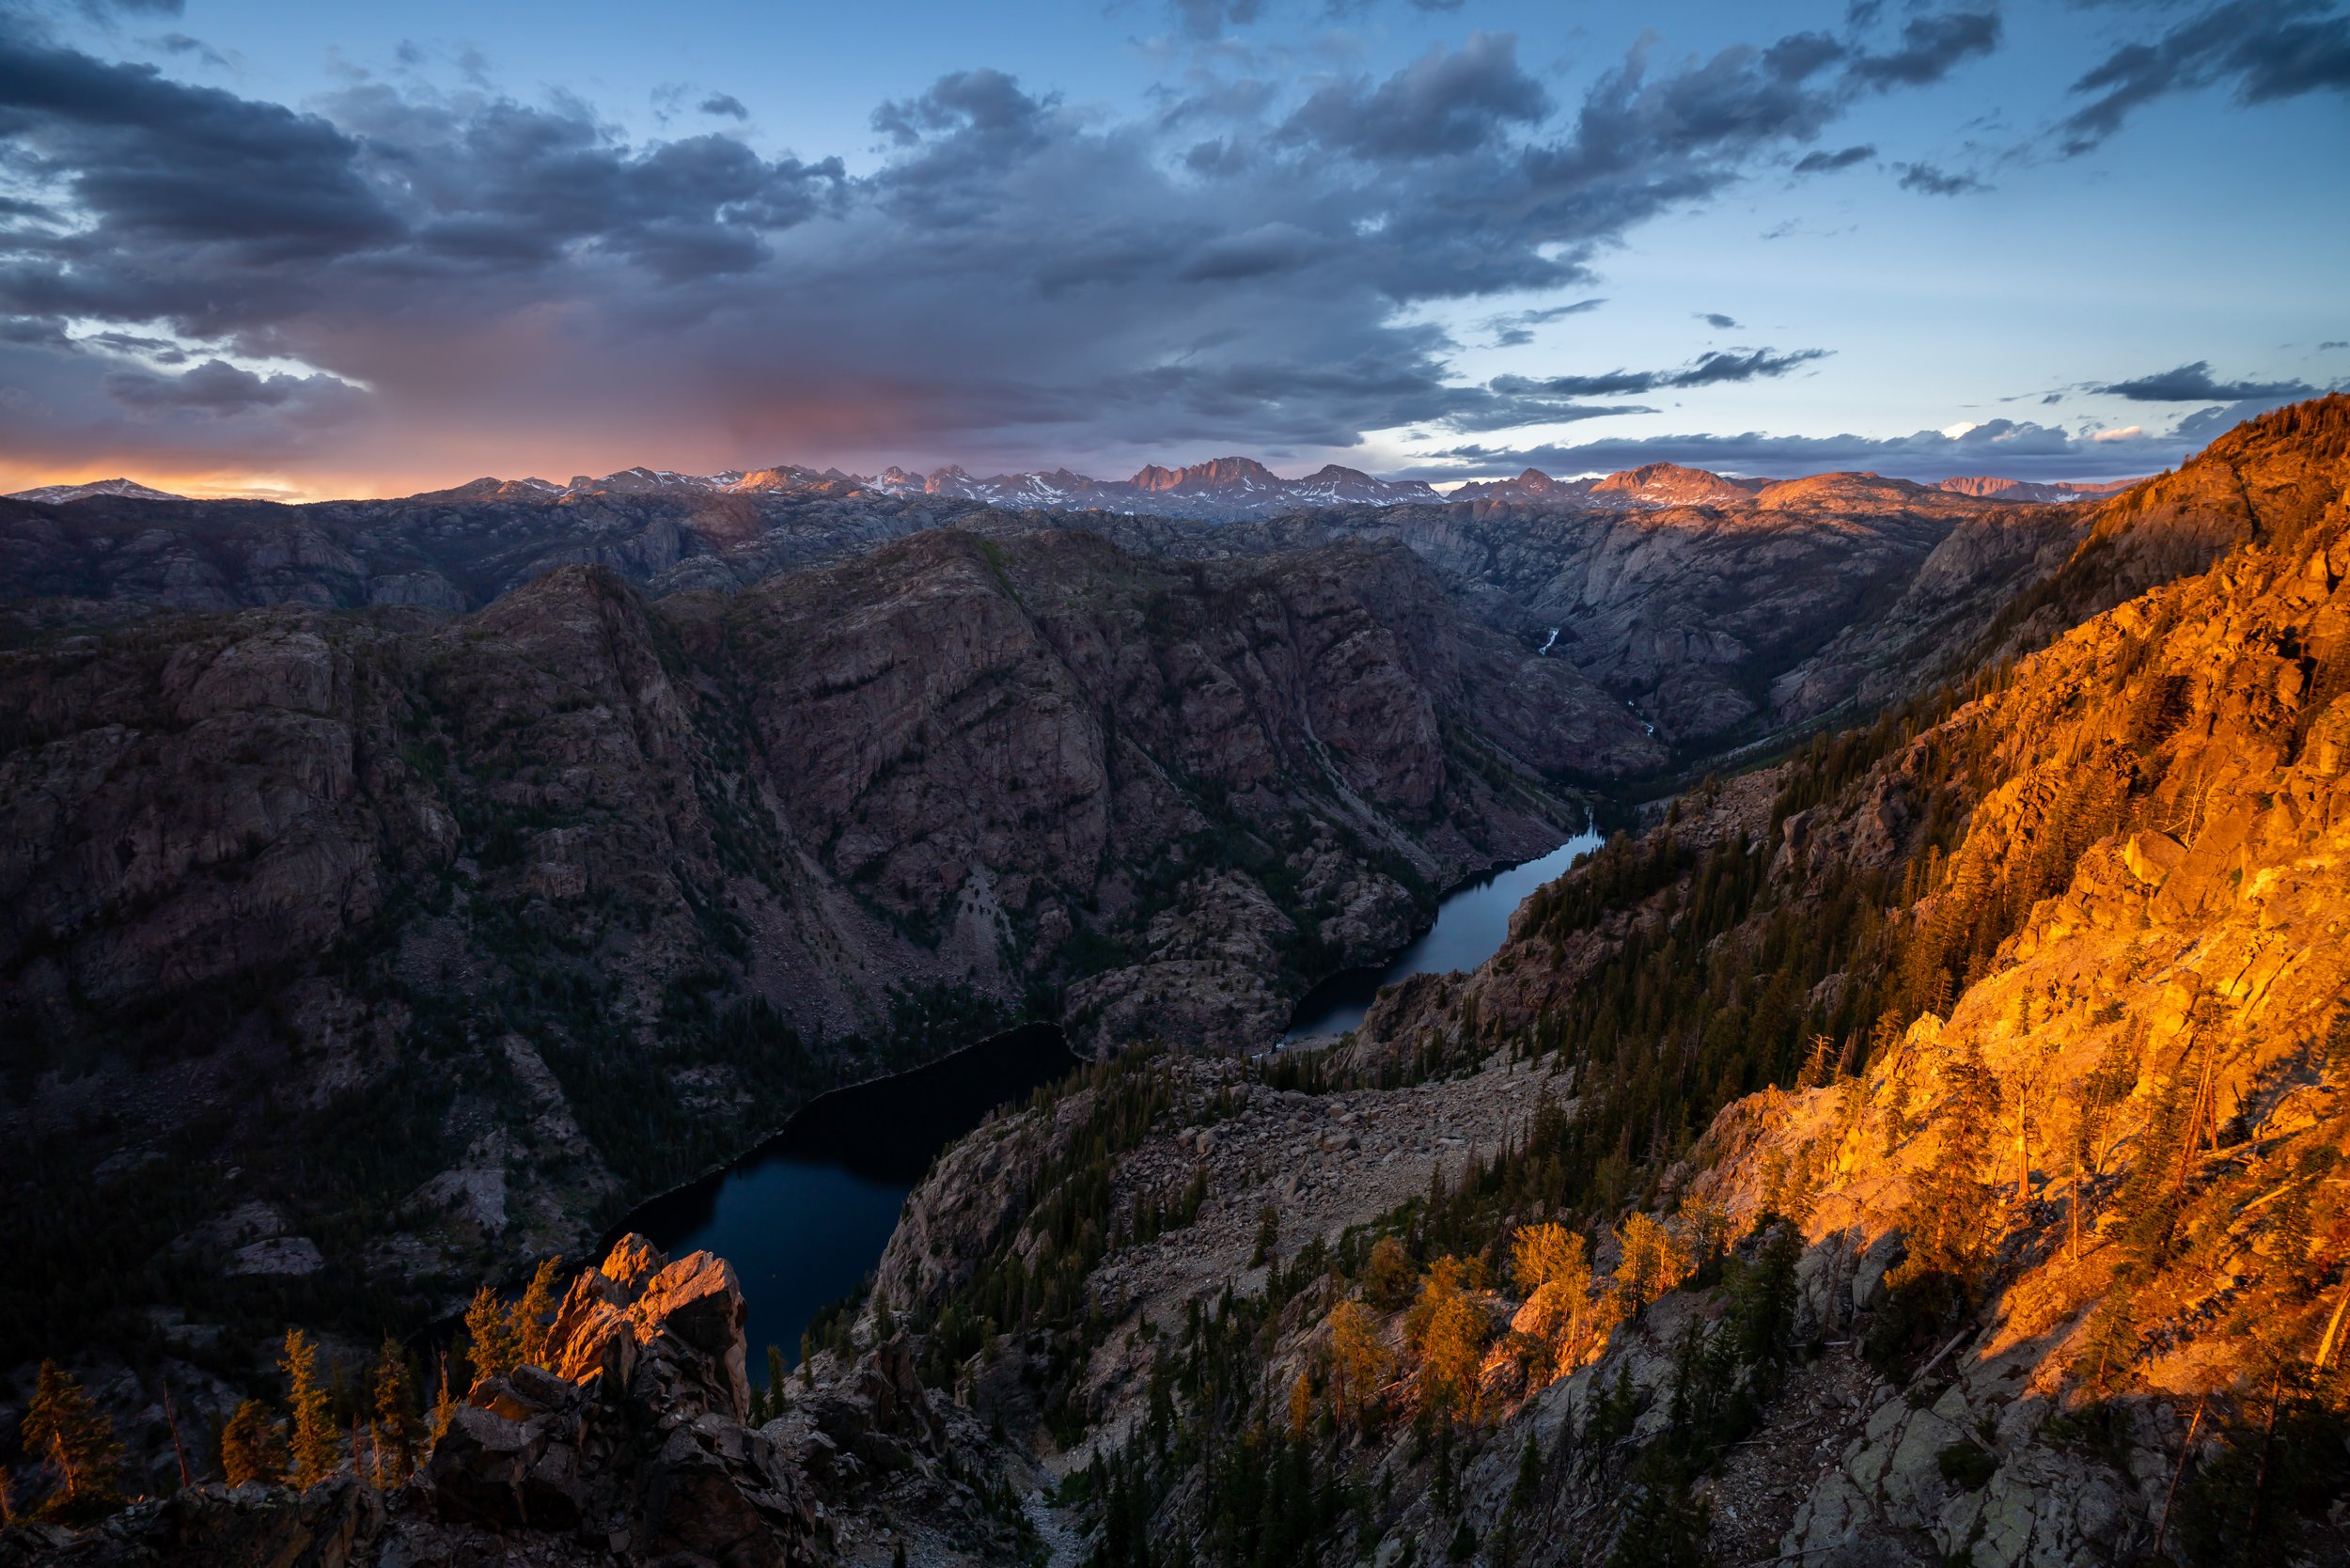
This is all to say that Gannett Peak is one of the most beautiful, remote, and pristine state high points in the continental U.S., and even spending a few days camping among the towering peaks that surround the Titcomb Basin is worth the trip alone!
What is the Best Time of Year to Climb Gannett Peak?
Following an average winter season, there are really only about 3–4 weeks each summer when climbing Gannett Peak is practical for most people.
There are stories of people starting early and hauling in snowshoes because the Wind River Range is just that loaded with snow, and there are also stories of climbers rappelling the bergschrund because they’re climbing well past the best season for Gannett.
Conditions obviously vary from year to year, but generally speaking, the middle of July through the end of the month is the best time of the year to attempt Gannett Peak. Keep in mind that the snow conditions during this prime season are generally very poor when it’s dark out, so you can start to imagine what they are like when the sun hits the glaciers in the morning and/ or August comes around.
This all goes without saying, but I highly recommend stopping in at the Great Outdoor Shop in Pinedale before setting out, as the folks who work there will be your best resource year after year for learning about current conditions across the Winds.
On top of this, if you need any last-second gear items before your trip, they will almost certainly have what you need and are always friendly and willing to talk about anything related to the outdoors—especially the Winds!
Google Maps Directions: Great Outdoor Shop
Elkhart Trailhead Parking
I have seen the Pole Creek Trailhead completely empty as well as completely full, as these photos show during prime backpacking season.
However, in my best estimation, more than 95% of all these hikers are not climbers. Most people visiting the Winds during the midsummer climbing season are here to backpack and fish.
That said, expect the adjacent Trails End Campground to be very busy, and expect to see a number of parties at every distance of the trail.
Google Maps Directions: Elkhart Park (Pole Creek Trailhead)
Hiking Checklist - Wind River Range
Obviously, for camping, you will need general backpacking gear. For this reason, I wrote a separate post about what backpacking gear is worth the money, from my experience, and what the best alternatives are to save you money.
Read My Separate Post: Best Ultralight Backpacking Gear
Additionally, the Winds is grizzly country. You need to be hiking with bear spray and a bear canister, which proved to be more for the marmots than the bears.
On top of this, you may think it’s odd to be recommending normal hiking shoes to climb Gannett, but they proved to be the best-case scenario with strap-on crampons instead of wearing approach shoes and hiking in with boots. Consider the fact that it’s summer on a fairly low-elevation peak. Boots for the cold are simply not necessary. That’s why I recommend saving the weight to hike/ climb with a solid hiking shoe.
Finally, I’m not going to go into the specifics of gear related to the climb/ glacier travel, as this is gear that you should already have owned for a number of other climbs prior to attempting Gannett.
Simply put, Gannett Peak is not a beginner climb.
Hiking to the Titcomb Basin
The distance above is the roundtrip hike from Elkhart Park to the summit of Gannett Peak.
The long 15-16 mile (24.1-25.7 km) hike from the Elkhart Trailhead to the Titcomb Basin is actually a collection of a number of different trails, as you make your way into the heart of the Winds.
From the trailhead, go left on the Pole Creek Trail and say on this trail for roughly 5.5 miles (8.9 km).
Pole Creek-Sacred Rim Junction
Almost immediately after leaving the trailhead, the Pole Creek Trail will split with the Sacred Rim Trail.
Go right to stay on the Pole Creek Trail, but as a side note, Sacred Rim is one of the best day hikes in the Winds, and it’s far prettier than the overlook at Photographers Point.
Read My Separate Post: Sacred Rim Trail
Pole Creek-White Pine Junction
Then, at the White Pine Junction, continue straight on the Pole Creek Trail.
Bridger Wilderness Boundary
As a friendly reminder, please don’t fly drones in a wilderness boundary.
Miller Lake-Pole Creek Junction
At the next split, go left toward Eklund Lake.
Photographers Point
At about 4.5 miles (7.2 km), the trail passes by Photographers Point.
If you checked out the photos in my Sacred Rim post, you’ll clearly see why the views are better from there.
As for Photographers Point, if you know what you’re looking for, you can see the peaks surrounding the Titcomb Basin, but they won’t really stand out until you’re much closer.
Pole Creek-Sweeny Creek Junction
At the split for the Sweeny Lakes, go left.
Seneca Lake-Pole Creek Junction
At the next split, go left to leave the Pole Creek Trail, which is the start of the Seneca Lake Trail.
Barbara Lake
Once the trail begins to pass by the lakes, the hike gets a bit more hilly, as the trail goes up and down between basins for the rest of the hike into the Titcomb Basin.
That said, the net elevation gain from Elkhart to the Titcomb Lakes is essentially negligible because you start and end at nearly the same elevation.
Hobbs Lake
Some people choose to break up the hike by camping at Hobbs Lake, but in my opinion, that’s far too little of a hike for an attempt up Gannett Peak.
If you care about giving yourself the best chance at summiting, I recommend hiking all the way to Titcomb in one day like we did, or plan for more than five days in the backcountry with hopes of summiting sooner.
I’ll talk more later about why five days on our trip was essential for summiting Gannett, which was entirely related to weather.
Seneca Stream
From what I was tracking, this Seneca Lake Stream was right at 7.5 miles (12.1 km), which is a nice mental halfway check point if you’re goal is the middle of the Titcomb Lakes, as it was for our group.
Then, the trail passes by a few unnamed small lakes before reaching Seneca Lake.
Seneca Lake
Seneca Lake is one of the better places to break up the hike, but there aren’t a ton of great campsites on account of the cliffs on the trail side of the lake.
Seneca-Lost Lake Junction
On the far side of Seneca Lake, go right to begin hiking toward Island Lake.
Lester Pass Junction
At the Lester Pass Junction just past Little Seneca Lake, stay straight (left) to continue toward Island Lake.
Freemont Crossing Junction
Then, go right at the split just before the descent into Island Lake.
Island Lake
For me, it was hard not to forget the descent down to Island Lake, as it proved to be the most annoying hill to climb back up on the hike out.
Still, it’s not even remotely close to Bonney Pass!
Other than the Upper Titcomb Lake, I believe Island Lake was the next most beautiful lake, but if you’ve hiked this far in one day, I wouldn’t recommend stopping this short of Titcomb.
Titcomb-Indian Basin Junction
Finally, the last trail to get to the Titcomb Lakes is the Titcomb Basin Trail, which is only about 2.7 miles (4.3 km) away from the middle of the lakes where we set up camp.
Go left at this split, and the basin will get prettier and prettier the closer you get.
This stream crossing just after Island Lake was the longest on the entire hike, and depending on the time in the summer that you choose to go, the water level may be much higher or lower.
The approach into the Titcomb Basin was easily my favorite part of the entire hike in!
Titcomb Basin
For climbing Gannett Peak, camp at least in the middle of the lakes to get as close as you can get for your summit push.
Some groups choose to camp all the way at the end of the upper lake, which really comes down to personal preference.
Fishing the Titcomb Basin & Mistake Lake
My overall recommendation for fishing in the Titcomb Basin is to scramble up to Mistake Lake. That’s where the fishing seems to be the best, as it’s much easier cover more area on a smaller lake than either of the Titcomb Lakes.
That said, I fished all of the lakes but didn’t have any luck. However, I could clearly see more fish in Mistake Lake than I ever encountered in either of the lower lakes.
The Weather in the Titcomb Basin
Simply put, WE GOT ROCKED!!!
To this day, a part of me is surprised that we even found the window to summit, but when we hiked in, our weather forecast was only showing one out of five days with afternoon thunderstorms.
That proved to be inaccurate, as every single day we had lightning overhead and about every bad experience you can imagine. This included a pretty crazy storm through our first night, but then on our second night, our original summit push was screwed up because of a storm that quite literally shook Winds! I walked around to other camps the next day to see if it was as bad as I thought it was, and everyone with prior storm experience said that was the worst they’ve ever seen! Everyone in our group agreed!
On our third night, we finally woke up to stars, which is how we found the window to summit. However, we didn’t completely luck out, as we yet got caught and hid in a cave on our hike down from Bonney Pass. More on this later.
Finally, on our hike out, more crazy storms made all us hide time and time again over the 15.0 miles (24.1 km) out because wave after wave of hail and lightning kept sweeping in.
This is all to say that we didn’t expect any of it, so prepare for the worst and hope for the best. I obviously left with a destroyed tent and memories that I’ll never forget.
Climbing Gannett Peak via Titcomb Lakes
When we hiked into the Titcomb Basin, I stopped to talk to every group that I noticed with climbing gear on their packs, and out of four or five groups, none of them summited for seemingly one reason: they didn’t start early enough!
It’s as if every group underestimated how much effort Bonney Pass would take—not to mention what it would take to re-climb it after reaching Gannett Peak.
That said, every group we talked to started after 3 a.m., which is simply not early enough! Seriously, if you want to summit, start at midnight, or even 11 p.m. On our climb, it took us just over three hours to the top of Bonney Pass from the middle of the Titcomb Lakes.
This is considering that we must have been a faster-than-average group because, from the top of Bonney Pass, we could see all of the other groups from the other direction starting at the bottom of the Gooseneck Glacier, and we still ended up beating about half of those groups to the summit of Gannett, even though they were so much closer!
Obviously, we climbed through the night, so these photo are out of order in terms of daylight, but they are in order in terms of how you’d be climbing Gannett.
Don’t underestimate how far the climb up Bonney Pass is from the Upper Titcomb Lake. The two are not close!
There is a very long approach across countless streams that soaked our feet well before we even started climbing.
This was something that none of us anticipated, but all these muddy streams are nearly impossible to find the best way across in the dark. Packing an extra pair of socks to change at the top of Bonney Pass isn’t the worst idea.
Climbing Bonney Pass
The climb up Bonney Pass can either be more snow or rock, depending on the snowpack.
In the dark, it was nearly impossible to try and choose between one or the other, so we ended up making our way across both about equally.
Additionally, our group did not rope up to climb the pass, but I really think that’s a comfortability thing among your group. You’d definitely move faster without the rope, but I think that’s a judgement call based on experience and snow conditions.
Yes, she’s steep!
Top of Bonney Pass
From the top of Bonney Pass, you can get a vague idea of how far it really is from the upper lake, but it feels so much further in person.
When we got our first views of Gannett from the summit of Bonney Pass in the dark, the climb started to feel real.
To me, the shadow of Gannett Peak looks like a mini Kilimanjaro, but seeing how the beautiful summit rises above every surrounding peak made me forget about the pain up Bonney Pass and got me stoked for the rest of the climb!
Descending Bonney Pass
To our mistake, we roped up at the top of Bonney Pass only to put it all away about a minute later.
When we were climbing at the end of July, the snow was not continuous from the Dinwoody Glacier to the top of Bonney Pass. Therefore, we ended up scrambling down the rock until we hit the glacier before tying back in again.
Dinwoody Glacier
The Dinwoody Glacier was the lightest and fastest part of the entire climb.
The gradual downhill slope over to the Gooseneck scramble easily took less than 15 minutes.
Gooseneck Scramble
This is where the Dinwoody Glacier ends, and the start of the scramble up to the Gooseneck Glacier begins.
Gooseneck Glacier
When we reached the Gooseneck Glacier, both my friend and I looked up and basically thought at the same time that it didn’t seem necessary to rope up.
Do not take that as advice, but use your own judgement for your own group’s ability.
Gooseneck Glacier Bergschrund
I believe this to be the Gannett Peak Bergschrund, but comment below if I have it wrong.
Either way, the was the only “crevasse” or bergschrund that we found on the entire route, which is why I believe this to be correct.
Anyway, this it what it looked like during the last week of July in an above average snow year. We simple breezed across it both ways, but during very late ascents the bergschrund can be a major obstacle to climb and repel.
It’s just something to think about, depending on your timing, but over any other source, I encourage you to read about the conditions on the local Great Outdoor Shop website.
Like I said in the beginning, they are a locally-based outdoor shop in Pinedale that maintains this blog annually with the most current conditions around the Winds.
Now, there was finally enough daylight to use my photos from the ascent.
I believe this middle section up the Gooseneck is the steepest part of the glacier.
Again, we felt completely comfortable without a rope, as did this group in the photo. However, there were still a few who chose to rope up for the entire ascent/ descent.
Yes, it’s pretty steep!
The one thing I didn’t anticipate was how many times up Gannett Peak we would be putting on and off our crampons.
It’s essentially nonstop transitions for the entire climb after leaving the Dinwoody Glacier.
If you can pick out the section just below the summit ridge, you can either scramble up the rock or climb the snow to get up to the top.
The rock is by far easier and safer, as this is the section on Gannett Peak that is easily the most dangerous because of the cliff below the ridge.
Note how steep this cliff is for the next photo below.
Summit Ridge
To get to the summit ridge, I chose to climb the rock, but either way, you’ll still need to put on crampons one last time to cross the summit ridge over to the top of Gannett.
Warning
This summit ridge is easily the most dangerous section on the entire climb.
I would go as far to say that there is no room for error, or it would almost certainly mean death. I say this because during the normal climbing season, the snow is absolute trash. Even in the dark, the snow is soft, and post-holing is not uncommon.
Most of all, I say that there’s no room for error because I did slip on one of the lower sections of the Gooseneck because the trashy snow simply couldn’t hold my weight, and I’m only 175 pounds. When I slipped and arrested my fall, it still took me at least 50 ft. (15 m) of sliding before I was able to dig my axe into something that would hold.
Keep in mind that where I slipped, the glacier was significantly less steep than the summit ridge, which is why I believe that on this steeper slope, there’s not much of a chance at arresting your fall because there is nearly no runout before the slope dumps off the cliff.
Climbers have died here before.
I simply say this as a warning, and to say that summiting isn’t everything. Some people roped up, and others didn’t. Overall, my experience with exposure is pretty nuts because I live in Hawaiʻi. Therefore, I felt completely fine doing it on my own, but don’t use this as advice.
This is the final scramble up to the summit and one last place that you’ll likely want to take off your crampons.
Gannett Peak
According to the USGS, the official elevation of Gannett Peak is 13,804 ft. (4,207 m).
If you make it to the summit, I say congratulations. I believe Gannett Peak is the most challenging high point in the lower 48, followed by Granite and then Rainier.
This is just one person’s opinion, but there’s just no way that Mt. Rainier even comes close when thousands of people attempt a well-established route by the National Park Service every year. On top of that, the effort to start ascending both of these other peaks is no where near what it takes to get to the base of Gannett.
These are all the reasons why I believe Gannett Peak is the most difficult state high point in the lower 48!
I was shocked myself, but somebody climbed with their dog!
Downclimbing Gannett Peak
Do not glissade anywhere off Gannet Peak.
The runouts are far too short, and the consequences are too high. Save it for the Titcomb side of Bonney Pass.
Yes, reclimbing the Dinwoody is about as bad as everyone says.
These photos were only taken somewhere between 9-10 a.m., and yet the climb out was as hot and annoying as could be.
On top of this, the ice on the glacier that our crampons dug into in the dark turned into slush that soaked our feet on the way back out. It seemed that at no point we were going to avoid wet feet on this climb!
Among climbers, it seems to be a 50/50 tossup for whether climbing more snow or more rock up Bonney Pass is easier.
We chose more snow.
About halfway down Bonney Pass, our luck run out.
We thankfully were able to get off the steep stuff before we were forced to ditch our packs and take shelter in a rock cave.
Remember, your ice axe is basically a lightning rod that you cannot have with you if the weather turns for the worse.
Hiking Back to the Elkhart Trailhead
After all the constant storms we dealt with day after day, I decided to start heading out around 6:45 a.m.
Although, it didn’t make much of a difference because the storms rolled in around 8:30 a.m. and continued well into the evening long after I arrived in Pinedale.
Somehow, I got mostly lucky and was able to snake my way through these constant waves of storms that were all slightly north or slightly south of me.
However, with about 2.0 miles (3.2 km) to go, myself and some strangers got stuck with lightning and hail coming down right overhead.
After, tossing my pack and bear spray, we all crouched in a field for about 15 minutes taking the worst of it.
If this happens to you, remember to ditch your pack and any unnecessary metal on you. Also, get rid of your bear spray because that’s the last thing you need to explode! Then, crouch in a ball with your feet together away from any trees. Using these steps to avoid lightning is not foolproof, but these are a few things you should be doing if you’re caught somewhere without shelter.
Elkhart Park vs. Glacier Trailhead to Gannett Peak
I have personally begun hiking from both Elkhart Park and the Glacier Trailhead, and my personal preference is Elkhart Park because of how fun and beautiful the camping in the Titcomb Basin is!
However, if you decided to hike out of the way to pass through the Bomber Basin and East Torrey Creek, I would change my mind. Bomber Basin is not on the way to or from Gannett Peak and the Glacier Trailhead, but it can be reached by scrambling down from the Downs Plateau. This is to say that, yes, Bomber Basin is easily one of the most beautiful places across the entire Wind River Range—not to mention that camping at Bomber Lake is on a true sandy beach!
That said, I’d say the choice to begin from either is entirely personal preference.
Would you rather hike an extra 10.0 miles (16.1 km) roundtrip for a more than 50.0-mile (80.5 km) journey from the Glacier Trailhead just to have a closer summit day, or would you rather have a shorter approach but a longer/ annoying summit day up and over Bonney Pass twice?
We obviously chose the latter, but I don’t know if their is a right answer. Gannett Peak is a mission from either direction.